
Follow the steps below to configure the server and deploy a backup image to multiple target PCs.
Step 1: Back Up the Source PC
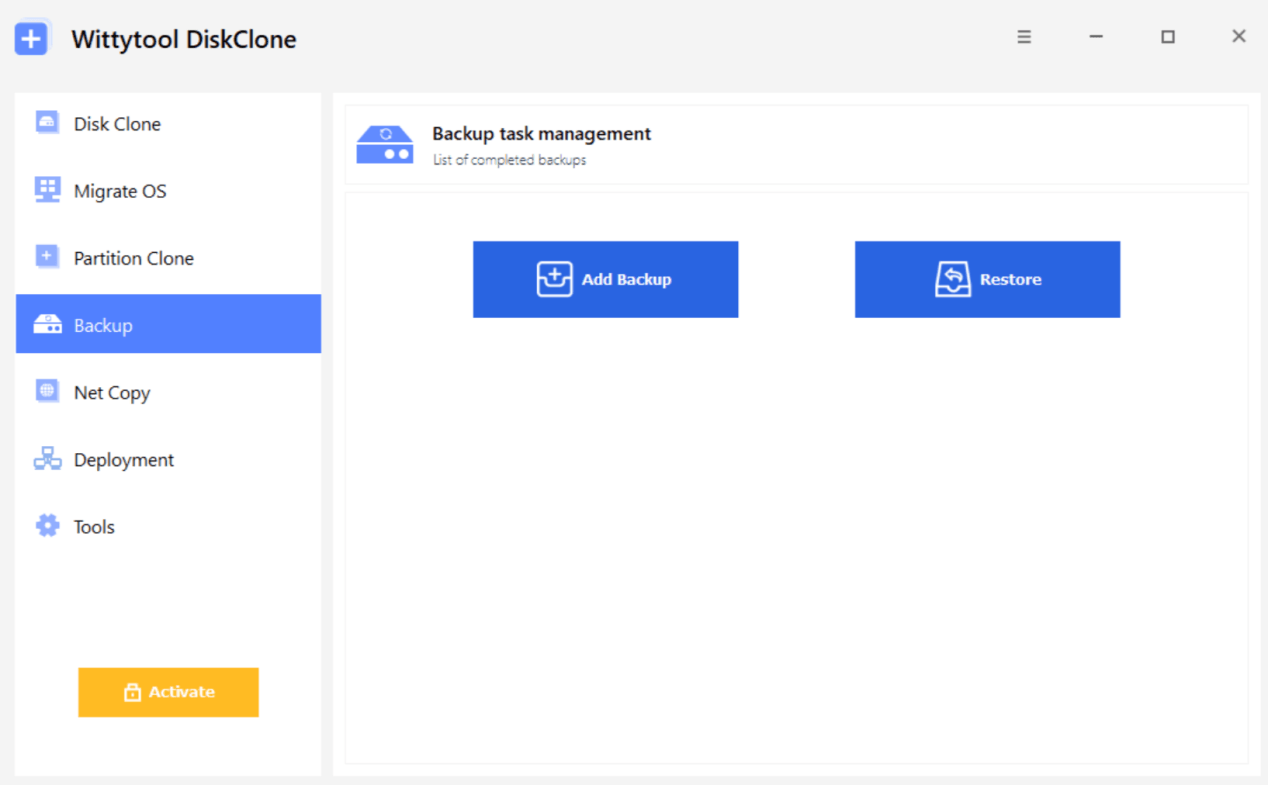
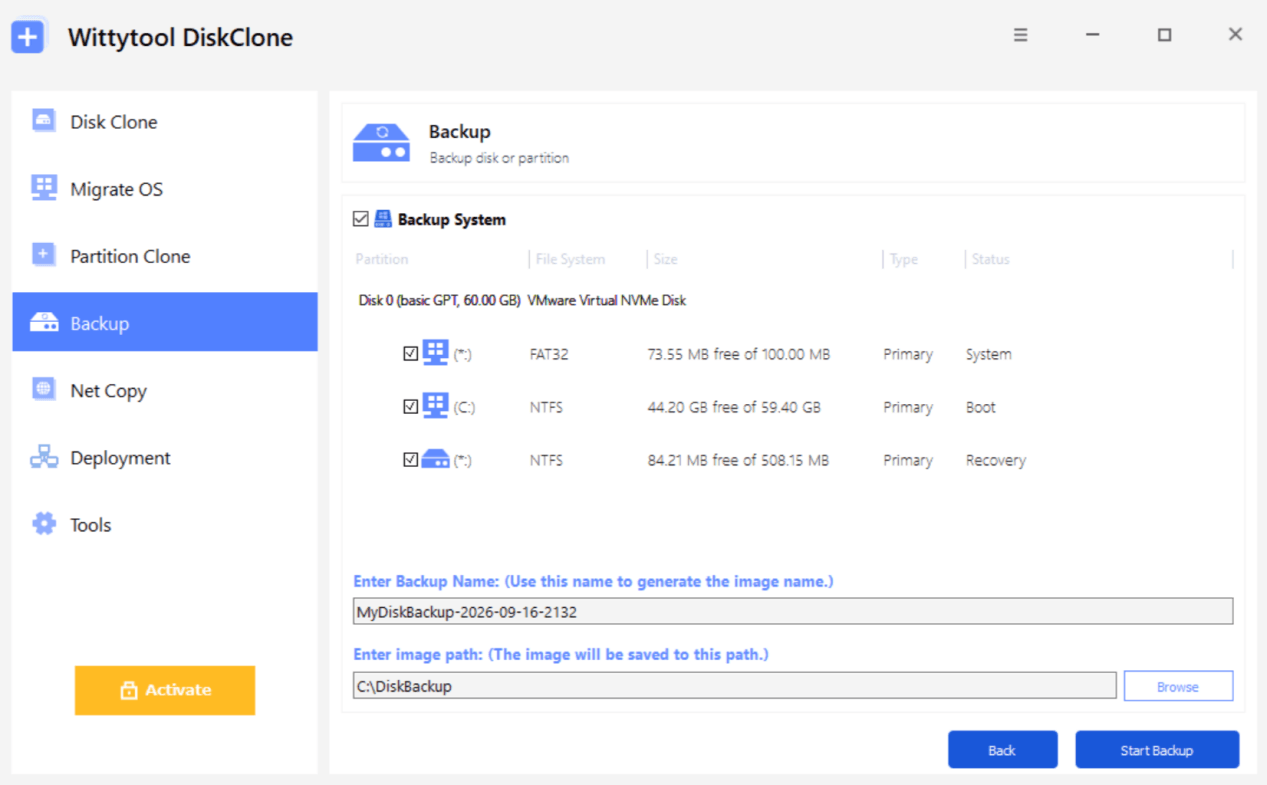
First, create a backup image of the source PC.
Step 2: Configure the Server
After the backup is complete, configure the server:
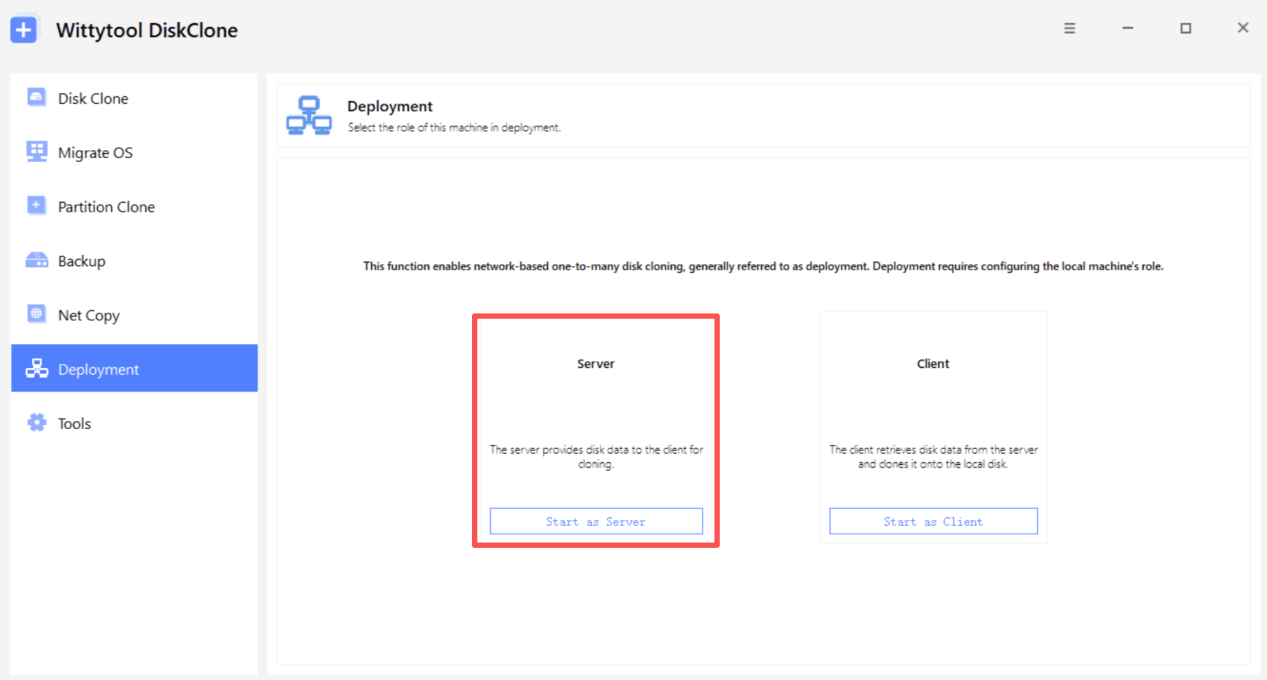
Open Deployment. Select Start as Server.
Step 3: Select the Backup Image
Click Browse and select the backup image you created in Step 1.
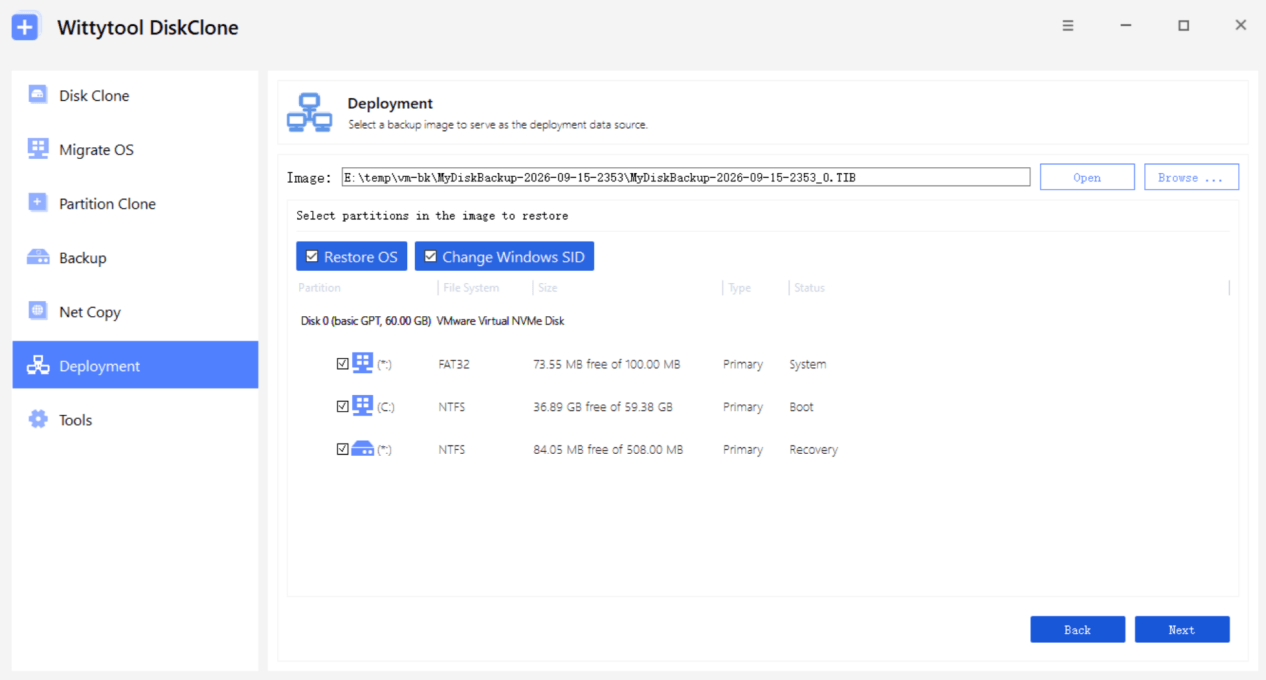
If the selected image is a system image, the Restore OS and Change Windows SID options will appear.
Select these options according to your requirements:
- Restore OS: Automatically selects the partitions related to the operating system.
- Change Windows SID: Changes the SID in the current image.
Step 4: Configure Target PC Settings
Configure the target PC settings according to your deployment requirements.
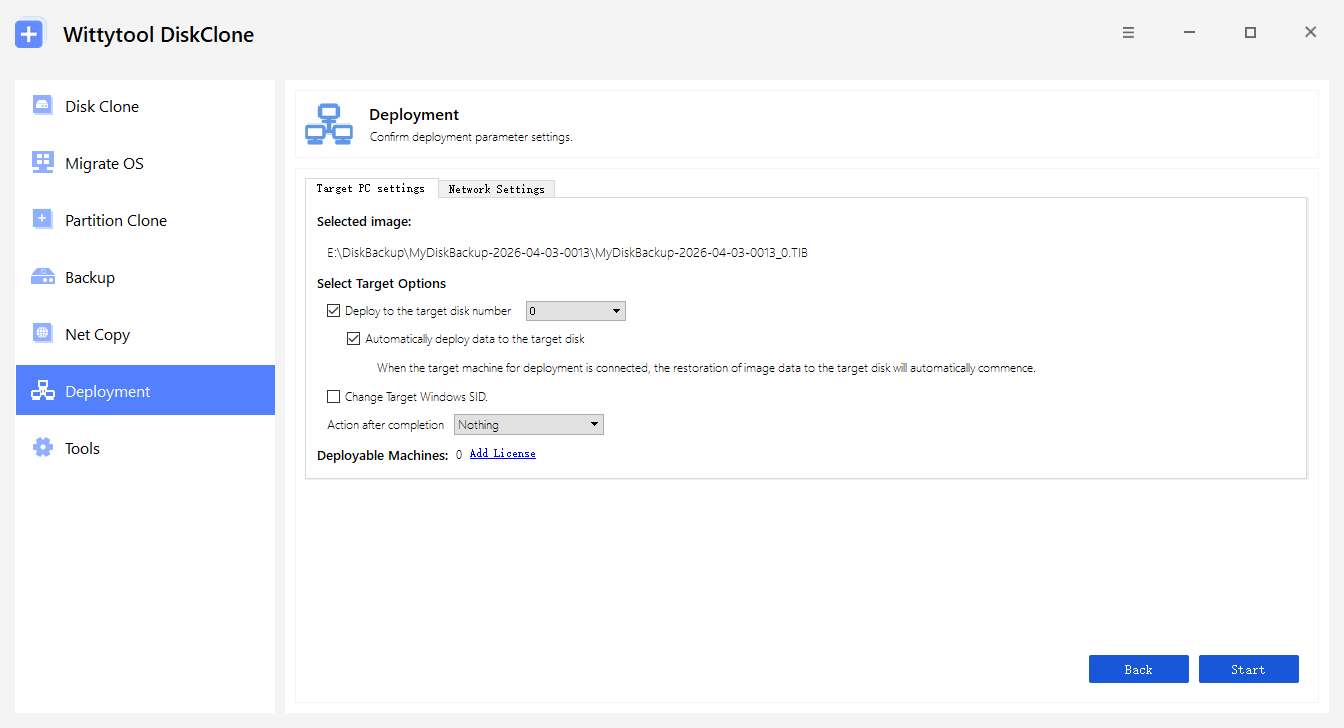
Under Target Options:
- Set Target Disk Number to specify the target disk for deployment.
- Select Automatically Deploy Data to the Target Disk to enable automatic deployment when Wittytool Disk Clone starts on the target PC.
- If Change Windows SID is selected, the SID on the target PC will be changed automatically to help prevent duplicate SIDs.
The server-side configuration is now complete.
Step 5: Connect the Target PC to the Server
On the target PC, connect to the server to start the deployment. There are two deployment methods: automatic and manual.
——Automatic Deployment——
Use automatic deployment when Target Disk Number and Automatically Deploy Data to the Target Disk have been configured on the server.
Method 1: Start Wittytool Disk Clone in WinPE
- Start Wittytool Disk Clone in WinPE mode on the target PC.
- The program will automatically detect the server and obtain its information.
- Wittytool Disk Clone will automatically connect to the server.
- After connecting, the deployment will be performed automatically according to the server-side settings until it is complete.
Method 2: Start from the Command Prompt
You can start the deployment directly from the command prompt using:
DiskClone.exe deployment [server IP] [port]Example: DiskClone.exe deployment 192.168.1.1 3002
The target PC will connect directly to the server and perform the deployment according to the server-side settings.
Method 3: Connect Through Deployment
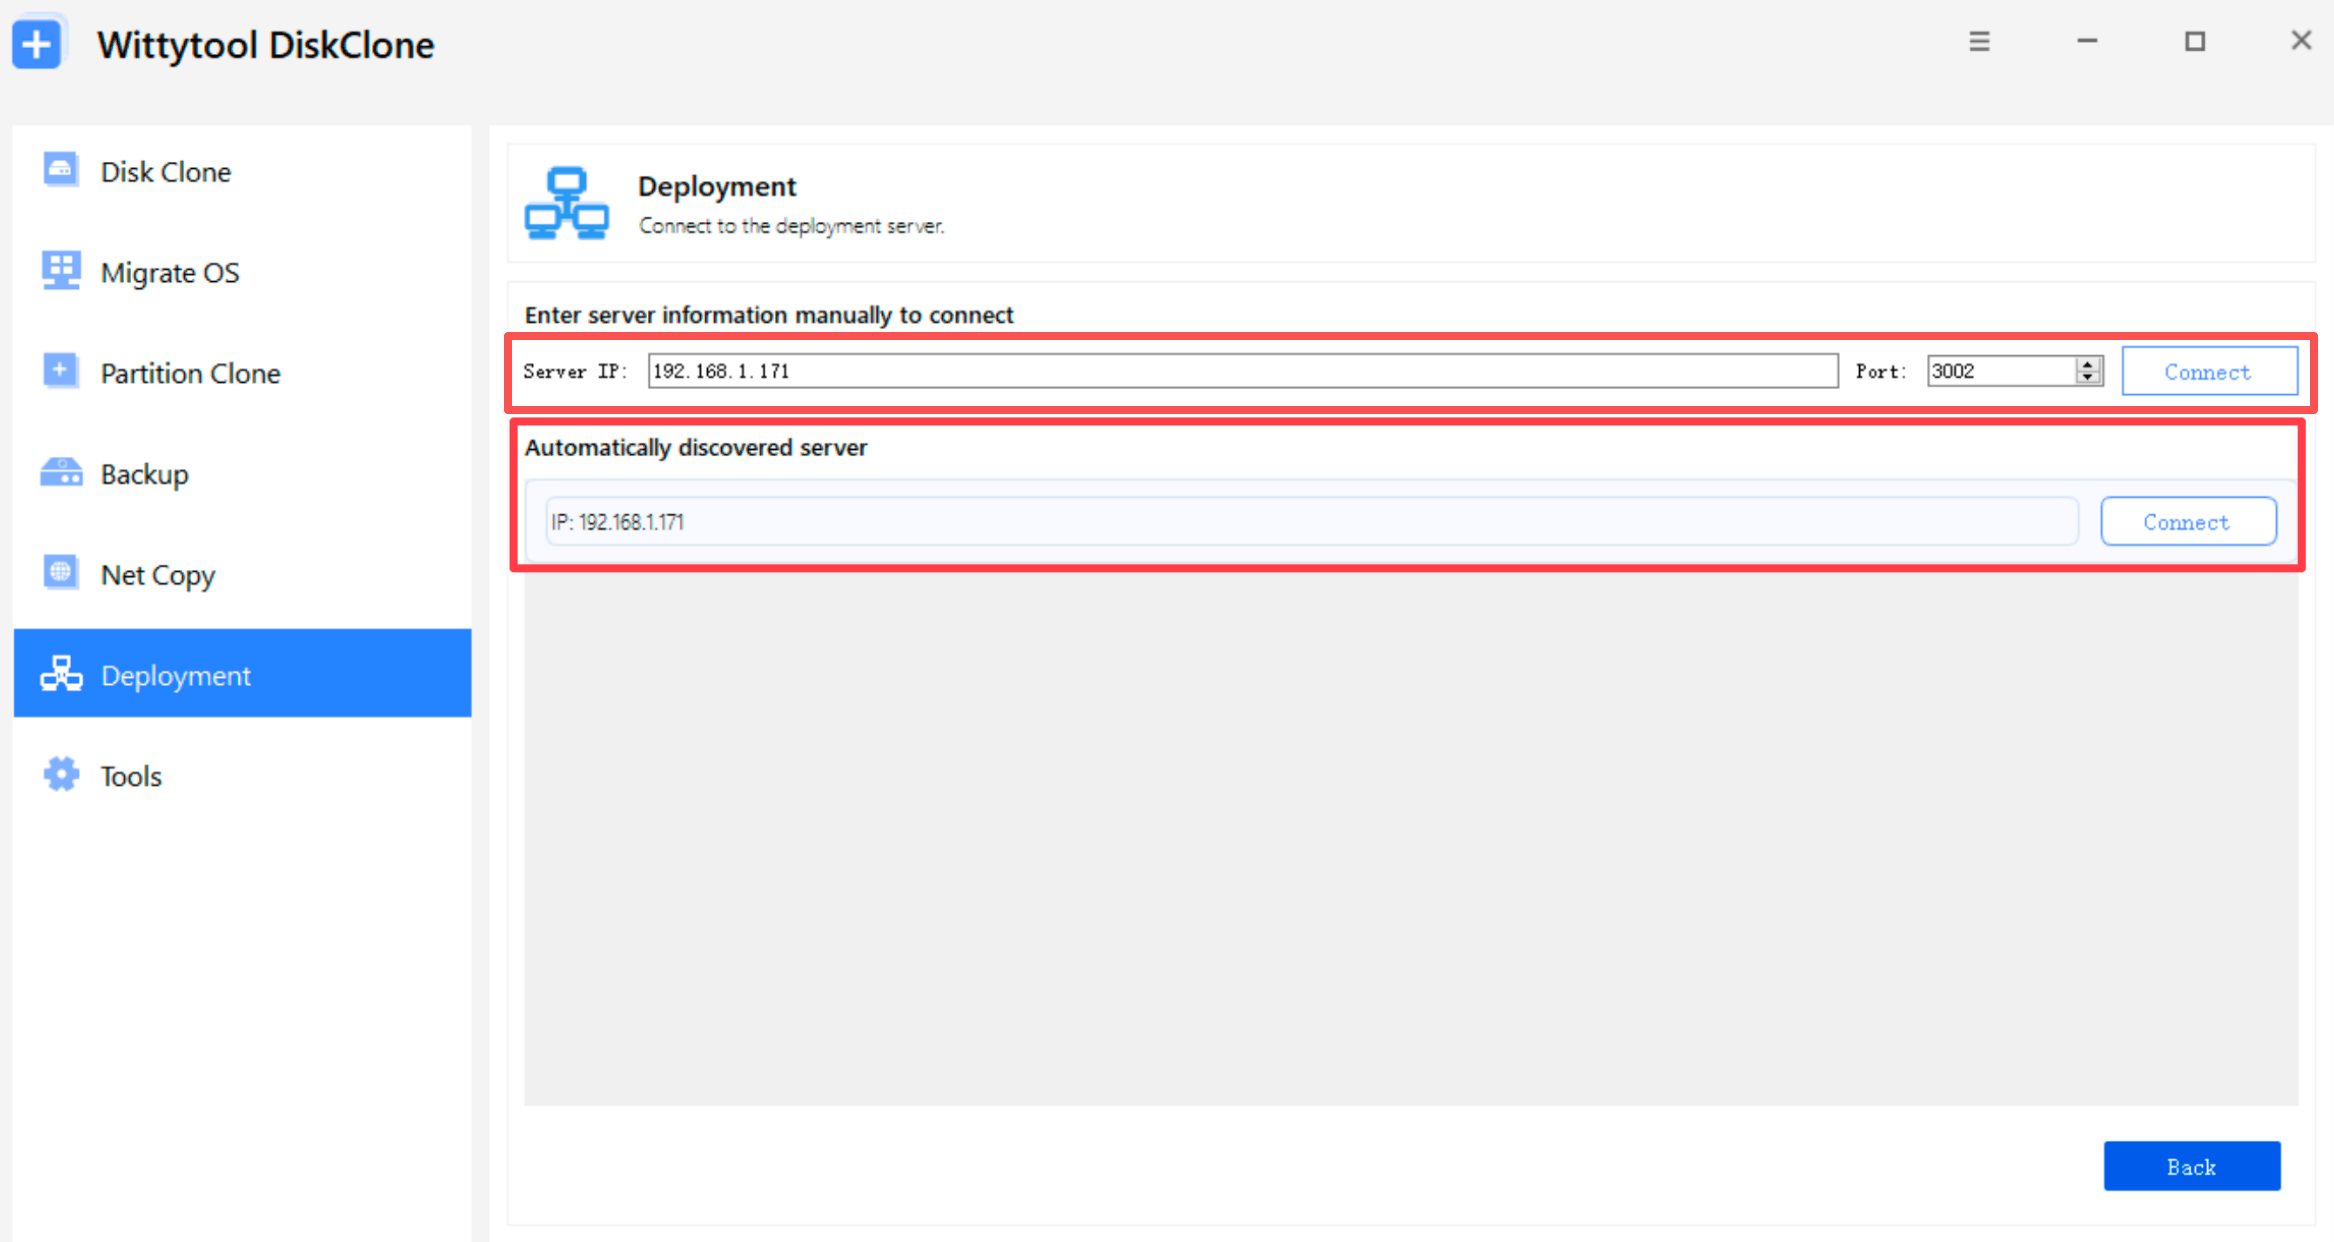
- Open Deployment on the target PC.
- The program will automatically search for the server IP information.
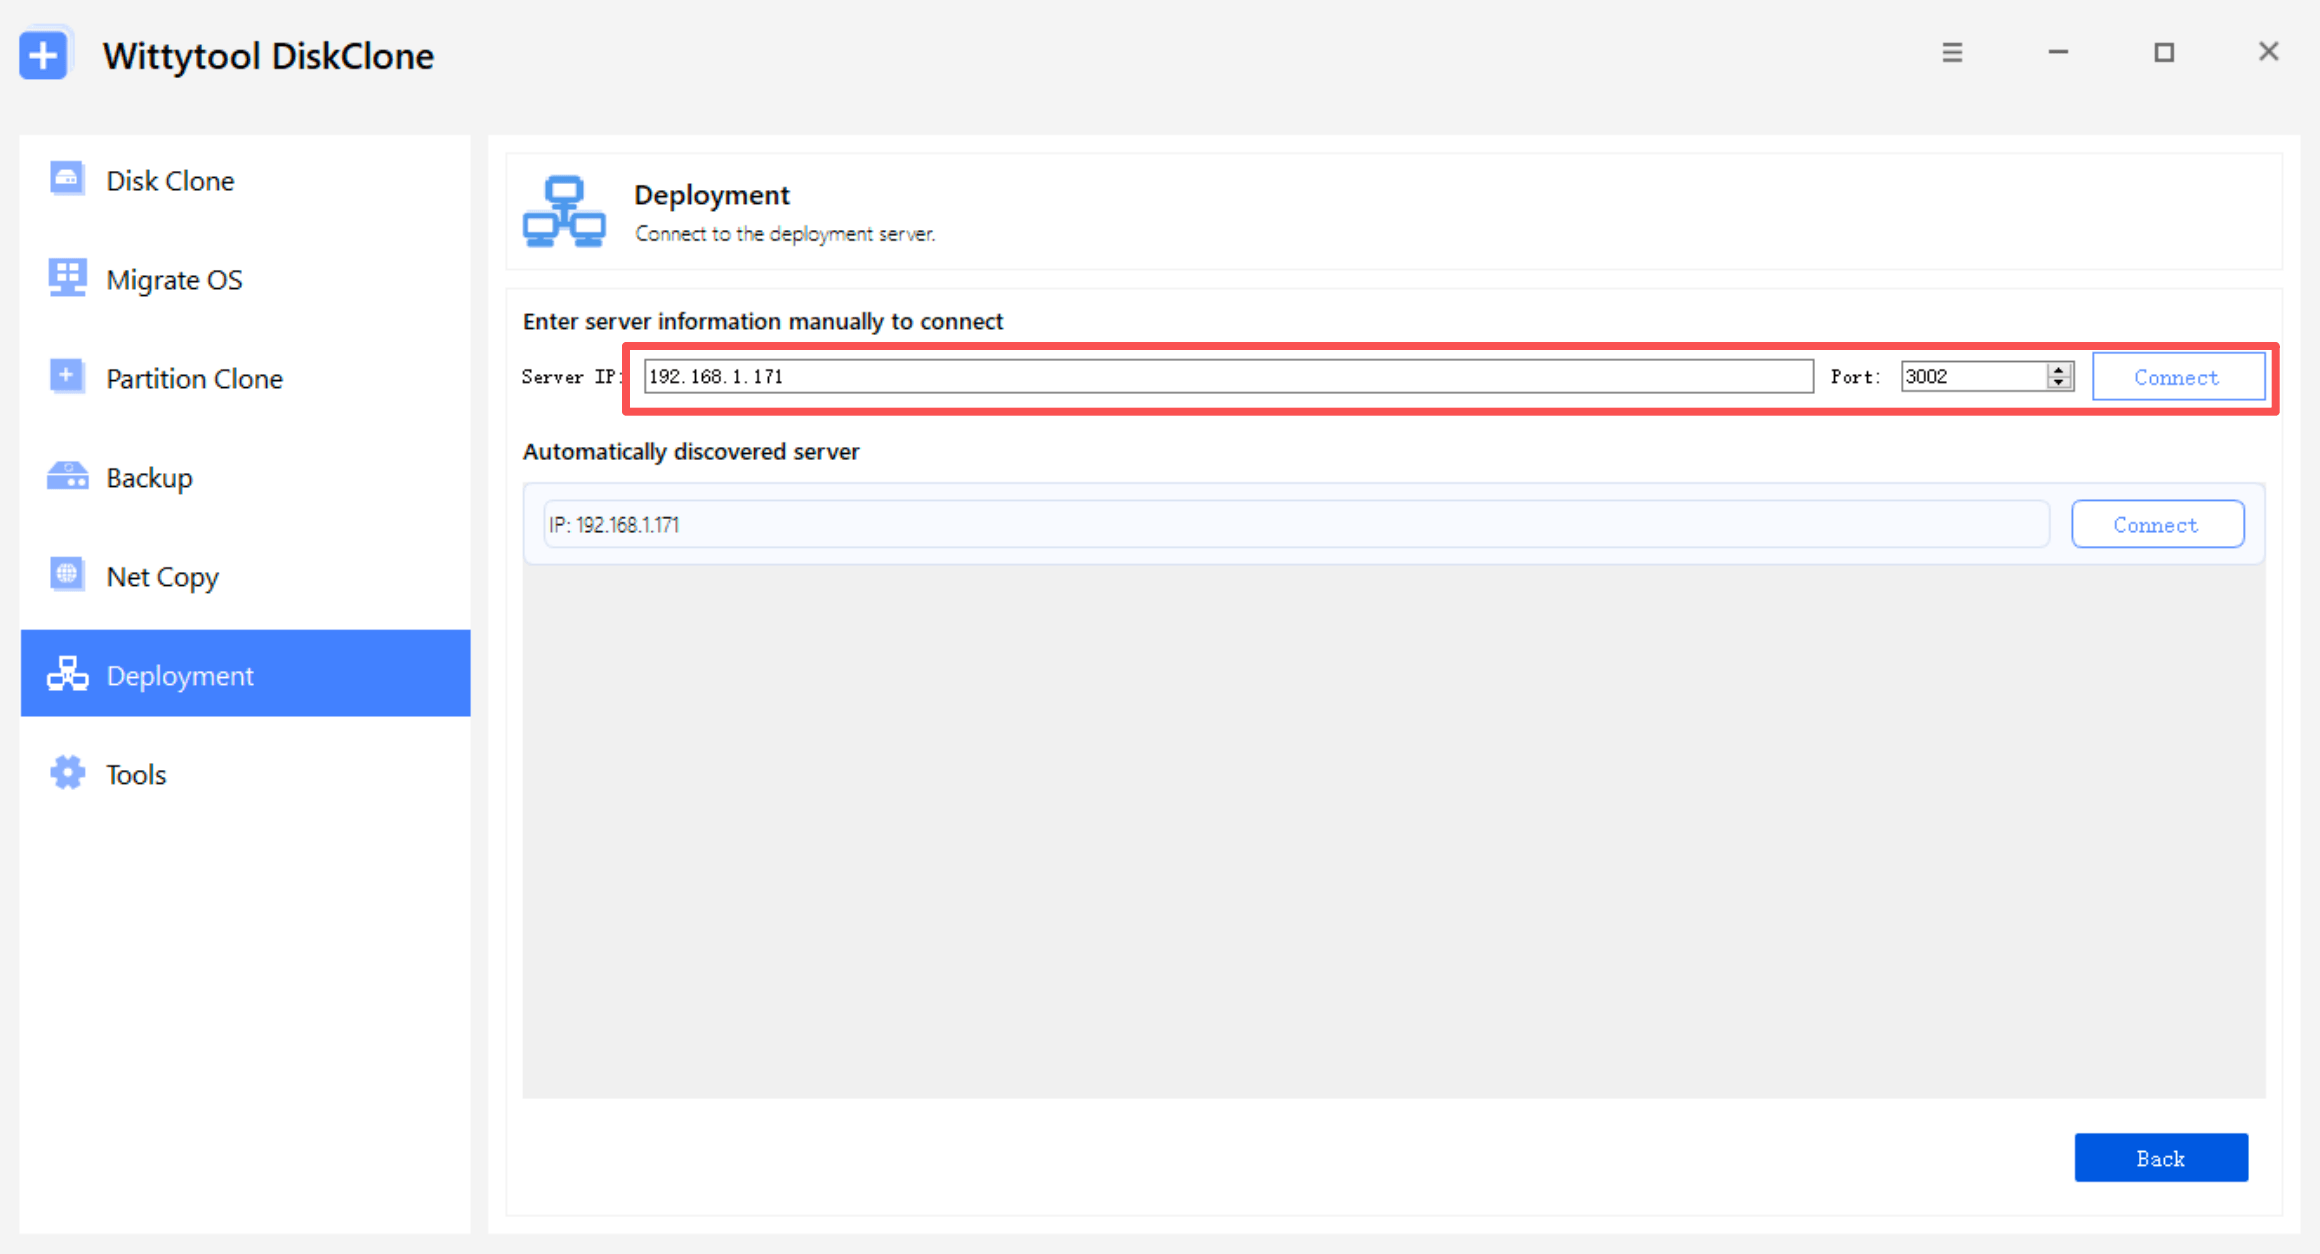
- You can also enter the server IP information manually.
- Click Connect after the server information is displayed.
- The target PC will connect to the server and perform the deployment according to the server-side settings.
——Manual Deployment——
Use manual deployment when Target Disk Number and Automatically Deploy Data to the Target Disk have not been configured on the server.
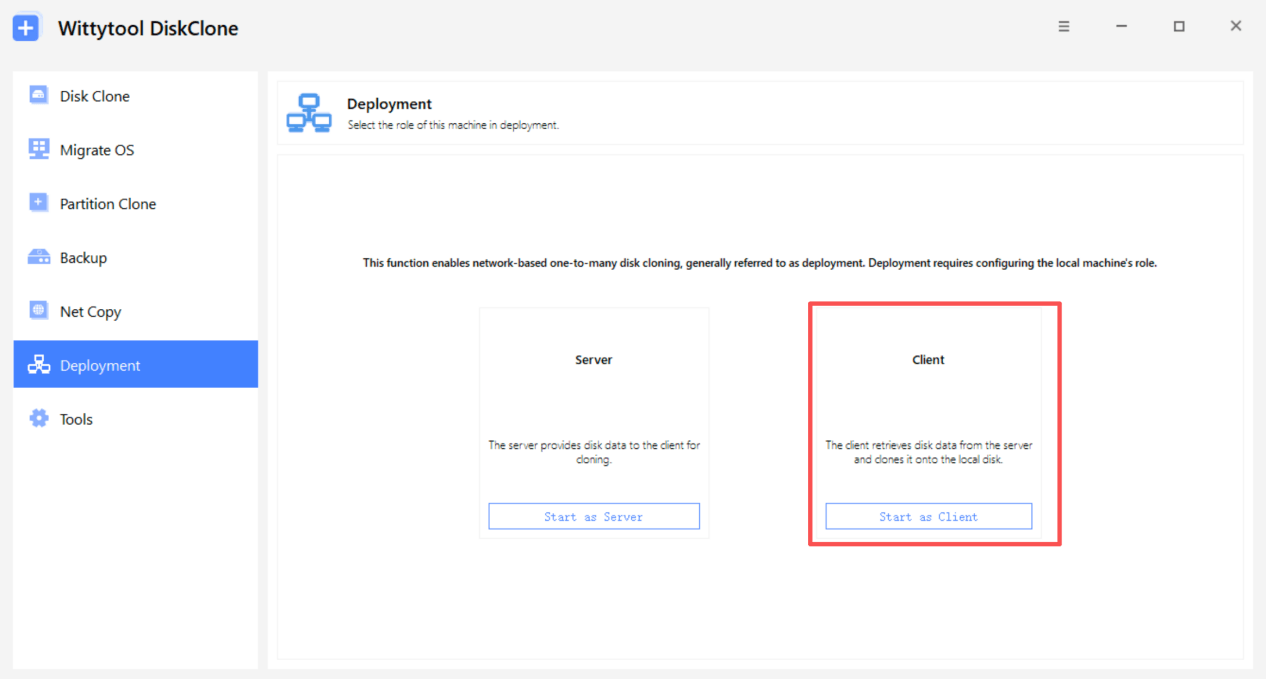
1. On the target PC, open Deployment and select Start as Client.
2. Enter the server IP address and Port, then click Connect.
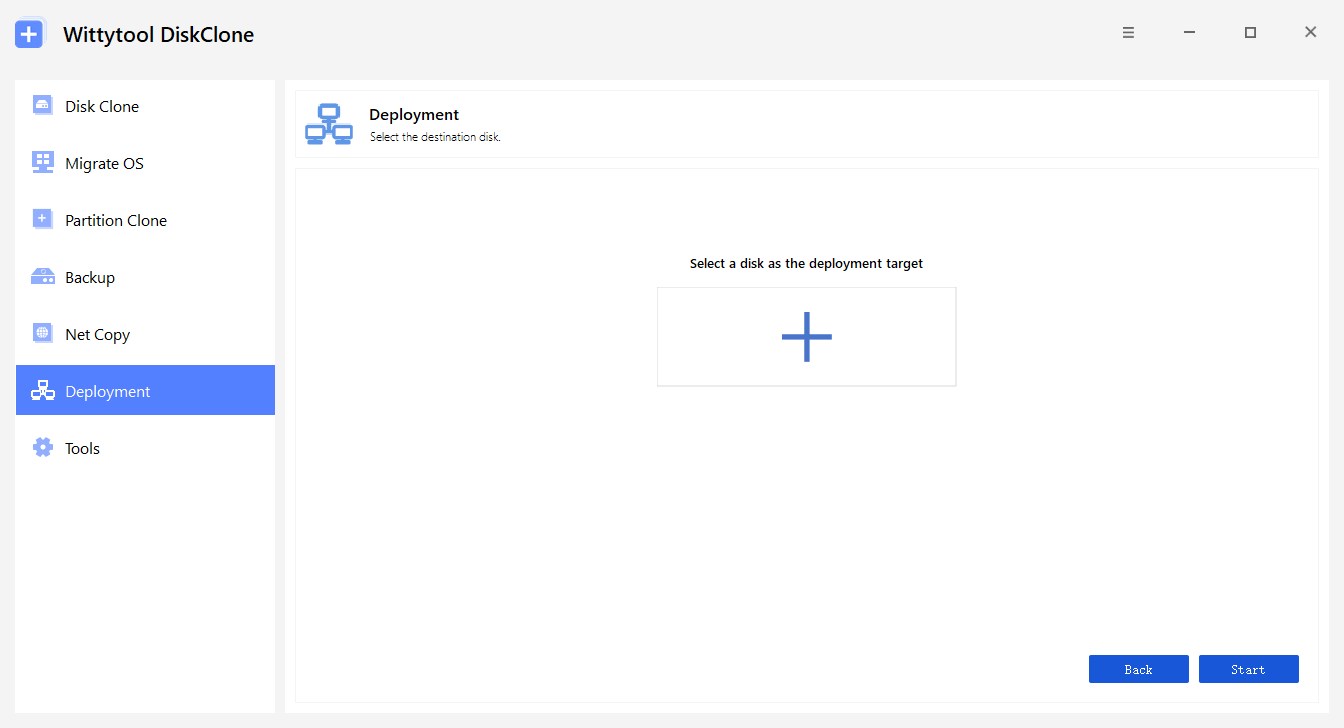
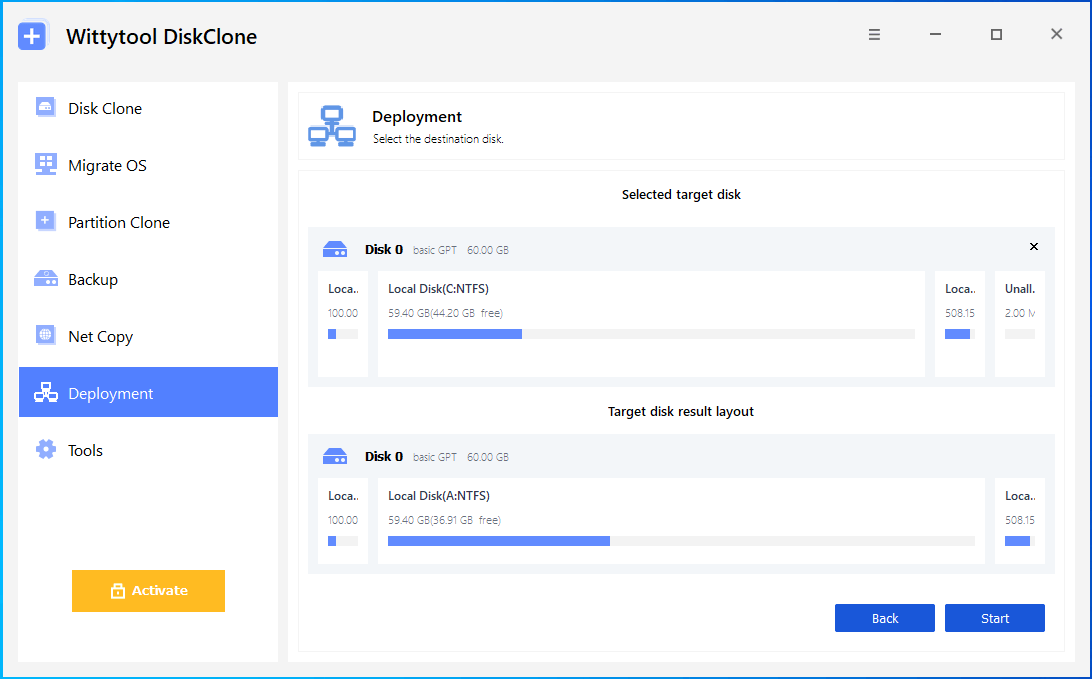
3. Select the disk where you want to deploy the image.
4. Click Start to begin the deployment.
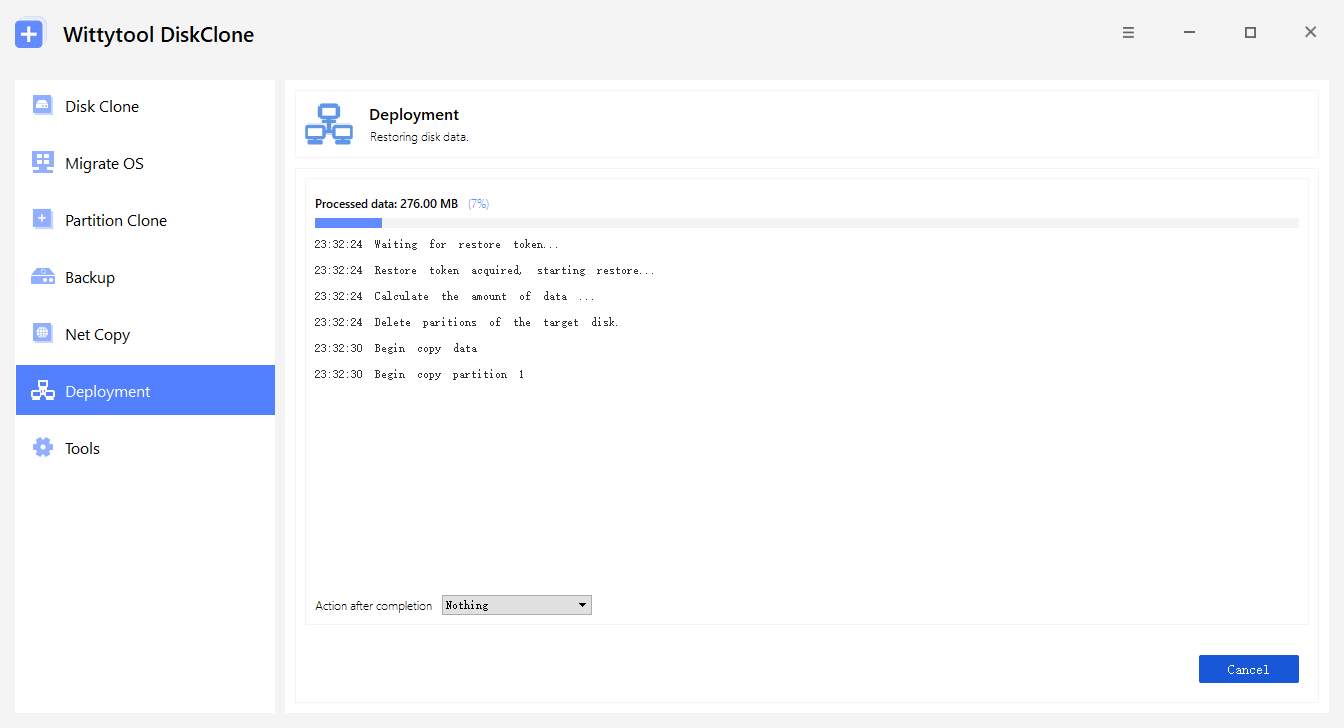
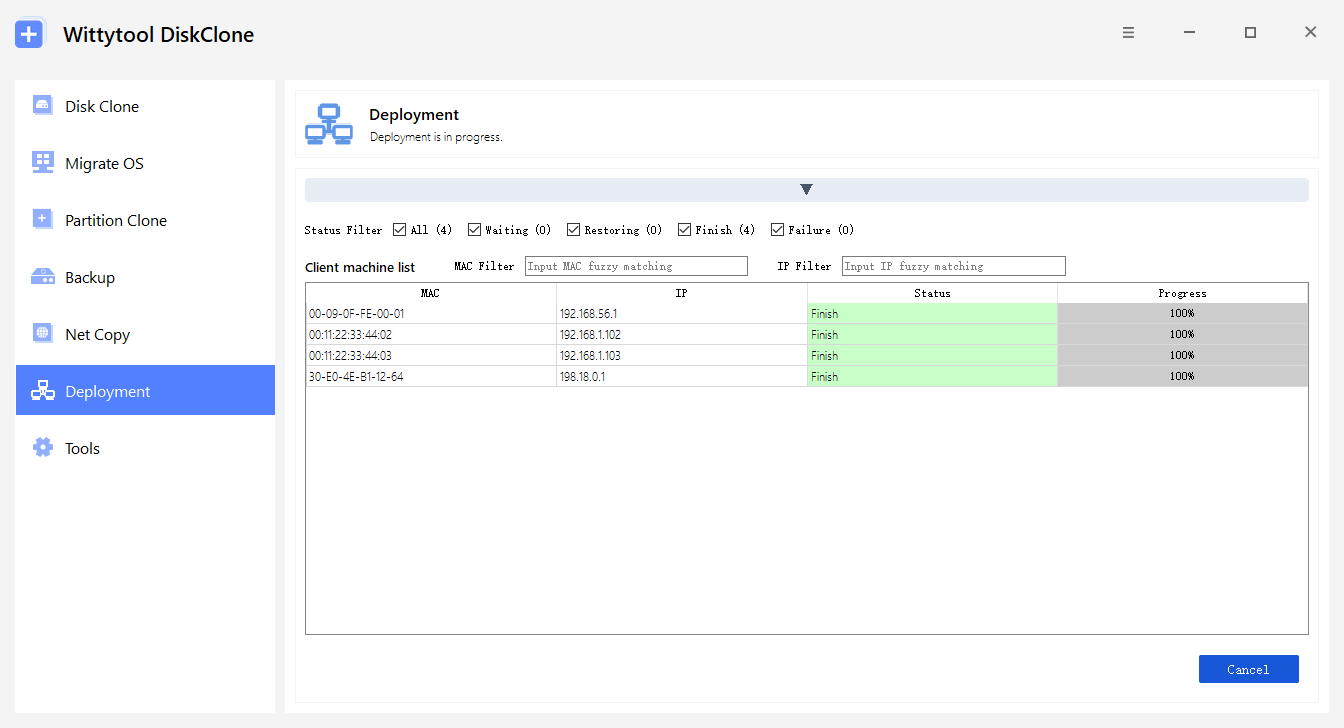
Step 6: Monitor the Deployment Progress
You can monitor the deployment progress in real time from the server side.
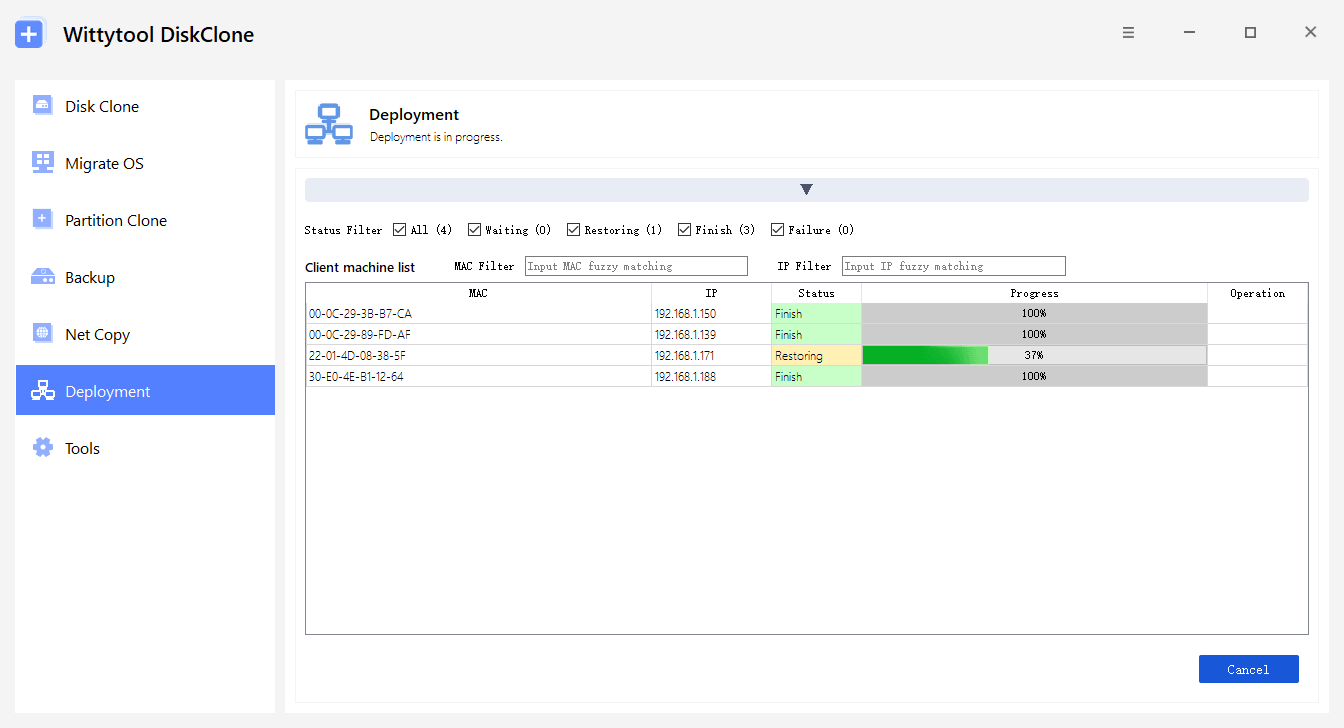
When the deployment is complete, the entire deployment process is finished.