Last updated on December 8, 2025
“I suspect that the hard drive on which my current OS (Windows 7) is located, is likely to fail soon.
I want to know how to transfer my OS to a new hard drive, as I am not keen on having to re-purchase another copy of windows for a new hard drive just because of hard drive problems.
I understand this will require much deactivating and uninstalling, of not only windows, but also other programs such as MOffice, Lightroom etc. How do I go about achieving this?”
Struggling with a slow HDD or upgrading to an SSD? You don’t need to reinstall Windows 7! This article reveals how to clone a hard drive in Windows 7 without losing data or settings. Whether replacing a failing drive or migrating to an SSD, cloning is your fastest solution. Discover tools to bypass nightmares like a cloned HDD or SSD won’t boot and avoid pitfalls users face when they clone disk Windows 11 unprepared.
Why Clone Your Windows 7 Hard Drive? Critical Scenarios
Cloning preserves your system better than clean installs or backups in these scenarios:
- Migrating to an SSD: HDDs slow down Windows 7’s aging hardware. Cloning moves everything without reactivation or driver chaos.
- Failing Drive Prevention: 64% of HDDs fail within 5 years (Backblaze 2023 stats). Clone before disk errors corrupt data.
- Legacy Hardware Upgrades: OEM recovery partitions vanish with new drives. Cloning retains factory settings & drivers.
- System Duplication: Create identical setups for multiple PCs—ideal for offices using win7 disk-based machines.
Windows 7 Cloning Prep: 5 Must-Do Steps
Skip these = risk failed clones or boot loops:
- Check Drive Health: Use
chkdsk /rand CrystalDiskInfo to confirm your source drive isn’t failing. - Target Drive Requirements:
- SSD/HDD must be ≥ source’s used space (not total capacity).
- Use a SATA-to-USB adapter for externals or connect internally.
- Backup Critical Data: Even cloning can fail. Use Windows Backup or drag files to an external drive.
- Disable Sleep/Hibernation: Prevent OS interruptions via Power Options > Change plan settings > Never sleep.
Why Cloning Software > Manual Methods for Windows 7
Windows lacks native cloning tools, making third-party software essential:
- Boot Sector Intelligence: Tools replicate hidden MBR partitions critical for booting—file copy misses these.
- SSD Optimization: Auto-enables TRIM/4K alignment (vital for SSD speed & lifespan).
- Error Handling: Pauses cloning on bad sectors vs. crashing like manual
ddcommands. - Partition Resizing: Shrinks partitions when cloning to smaller drives—key when migrating old how to clone Windows 7 HDD setups to SSDs.
- Speed & Validation: Sector-by-sector cloning with MD5 checks.
How to Clone a Windows 7 Drive: Step-by-Step Guide
Hard drive cloning software significantly simplifies the process of duplicating a hard drive. Based on the criteria mentioned, Wittytool Disk Clone stands out as the premier Windows 7-compatible cloning tool. It offers notably faster cloning speeds than alternatives, saving considerable time. Furthermore, it enables laptop hard drive replacement without data loss or system reinstallation.
Additionally, Wittytool Disk Clone excels at cloning drives containing bad sectors and can even repair them. It also allows selective cloning of only the used sectors from a source disk to a smaller SSD. Crucially, computers can successfully boot from the cloned drive created by this software.
Step 1: Select Migrate OS in left pannel, then choose the destination disk from the list.
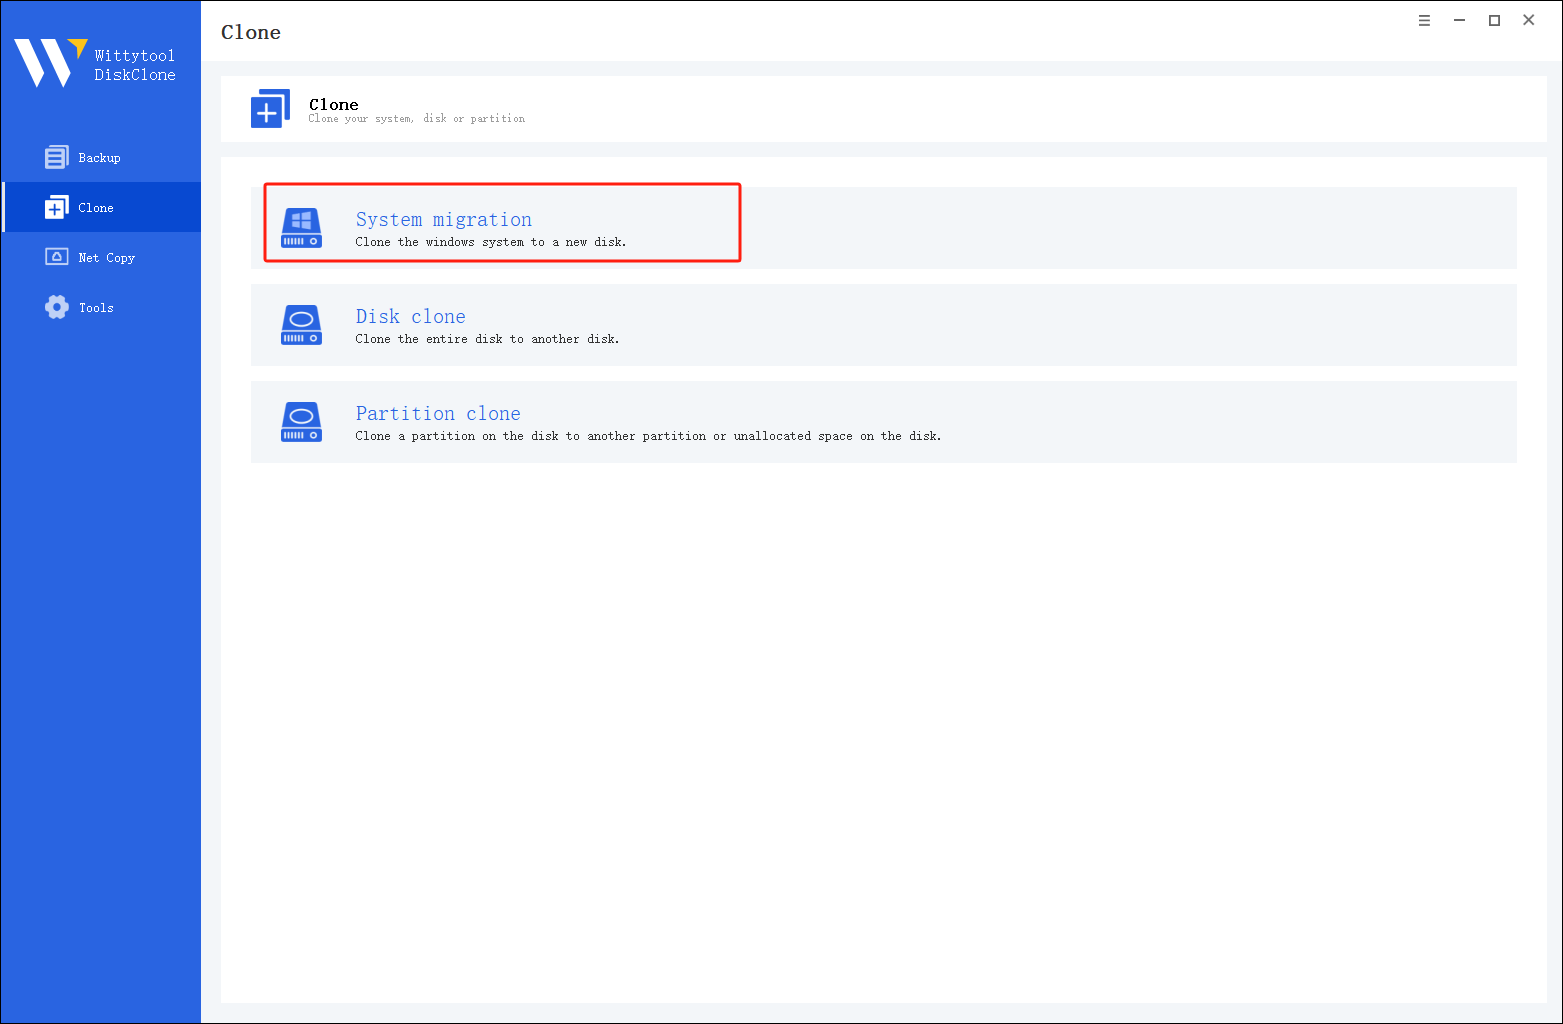
*Change Windows SID: When cloning multiple machines on the same network, select “Change Windows SID” to prevent SID duplicated issues related to network access. This direct approach allows you to change windows sid without sysprep, making large-scale cloning operations much quicker and more efficient.
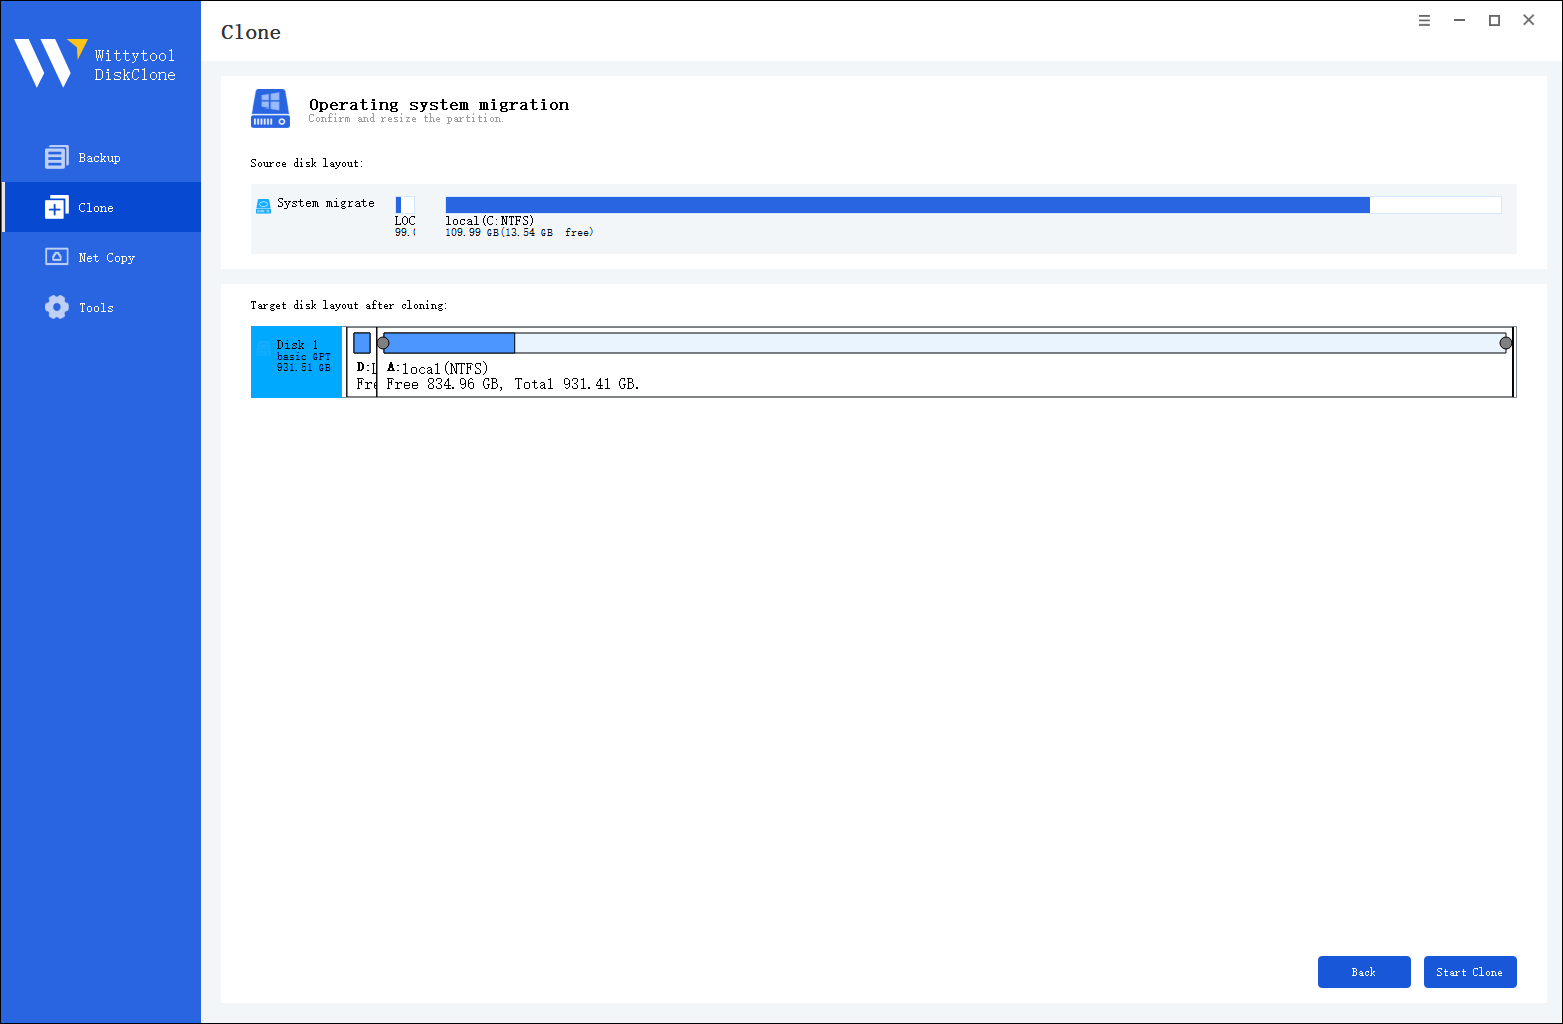
Step 2: Confirm Partition Size. Review and resize the partitions on the target disk as needed. Once ready, click the “Start Clone” button to begin the cloning process.
Once the cloning process is complete, you must tell your computer to load Windows from the new drive:
Step 3. Restart your PC and immediately press the BIOS key (usually F2, F12, or Del) repeatedly as the computer starts up.
Step 4. Navigate to the Boot menu or Boot Priority settings. Move your new disk to the top of the list to make it the primary boot device.
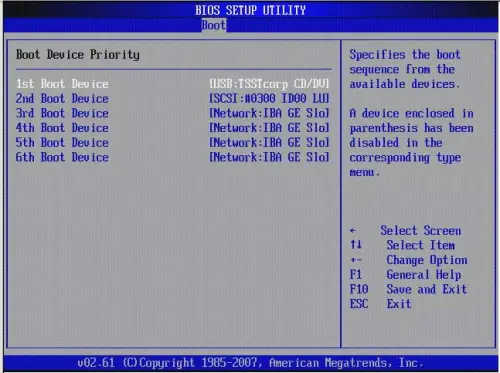
Step 5. Save your changes (often by pressing F10), exit the BIOS, and allow the PC to restart.
Watch this video guide to learn how to clone your system with Wittytool Disk Clone:
Post-Clone Optimization & Next Steps
- Benchmark Your Drive: Use AS SSD Benchmark to confirm 4K alignment (green “OK” badges).
- Wipe Old Drive: Format original drive for storage via Disk Management > Initialize > NTFS.
- Enable TRIM (SSDs): Run
fsutil behavior set DisableDeleteNotify 0in Command Prompt. - System Updates: Run Windows Update—cloned systems often need driver refreshes.
Windows 7 Drive Cloning FAQs Solved
1. Can Windows 7 clone to SSD?
Yes, Windows 7 can be directly cloned to an SSD by an SSD cloning software. To upgrade your system disk from an HDD to an SSD, OS migration is the recommended method—it transfers your operating system, applications, and data without requiring reinstallation.
2. How to copy Windows 7 OS without cloning?
Using Wittytool Disk Clone, you can select specific partitions to clone. Choose your current system disk as the source drive and transfer its contents to another HDD or SSD.
3. Can I manually clone a Windows 7 hard drive?
You can manually clone a drive using Windows’ built-in Backup and Restore feature: create a system image of your source drive, then restore it to the target drive. However, user reports indicate this method may occasionally cause data loss or process hangs. We strongly recommend dedicated cloning software for reliable data transfer and improved efficiency.