Last updated on June 25, 2026
Currently, my OS is installed on an SSD. I want to upgrade the size of the SSD, so I want to move the OS to my hard drive, replace the SSD, and move the OS back to the new SSD. How do I move the storage device the OS is installed on?
With Windows 10 end of support approaching, migrating your OS to a new drive is essential for continued security and performance. Yes, you can transfer Windows 10 to another hard drive seamlessly—a proven solution recommended by tech communities to upgrade aging hardware or shift to faster SSDs/HDDs.
Learning how to move Windows 10 to another drive is essential when migrating to a faster SSD or larger HDD. Whether you’re trying to transfer OS to another drive or move Win 10 to SSD, this guide avoids tedious OS reinstallation. Tools like a reliable usb disk clone tool simplify the process, similar to how to clone SD card tasks. For complex migrations, third-party os migration software ensures efficiency. We’ll cover two proven methods to transfer Windows to another drive safely.
Preparation Checklist: Before Moving Your OS to a New Drive
Prepare these critical items before migrating Windows to ensure a smooth transfer to your new SSD or HDD:
✔️ Select the Right Drive
Opt for an SSD (minimum 1TB recommended) for faster performance. Verify compatibility with your system’s interface (SATA/NVMe) and form factor (2.5″/M.2).
✔️ Test New Drive Health
Perform a surface test to identify bad sectors – crucial even for brand-new drives.
✔️ Clean Source Drive
Remove unused apps, duplicates, and junk files to speed up migration and reduce transfer time.
✔️ Prepare Connection Hardware
Get a USB-to-SATA adapter or external enclosure to connect the new drive to your PC.
✔️ Install Migration Software
Download cloning software like Wittytool DiskClone (Windows lacks native cloning tools) for seamless OS transfer.
✔️ Gather Physical Tools
Have a screwdriver/pry tool ready for opening your PC case and drive replacement.
Method 1: Clone Windows via WittyTool DiskClone
Disk cloning stands as the most efficient method to transfer Windows to another drive—eliminating OS reinstallations and guaranteeing zero data loss. For flawless execution, leverage Wittytool DiskClone: a certified disk cloning solution for Windows 11/10/8/7 that dramatically simplifies the process while maximizing migration success rates.
Effortlessly replace HDD with lightning-fast SSDs using WittyTool DiskClone – the definitive tool for seamless storage upgrades and system migrations. Engineered to transfer OS to SSD in minutes without reinstalling Windows or losing data, DiskClone performs intelligent sector-by-sector replication while maintaining partition structures, boot configurations, and file integrity.
Standout features include integrated bad sector repair tool technology that scans and bypasses damaged disk areas during cloning, guaranteeing 100% operational success even with aging drives.
Effortlessly Clone Windows to a New Drive: Step-by-Step Guide Using WittyTool DiskClone:
Step 1: Select Migrate OS in left pannel, then choose the destination disk from the list.
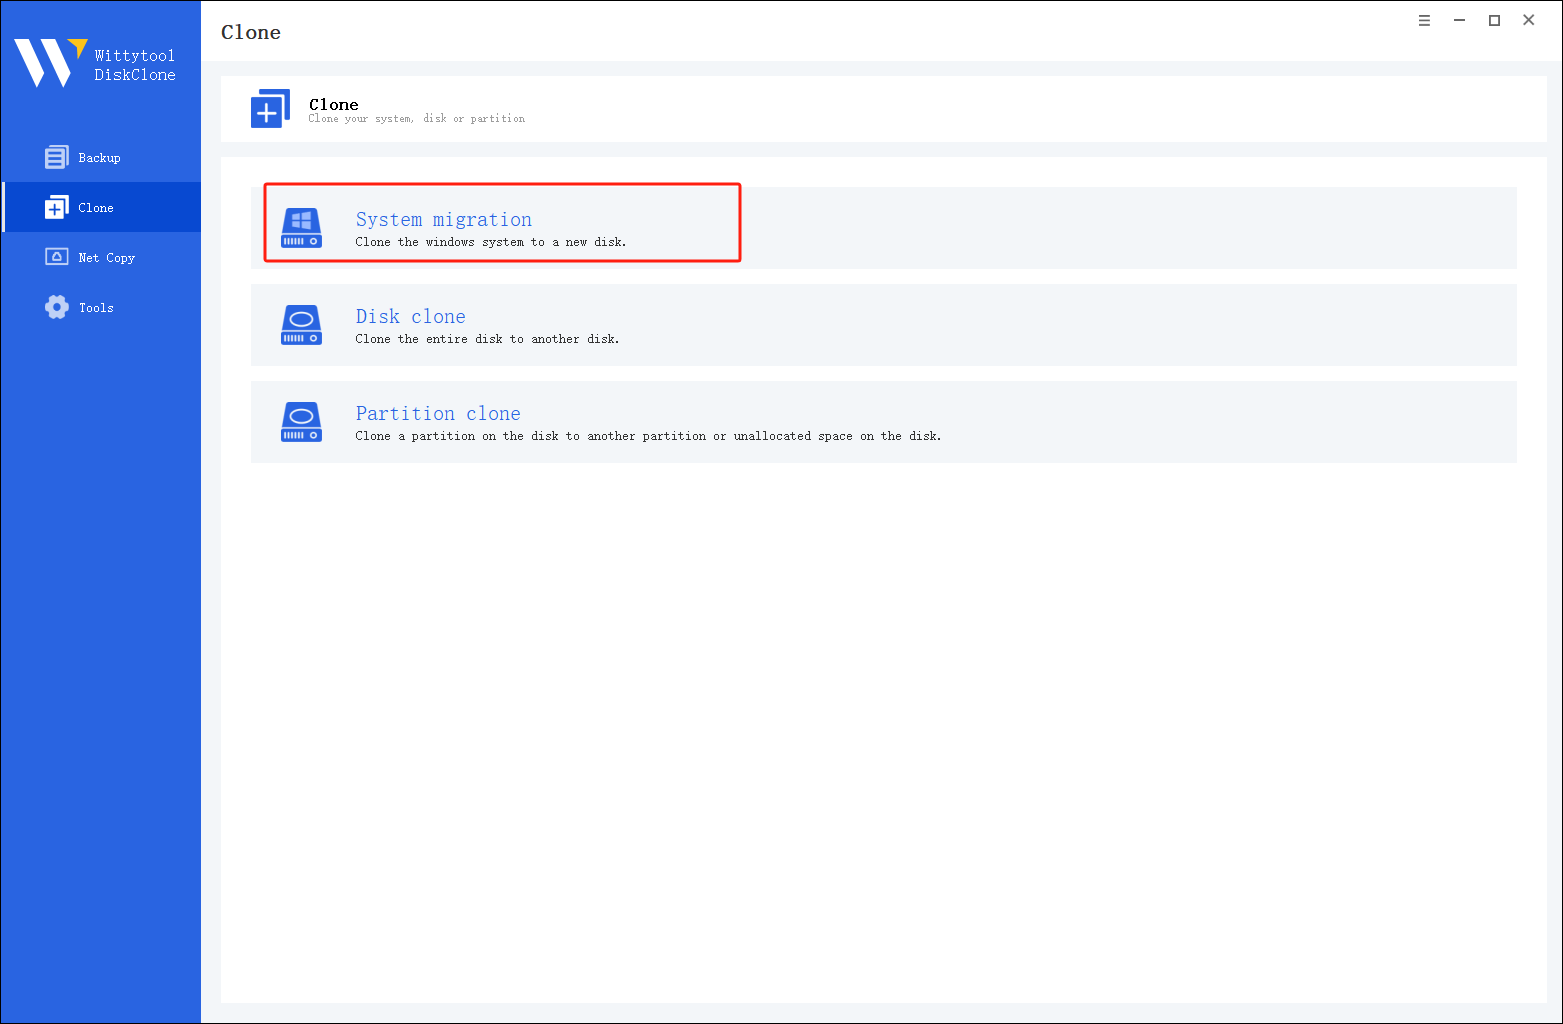
*Change Windows SID: When cloning multiple machines on the same network, select “Change Windows SID” to prevent SID duplicated issues related to network access. This direct approach allows you to change windows sid without sysprep, making large-scale cloning operations much quicker and more efficient.
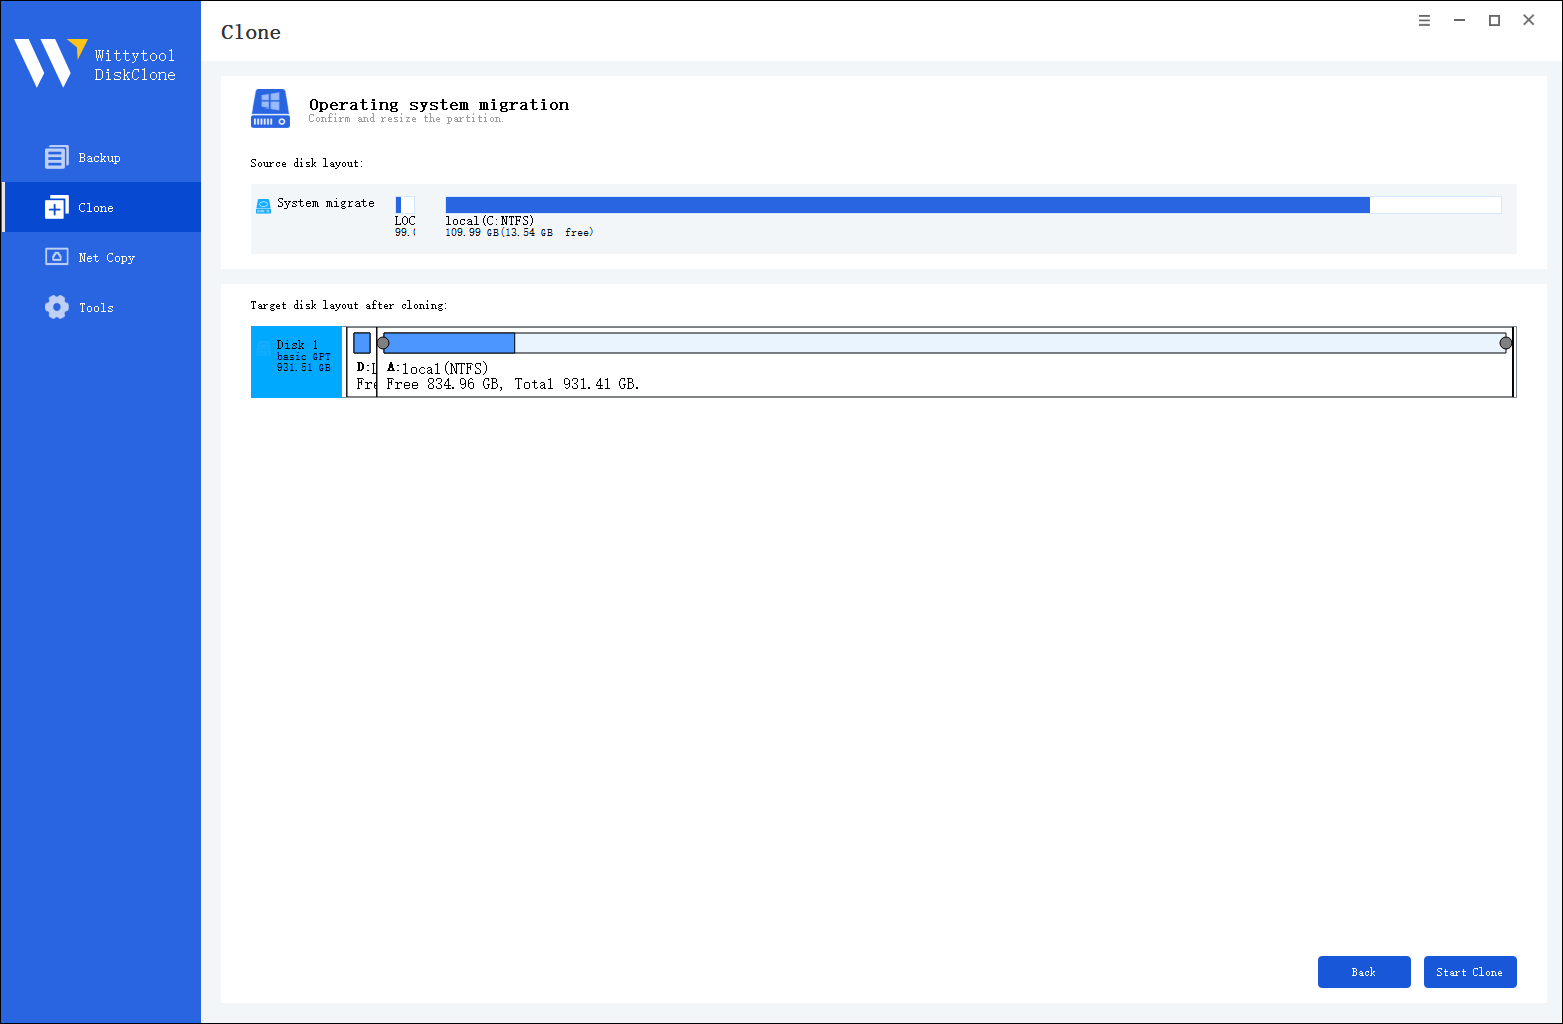
Step 2: Confirm Partition Size. Review and resize the partitions on the target disk as needed. Once ready, click the “Start Clone” button to begin the cloning process.
Once the cloning process is complete, you must tell your computer to load Windows from the new drive:
Step 3. Restart your PC and immediately press the BIOS key (usually F2, F12, or Del) repeatedly as the computer starts up.
Step 4. Navigate to the Boot menu or Boot Priority settings. Move your new disk to the top of the list to make it the primary boot device.
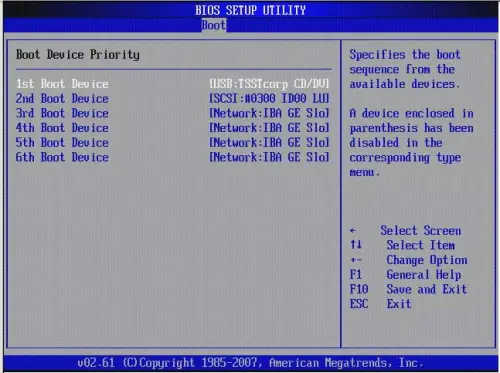
Step 5. Save your changes (often by pressing F10), exit the BIOS, and allow the PC to restart.
Watch this video guide to learn how to clone your system with Wittytool Disk Clone:
Method 2: System Image Transfer (Built-in Tool)
Use Windows’ native imaging for OS migration.
Part 1: Create Windows System Image Backup
Follow these steps to create a full system snapshot:
- Connect external storage to your PC (ensure ≥100GB free space).
- Open Control Panel → System and Security → Backup and Restore (Windows 7).
- Select ”Create a system image” in the left pane.
- Choose external drive → Next.
- Confirm partitions (system drive selected by default) → Next.
- Click “Start backup” (takes 20-60 mins depending on data).
Note: Requires admin rights. Keep PC plugged in during process.

Part 2: Prepare Recovery Media
Create bootable rescue tools for restoration emergencies:
Option A: For Older Systems (DVD Required)
- Insert blank DVD → Click ”Create system repair disc”.
- Select optical drive → Create disc.
❗ Limits: Only works on optical drives. USB not supported.
❗Avoid delays: Recovery media prevents system restore taking a long time.
Option B: Modern Recovery USB (Recommended)
- Search ”Create recovery drive” → Select USB port (≥8GB).
- Check ”Back up system files” → Follow prompts.
✅ Pro tip: Label USB as “Windows Recovery” for easy identification.

Part 3: Restore Image to New Drive
Migrate OS to replacement hardware:
- Connect both drives:
- Backup drive (with system image)
- Target drive (empty SSD/HDD)
- Boot into Recovery Environment:
- Win 10/11: Settings → Update & Security → Recovery → Restart Now
- Navigate:
Troubleshoot → Advanced options → System Image Recovery - Restoration workflow:
a. Select ”Use latest image”
b. Check ”Format and repartition disks”
c. Target new drive → Next
d. Confirm → Finish
⚠️ WARNING: All target drive data will be overwritten!

What to do After moving Windows 10 to another drive
#1. Replace Old Drive
Shut down > Swap old drive with the new drive physically.
#2. Boot from Cloned SSD/HDD
Enter BIOS/UEFI > Set new drive as the first boot device.
#3. Test Migration Success
- Verify boot time and drive capacity in ”This PC”.
- Run
chkdskandsfc /scannowfor errors. - Confirm apps and files are intact.
Conclusion
How to transfer OS to another drive no longer requires fresh installs. Use WittyTool DiskClone for speed or System Image for built-in reliability. Both methods let you move Win 10 to SSD or HDD seamlessly.
FAQs About How to Move OS to Another Drive Windows 10
Q1: Can I install Windows 10 on a different drive?
Yes – use either:
① Disk cloning (recommended) – transfers everything without reinstallation or data backup
② Clean install – requires new Windows setup and manual data migration
Q2: How to fresh install Windows 10?
Follow this 6-step process:
- Download official Windows 10 ISO
- Create bootable USB with Rufus or Media Creation Tool
- Replace old drive with new SSD/HDD
- Boot from installation media (press F12/Del during startup)
- Install Windows following prompts (format new drive during setup)
- Set new drive as primary boot device in BIOS/UEFI
Q3: How to migrate OS between drives?
Top 3 migration methods:
✅ Clone disk-to-disk – Fastest method using tools like EaseUS Disk Copy
✅ System image restore – Use built-in Windows backup/restore
⏱️ Fresh install – Time-consuming but resolves system errors
Q4: Will changing hard drive void my Windows 10 license?
No – Your license ties to the motherboard, not storage:
• Automatic reactivation: Connect to internet after migration
• Manual activation: If needed, go to:Settings → Update & Security → Activation → Troubleshoot
⚠️ Exception: OEM licenses tied to pre-built PCs may require reactivation