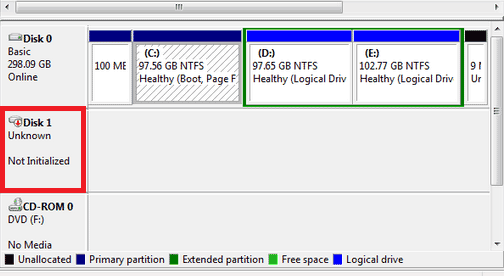
It is a heart-stopping moment: you plug in your external hard drive or SSD, but it doesn’t appear in File Explorer. You open Disk Management, only to see your drive labeled as “Disk 1 Unknown Not Initialized” or “Disk 0 Unknown Not Initialized”.
This error effectively locks you out of your data. Windows cannot mount the drive because it lacks a valid signature or Master Boot Record (MBR). While the immediate temptation is to follow the system’s prompt to “Initialize Disk,” doing so incorrectly can lead to permanent data loss.
In this guide, we will troubleshoot the disk not initialized error with professional precision, starting with data protection and moving through verified fixes for Windows 10 and 11. This issue is also a common reason why a USB drive not showing up in Windows may be detected in Disk Management yet remain inaccessible in File Explorer.
Symptoms: Diagnosing “Disk Not Initialized” Errors
Before applying fixes, it is crucial to understand which type of error you are facing. Open Disk Management (press Win + X > Disk Management) and check the status of the problematic drive.
Case 1: Disk Shows “Not Initialized” and “Unallocated Space”
If you see disk unknown not initialized accompanied by a black bar showing “Unallocated Space,” it typically means the drive is recognized physically, but the partition table (MBR or GPT) is corrupted or missing. This is often software – related and has a high chance of recovery.
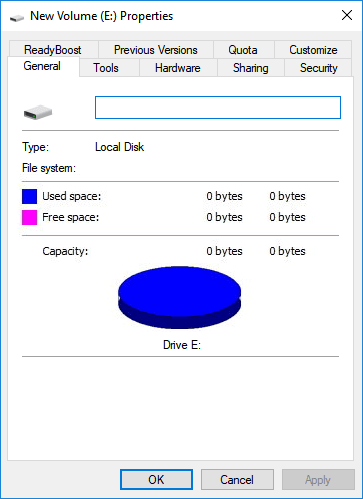
Case 2: Disk Shows “Not Initialized” and “0 Bytes/No Size”
If the not initialized disk shows “0 bytes” or no disk capacity at all, the situation is more severe. This often points to a physical hardware failure, bad sectors preventing the drive from reading the firmware, or a severe driver conflict.
Why Does “Disk 1 Unknown Not Initialized” Happen?
- Corrupted MBR/GPT: The “table of contents” for your drive is damaged.
- Connection Issues: Faulty SATA cables or USB ports.
- Virus Attack: Malware has modified the boot sector.
- Physical Damage: Bad sectors or head failure on the hard drive.
Recover Data from Not Initialized Disk Before Fixing
⚠️ Warning: Initializing a disk rebuilds the MBR, but it may also render the existing data on the drive inaccessible, effectively “erasing” it from the user’s view. If you have valuable photos, documents, or work files on the drive, do not initialize it yet.
We recommend recovering your data first using professional data recovery software. For this task, we utilize Wittytool Data Recovery.
This free hard drive repair software is specifically engineered to scan storage devices that Windows recognizes as “RAW” or “Uninitialized.” Unlike standard file explorers, WittyTool accesses the low-level sectors of the drive to bypass the corrupted boot record.
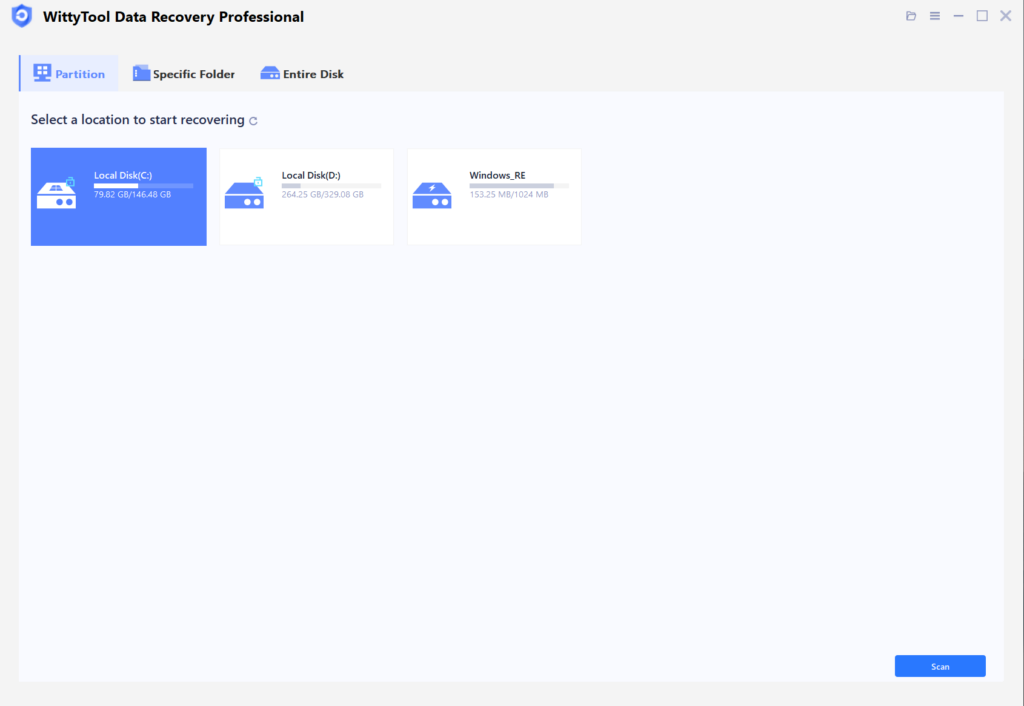
Step 1: Select Location and Initiate Scan
Launch Wittytool Data Recovery. Select the partition or drive where your deleted files were originally stored. Click “Scan” to begin searching for lost files.
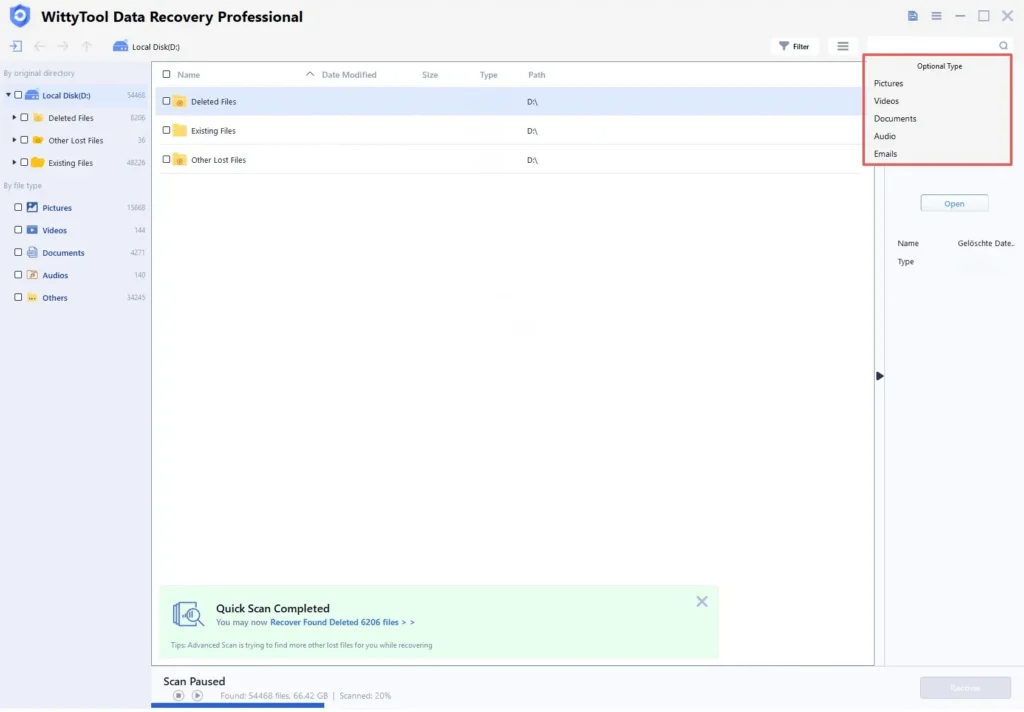
Step 2: Identify Files for Recovery
Once the scan completes, browse the results and select files you wish to recover. Utilize these options to locate files efficiently:
- Search by filename using the search box for fastest results
- Click the filter icon to display specific file types
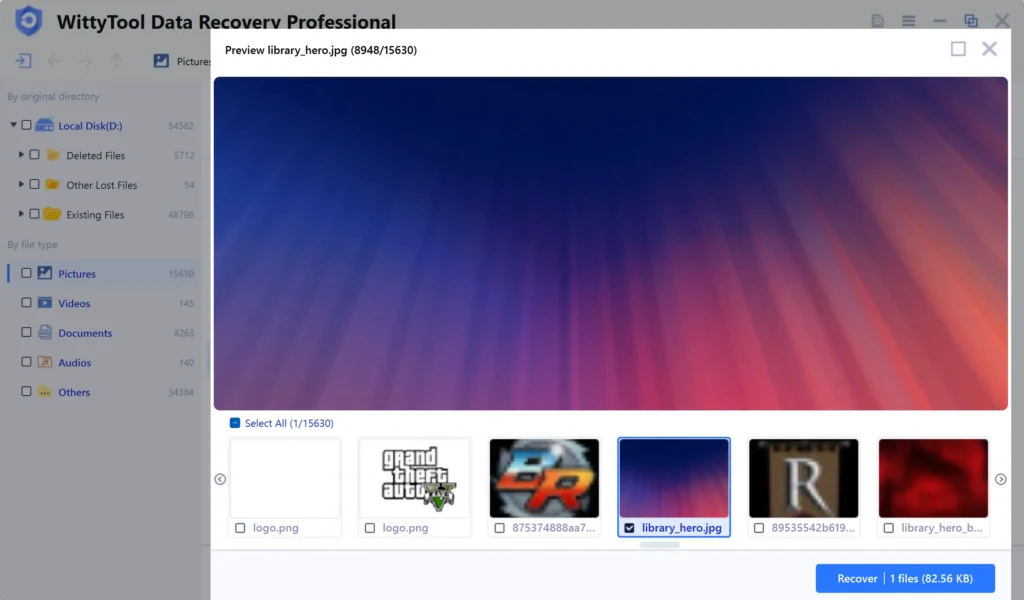
Step 3: Preview and recover your files
After previewing your recoverable files to verify content, select the target files and click “Recover”. Immediately choose a new storage location for saving recovered files.
CRITICAL: DO NOT select the original drive where data loss occurred to prevent overwriting – then click “Save” to complete the restoration.
Once your data is secured, you can safely proceed to fix the drive.
Quick Checks: Hardware Troubleshooting for Uninitialized Disks
Sometimes, a disk unknown not initialized error is simply a bad connection. Rule this out first:
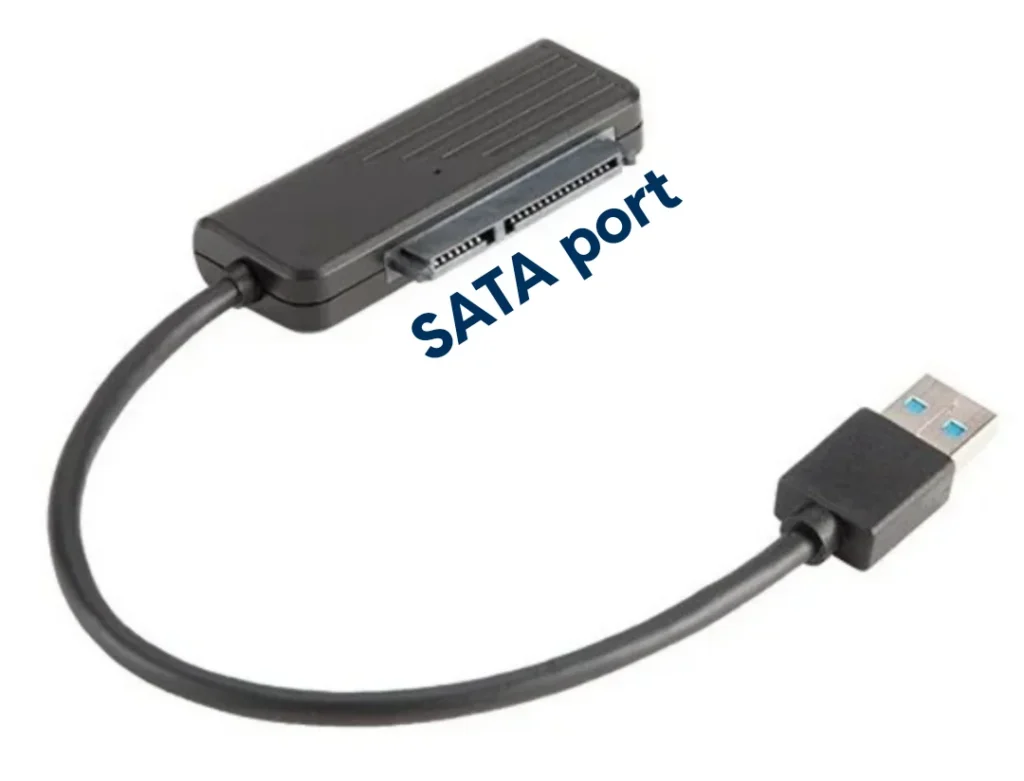
Check SATA/USB Cables and Ports
- For External Drives: Swap the USB cable for a new one. Plug the drive into a rear USB port (directly on the motherboard) rather than a front panel hub to ensure sufficient power delivery.
- For Internal Drives: Shut down your PC, open the case, and reseat the SATA data and power cables.
Test the Drive on Another PC
Connect the not initialized disk to another working computer. If it initializes correctly there, the issue lies with your original computer’s drivers or OS. If the error persists, the issue is with the drive itself.
Advanced Solutions: How to Fix Disk Unknown Not Initialized in Windows
If hardware checks fail, use these methods to resolve the issue within Windows.
Fix 1. Initialize Disk to MBR or GPT (For New Drives Only)
Best for: Brand new hard drives or after data recovery.
- Right-click “This PC” > Manage > Disk Management.
- Locate the Disk 1 unknown not initialized.
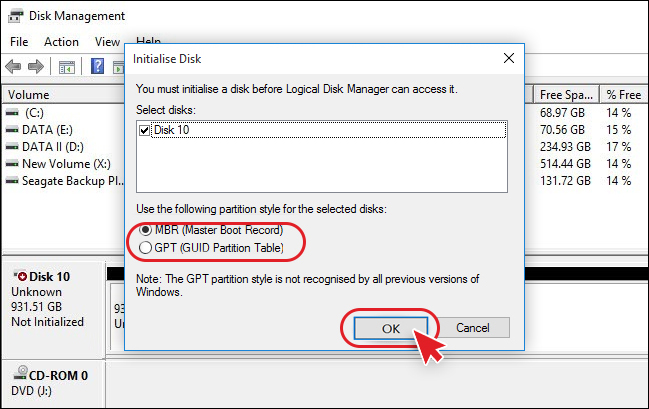
- Right-click the disk label and select Initialize Disk.
- Choose a partition style:
- MBR (Master Boot Record): For drives smaller than 2TB.
- GPT (GUID Partition Table): For drives larger than 2TB.
- Click OK. The disk will now show as “Online,” and you can create a new volume.
Fix 2. Update or Reinstall Disk Drivers via Device Manager
Outdated drivers can cause a disk 0 unknown not initialized error.
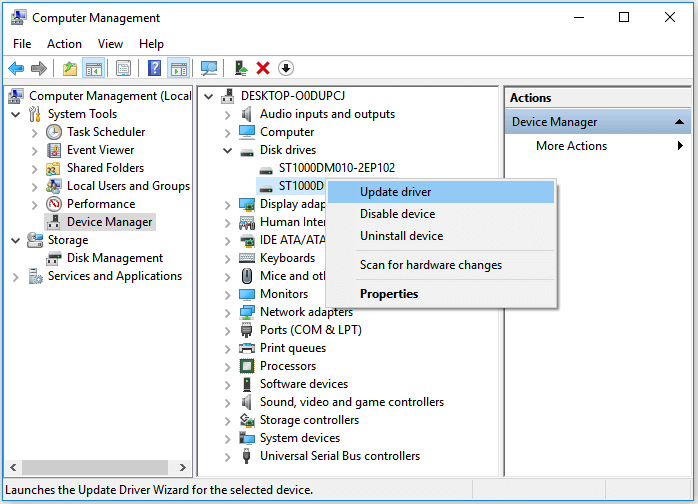
- Press Win + X and select Device Manager.
- Expand Disk drives.
- Right-click your uninitialized drive and select Update driver.
- If that fails, select Uninstall device. Restart your PC; Windows will attempt to reinstall the correct driver automatically.
Fix 3. Rebuild MBR Without Data Loss
If the MBR is corrupted, you can try to fix it using Command Prompt.
- Type
cmdin the search bar, right-click Command Prompt, and select Run as administrator. - Type the following commands, pressing Enter after each:
- bootrec /fixmbr
- bootrec /fixboot
- bootrec /rebuildbcd
- Restart your computer and check if the disk is initialized.
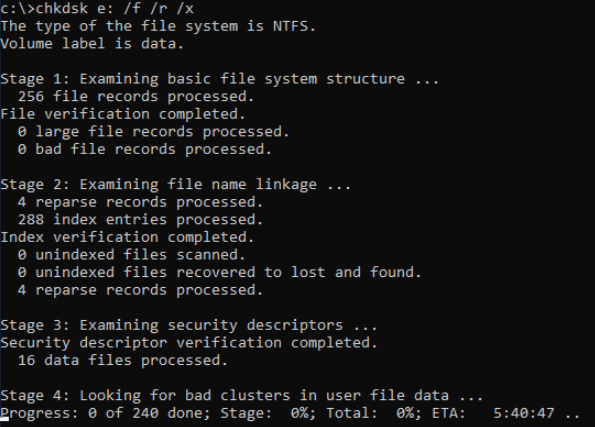
Fix 4. Use CHKDSK Command to Fix File System Errors
Note: CHKDSK requires a drive letter. If your disk is purely “unallocated,” skip this.
If your disk has a drive letter but is unaccessible:
- Open Command Prompt as Admin.
- Type:
chkdsk X: /f /r(Replace X with your drive letter). - This scans for bad sectors and attempts to repair file system logical errors.
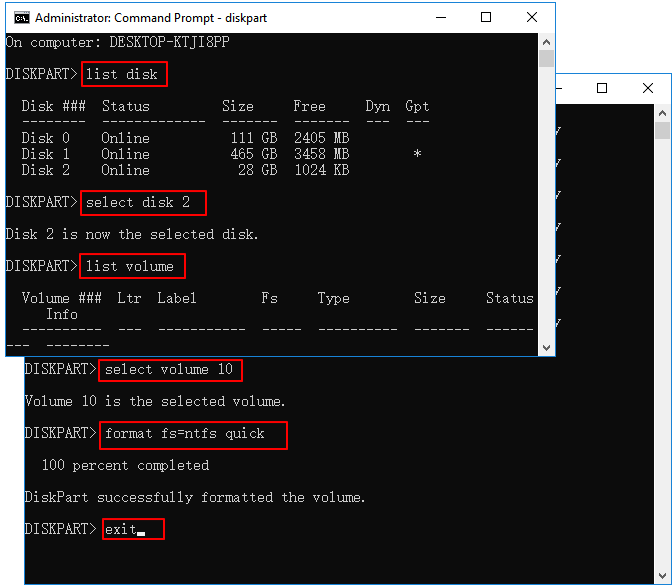
Fix 5. Use DiskPart to Clean and Format the Drive (Destructive)
If the drive is stubborn, DiskPart can wipe it clean to factory state. This erases all data.
- Open Command Prompt (Admin) and type
diskpart. - Type list disk. Identify your uninitialized disk (e.g., Disk 1).
- Type select disk 1. (Be extremely careful to select the correct disk).
- Type clean.
- Type convert gpt (or convert mbr).
- Type create partition primary.
- Type format quick fs=ntfs.
For a detailed guide with screenshots, you can refer to: how to convert MBR to GPT without losing data.
Fix 6. Scan for Viruses and Malware
Some boot-sector viruses cause disks to appear as disk unknown not initialized. Run a full scan using Windows Defender or your preferred antivirus software to remove any malicious code blocking the drive.
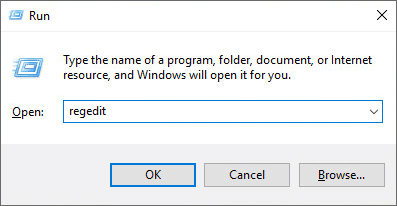
Fix 7. Edit Registry Values to Fix Connection Issues
Registry issues with “UpperFilters” and “LowerFilters” can block disk initialization.
- Press Win + R, type regedit.
- Navigate to: HKEY_LOCAL_MACHINE\SYSTEM\CurrentControlSet\Control\Class\{4d36e967-e325-11ce-bfc1-08002be10318}
- Look for values named UpperFilters or LowerFilters in the right pane.
- Right-click and Delete them.
- Restart your PC.
New vs. Old Hard Drive: How Handling Differs
Treating a brand new SSD the same way as an old HDD is a common mistake.
What to do if a NEW Disk is Not Initialized
If you just bought the drive, seeing disk not initialized is normal. It simply hasn’t been formatted yet. You can safely use Fix 1 (Initialize Disk) immediately without worrying about data recovery.
What to do if an OLD/USED Disk Suddenly Becomes Unknown
If a drive you have used for years suddenly shows disk 1 unknown not initialized, it indicates corruption or failure.
- Do NOT initialize it immediately.
- Stop using the drive to prevent overwriting data.
- Use WittyTool Data Recovery (as detailed above) to extract your files.
- Only after data is safe should you attempt to initialize or format the disk.
The Bottom Line
A disk unknown not initialized error is frustrating, but it doesn’t always mean your hard drive is dead. By distinguishing between logical errors (MBR corruption) and physical issues, and by prioritizing data recovery with tools like WittyTool, you can often resolve the issue safely. Always remember: recover data first, fix the disk second.
Disk Not Initialized FAQs
Why does my external hard drive say “not initialized”?
This usually happens due to a corrupted Master Boot Record (MBR), partition loss, bad sectors, or because the drive is brand new and hasn’t been set up yet.
Can I initialize a disk without losing data?
Technically, initializing a disk only rewrites the partition table and does not wipe the data sectors. However, it makes the data inaccessible to Windows until you reformat (which does erase data). It is safer to use data recovery software before initializing.
What is the difference between MBR and GPT when initializing?
MBR (Master Boot Record) is an older standard compatible with all Windows versions but limits drives to 2TB. GPT (GUID Partition Table) is newer, supports drives larger than 2TB, and is more robust against corruption. Choose GPT for modern Windows 10/11 PCs.
How to fix “The device is not ready” error associated with uninitialized disks?
This often indicates a hardware failure or a loose connection. Try changing the USB port, updating the disk driver in Device Manager, or checking the drive’s SMART status.