Last updated on June 25, 2026
Hearing strange clicking sounds from your computer? Seeing dreaded error messages like “Windows detected a hard disk problem”? Maybe your SSD not showing up in File Explorer, or you’re frustrated by an alert that the disk is write protected when trying to save files. You’re not alone. Research from Data Recovery Labs indicates that over 30% of computer users will experience a significant storage drive failure within four years.
💡 Before you consider expensive professional recovery services or a new drive, know that many common hard drive issues – including detection and permission errors – can be resolved using free hard drive repair software. This comprehensive guide, crafted from over a decade of data recovery expertise, will walk you through everything you need to know. We’ll demystify hard disk repair, explain why errors happen, and provide a detailed, step-by-step action plan using completely free tools. Our goal is to empower you, even if you’re a complete beginner, to diagnose and potentially fix your disk problems safely.
What Exactly Is HDD Repair Software?
At its core, hard drive repair software is a specialized program designed to diagnose problems and fix errors on your computer’s storage device (HDD or SSD). Think of it as a sophisticated digital mechanic for your disk.
These tools perform several critical functions:
- Error Scanning: They meticulously check the entire surface of the drive for problems.
- Bad Sector Repair: They identify “bad sectors” (tiny damaged areas on the disk platter) and attempt to repair them or mark them as unusable to prevent data corruption.
- File System Repair: The file system (like NTFS or FAT32) is the index that tells your computer where files are located. This software can fix corruption within this index.
- Data Recovery: Some tools can recover files from damaged or accidentally formatted drives.
❗ Important Distinction: It’s crucial to understand that software can primarily fix logical errors (software/firmware-related) and soft bad sectors. However, it cannot repair physical damage (e.g., a broken read/write head, motor failure, or severe platter scratches). If your drive makes loud, repetitive clicking or grinding noises, immediately power it down and consult a professional data recovery service to avoid permanent data loss.
Why Do Hard Drives Fail? Common Causes of Disk Errors
Understanding the “why” behind a failure is the first step to solving and preventing it. Hard drive errors can stem from various sources, broadly categorized into physical, logical, and environmental factors.
- Physical Wear and Tear: Hard drives have moving parts that degrade over time. A study by Backblaze on drive longevity shows that failure rates significantly increase after the 3-5 year mark. This is the most common cause of eventual failure.
- Sudden Power Loss or Surges: If the power is cut unexpectedly while the drive is writing data (e.g., during a blackout or by unplugging the computer), it can corrupt the file system and lead to errors. ⚠️ Always use a surge protector and properly shut down your PC.
- Malware and Virus Infections: Malicious software can deliberately corrupt your files, overwrite critical system data, and damage the file system structure.
- Software Conflicts and Improper Shutdowns: Buggy software, driver conflicts, or forced shutdowns can cause the operating system to write data incorrectly to the drive, leading to logical errors.
- Bad Sectors: These are small clusters of storage that become damaged and unreadable. While a few bad sectors are normal over a drive’s life, a rapid increase is a strong warning sign of imminent failure.
- Overheating: Excessive heat can cause physical components to expand and warp, leading to read/write failures and accelerated wear. A 2024 report by StorageReview.com found that inadequate cooling can reduce a drive’s lifespan by up to 40%.
Your Step-by-Step Guide to Hard Disk Repair with Free Tools
Now, let’s get to the practical solutions. Follow these steps in order. We’ll start with the safest, built-in Windows utilities before moving to more powerful third-party free hard drive repair software.
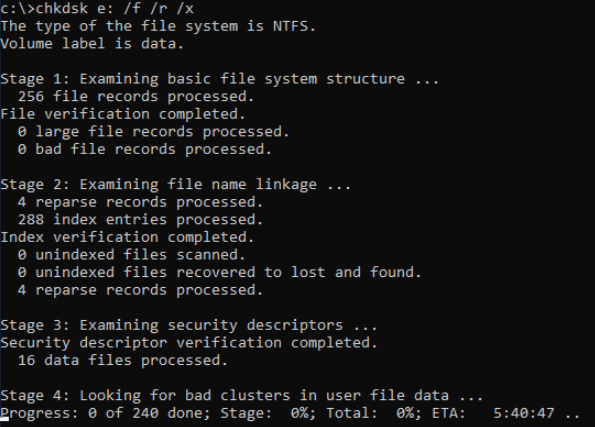
Step 1: Run CHKDSK (Check Disk) – The First Responder
CHKDSK is a venerable and powerful command-line tool built into Windows. Its primary job is to check the integrity of the file system and fix logical errors.
When to use it: When you experience file corruption, random crashes, or your system suggests a disk check.
How to run it:
- Click the Windows Start button, type
cmd. - Right-click on Command Prompt and select ”Run as administrator”.
- In the black window, type the following command and press Enter:
chkdsk C: /f /r- Replace
C:with the letter of the drive you want to check. - The
/fparameter tells CHKDSK to fix any errors it finds. - The
/rparameter locates bad sectors and recovers readable information (this includes the functions of/f).
- Replace
- If the drive is in use (especially your C: drive), you’ll be asked to schedule the scan for the next system restart. Type
Yand press Enter, then restart your computer.
💡 Expert Tip: The /r scan can take several hours for large drives, so plan accordingly. It’s a comprehensive first line of defense.
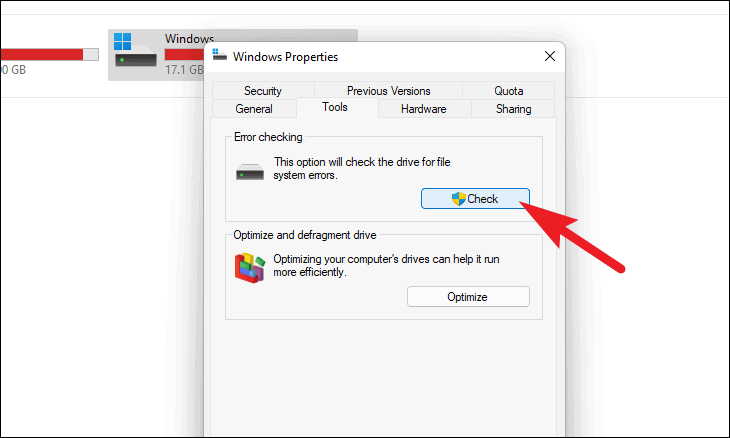
Step 2: Utilize the Built-in Windows Disk Error Checking Tool
For those uncomfortable with the command line, Windows offers a user-friendly graphical version of CHKDSK.
When to use it: For a quick, simple check without using commands.
How to run it:
- Open File Explorer (the folder icon on your taskbar).
- Right-click on the drive you want to repair (e.g., Local Disk (C:)) and select ”Properties”.
- Go to the ”Tools” tab.
- Under the “Error checking” section, click the ”Check” button.
- Windows might say it doesn’t need checking. You can still proceed by clicking ”Scan drive”.
This tool is excellent for basic checks but often lacks the deep scanning power of the command-line CHKDSK with its full parameters.
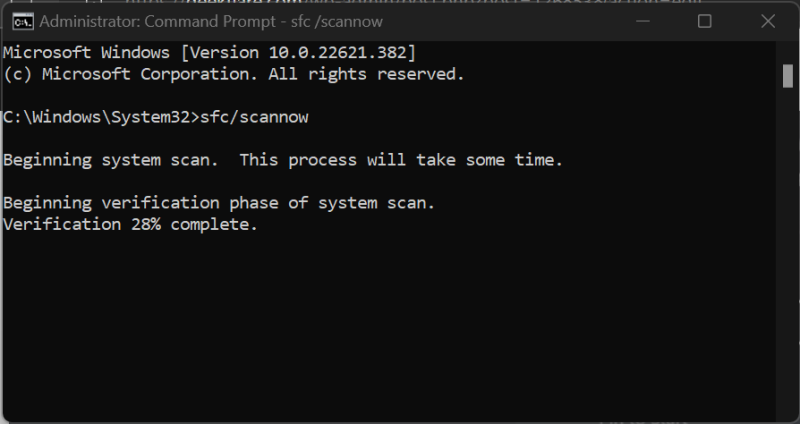
Step 3: Run the SFC Scan (System File Checker)
While CHKDSK focuses on your data and file system, SFC (System File Checker) is designed to protect and repair critical Windows system files. If these files are corrupted, they can cause widespread instability that might be mistaken for a disk error.
When to use it: If you’re experiencing frequent system crashes, application errors, or Blue Screens of Death (BSOD).
How to run it:
- Open Command Prompt as an administrator (as described in Step 1).
- Type the following command and press Enter:
sfc /scannow - The scan will proceed and display a message upon completion. If it finds and repairs corrupt files, it’s a good idea to restart your computer.
Step 4: Use a Specialized Tool – HDD Regenerator
HDD Regenerator is a well-known third-party tool famous for its claimed ability to “regenerate” bad sectors magnetically. While the science behind this is debated, it is effective at identifying and isolating bad sectors, which can restore stability and make data recovery possible.
When to use it: When you suspect physical bad sectors are causing issues (e.g., slow data access, certain files failing to open).
How to use it (Free Version):
- Download the official trial version of HDD Regenerator from its website.
- Run the application. It will prompt you to create a bootable USB/CD. This is necessary because it needs to scan the drive outside of Windows for full access.
- Follow the instructions to create the bootable media.
- Restart your computer and boot from the USB/CD (you may need to change the boot order in your BIOS/UEFI settings).
- The tool will start automatically. It provides a simple interface to select your drive and begin the scan and repair process.
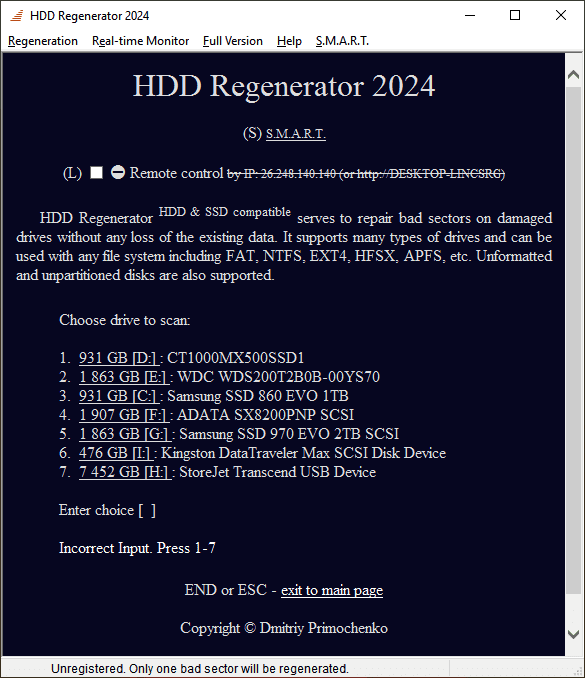
⚠️ Note: The free version typically has limitations, such as only repairing a single sector. However, its scanning function is fully functional and invaluable for diagnostics.
Step 5: The Last Resort: Data Recovery and Formatting
If the above steps fail to make the drive stable but it is still partially accessible, your priority shifts from repair to data recovery. The primary goal is to undelete files and salvage as much as possible before attempting any last-resort fixes. A specialized tool like Wittytool Data Recovery is ideal for this scenario. Its deep scan functionality can meticulously search a damaged drive, making it highly effective to recover permanently deleted photos, documents, and other critical file types from corrupted or formatted partitions. The preview feature allows you to verify file integrity before saving them to a safe location. Once your data is safe, a full format can often wipe the slate clean and make the drive usable again (though it should be considered a “patient with a chronic condition”).
When to use it: When the drive is unstable but you can still access it to run software, and your goal is to salvage files before formatting.
How to use Wittytool Data Recovery Software:
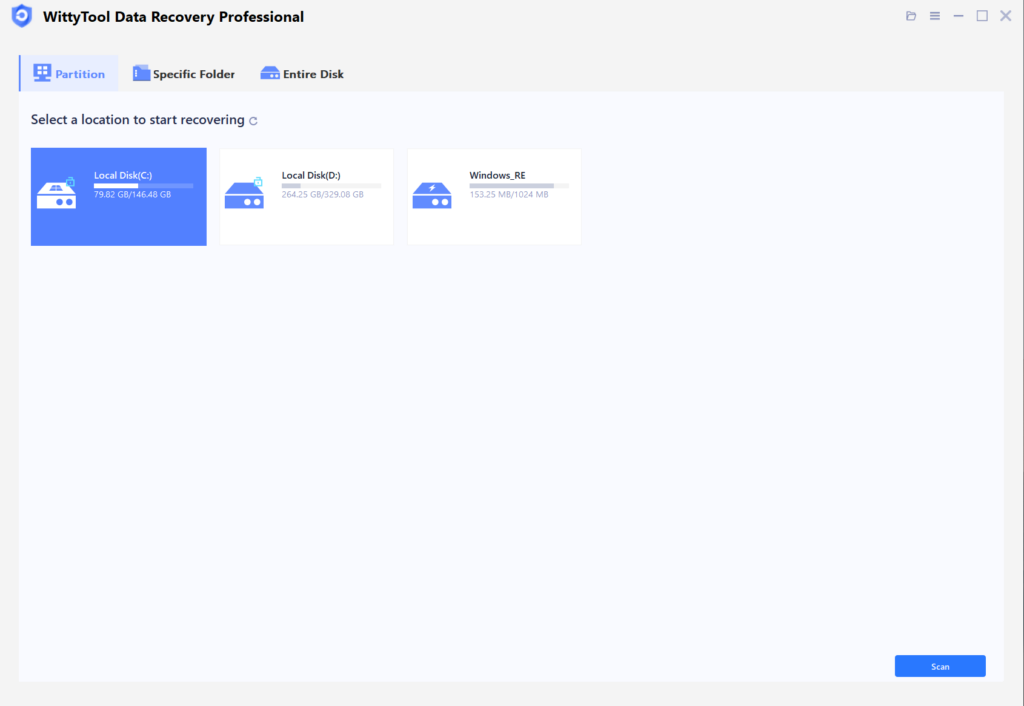
Step 1: Select Location and Initiate Scan
Launch Wittytool Data Recovery. Select the partition or drive where your deleted files were originally stored. Click “Scan” to begin searching for lost files.
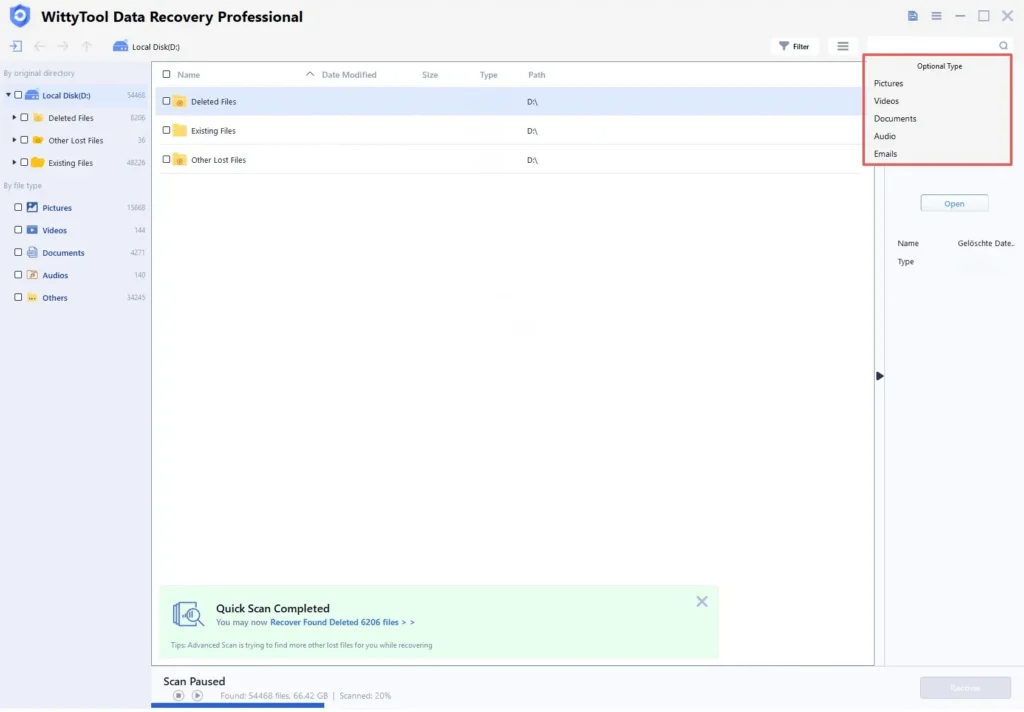
Step 2: Identify Files for Recovery
Once the scan completes, browse the results and select files you wish to recover. Utilize these options to locate files efficiently:
- Search by filename using the search box for fastest results
- Click the filter icon to display specific file types
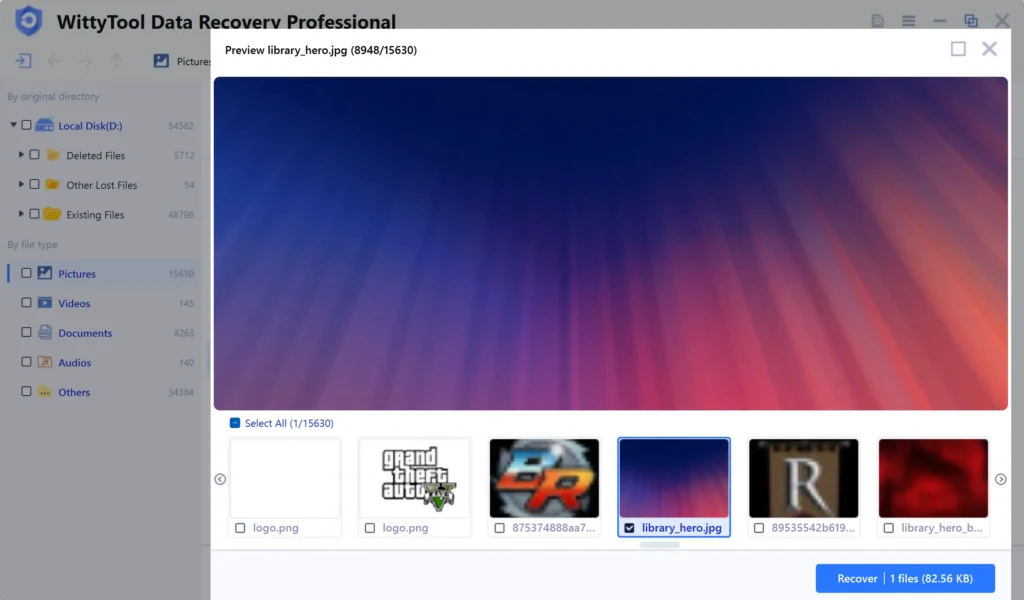
Step 3: Preview and recover your files
After previewing your recoverable files to verify content, select the target files and click “Recover”. Immediately choose a new storage location for saving recovered files.
CRITICAL: DO NOT select the original drive where data loss occurred to prevent overwriting – then click “Save” to complete the restoration.
After securing your data, you can format the faulty drive. Right-click the drive in Windows File Explorer, select “Format,” and choose the NTFS file system (quick format is usually sufficient).
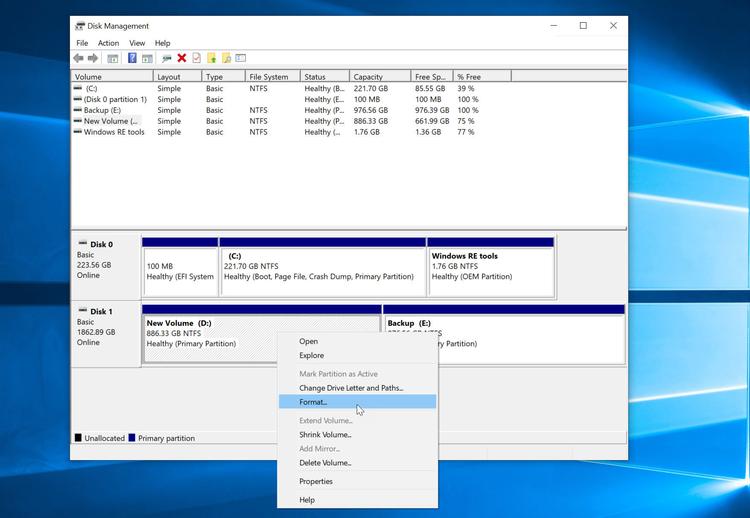
💡 Crucial Warning: Formatting erases all data permanently. Only proceed with formatting after you have successfully recovered and verified your important files.
Proactive Protection: How to Prevent Hard Drive Corruption and Data Loss
An ounce of prevention is worth a pound of cure. Here are essential habits to avoid data disasters, based on industry best practices.
- Implement the 3-2-1 Backup Rule: This is the gold standard. Keep 3 copies of your data, on 2 different media (e.g., an external HDD and cloud storage), with 1 copy stored off-site. Back up regularly!
- Use Drive Cloning for System Upgrades/Migration: Before replacing an old drive or upgrading your system, use a tool like Wittytool Disk Clone to create a perfect, bootable copy of your entire drive. This ensures a seamless transition and acts as a full-system backup.
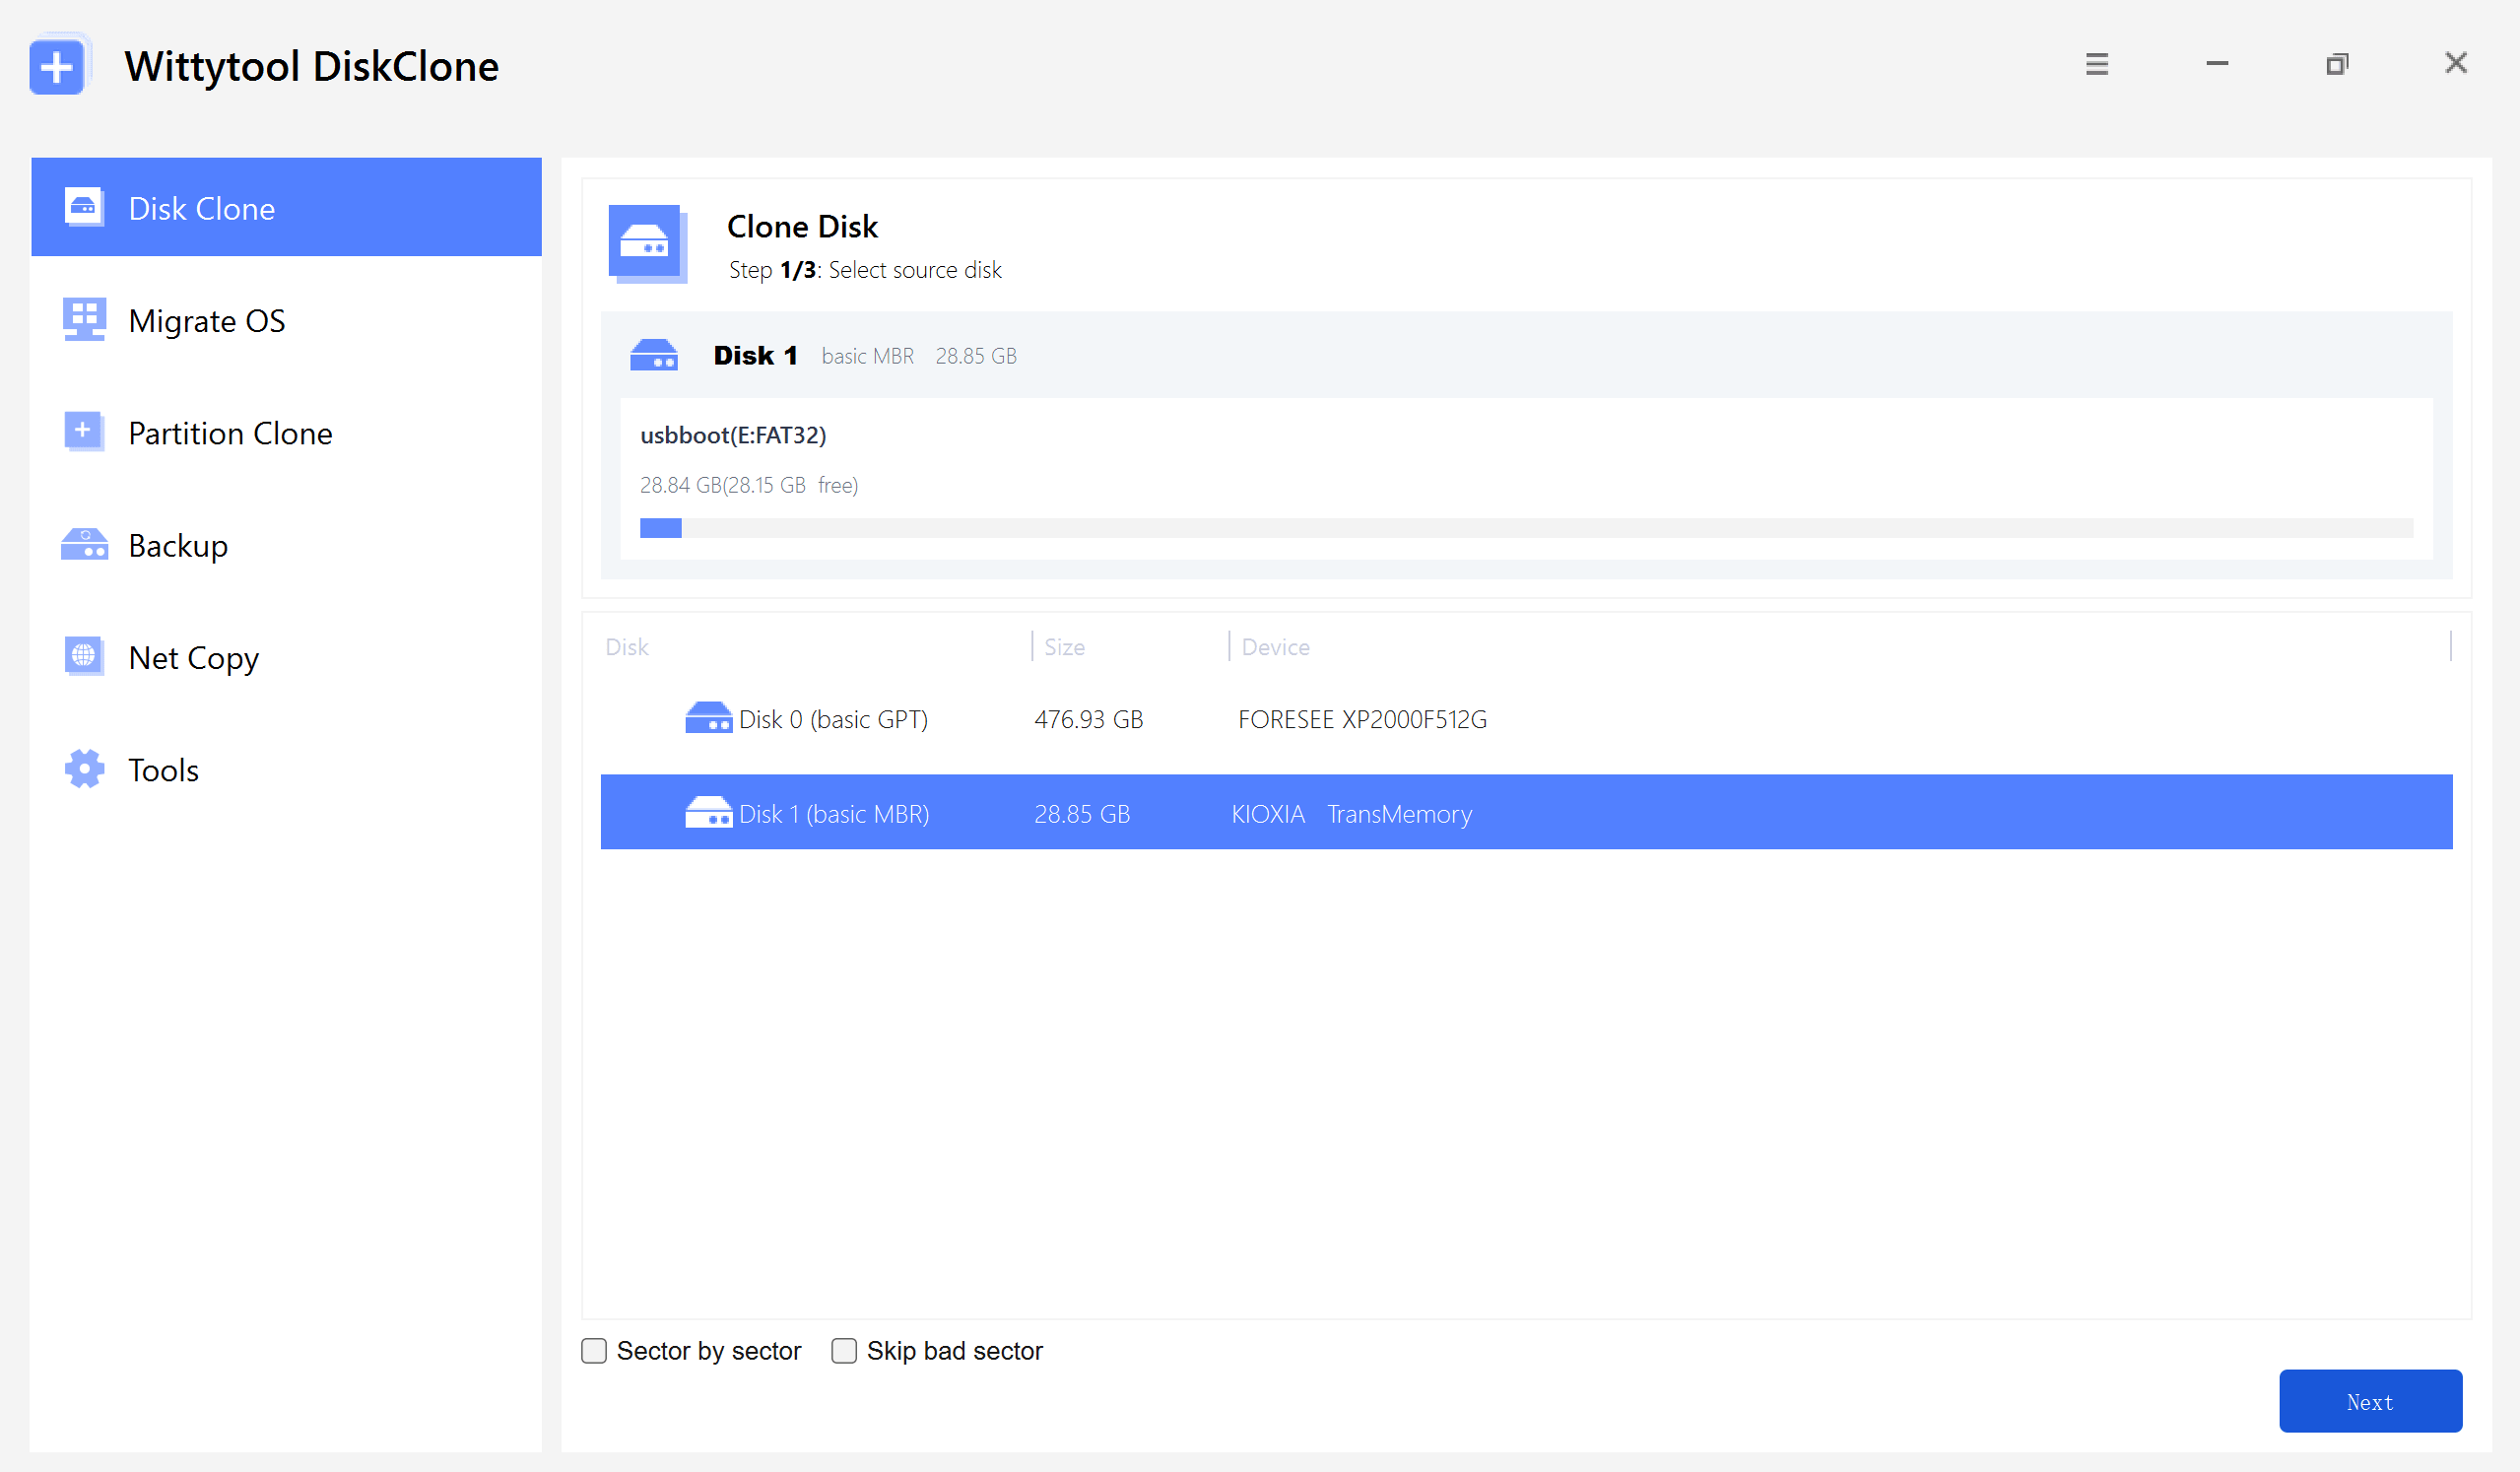
Step 1: First, pick either Disk Clone or Partition Clone (both follow the same logic), then simply select your source disk and hit Next.
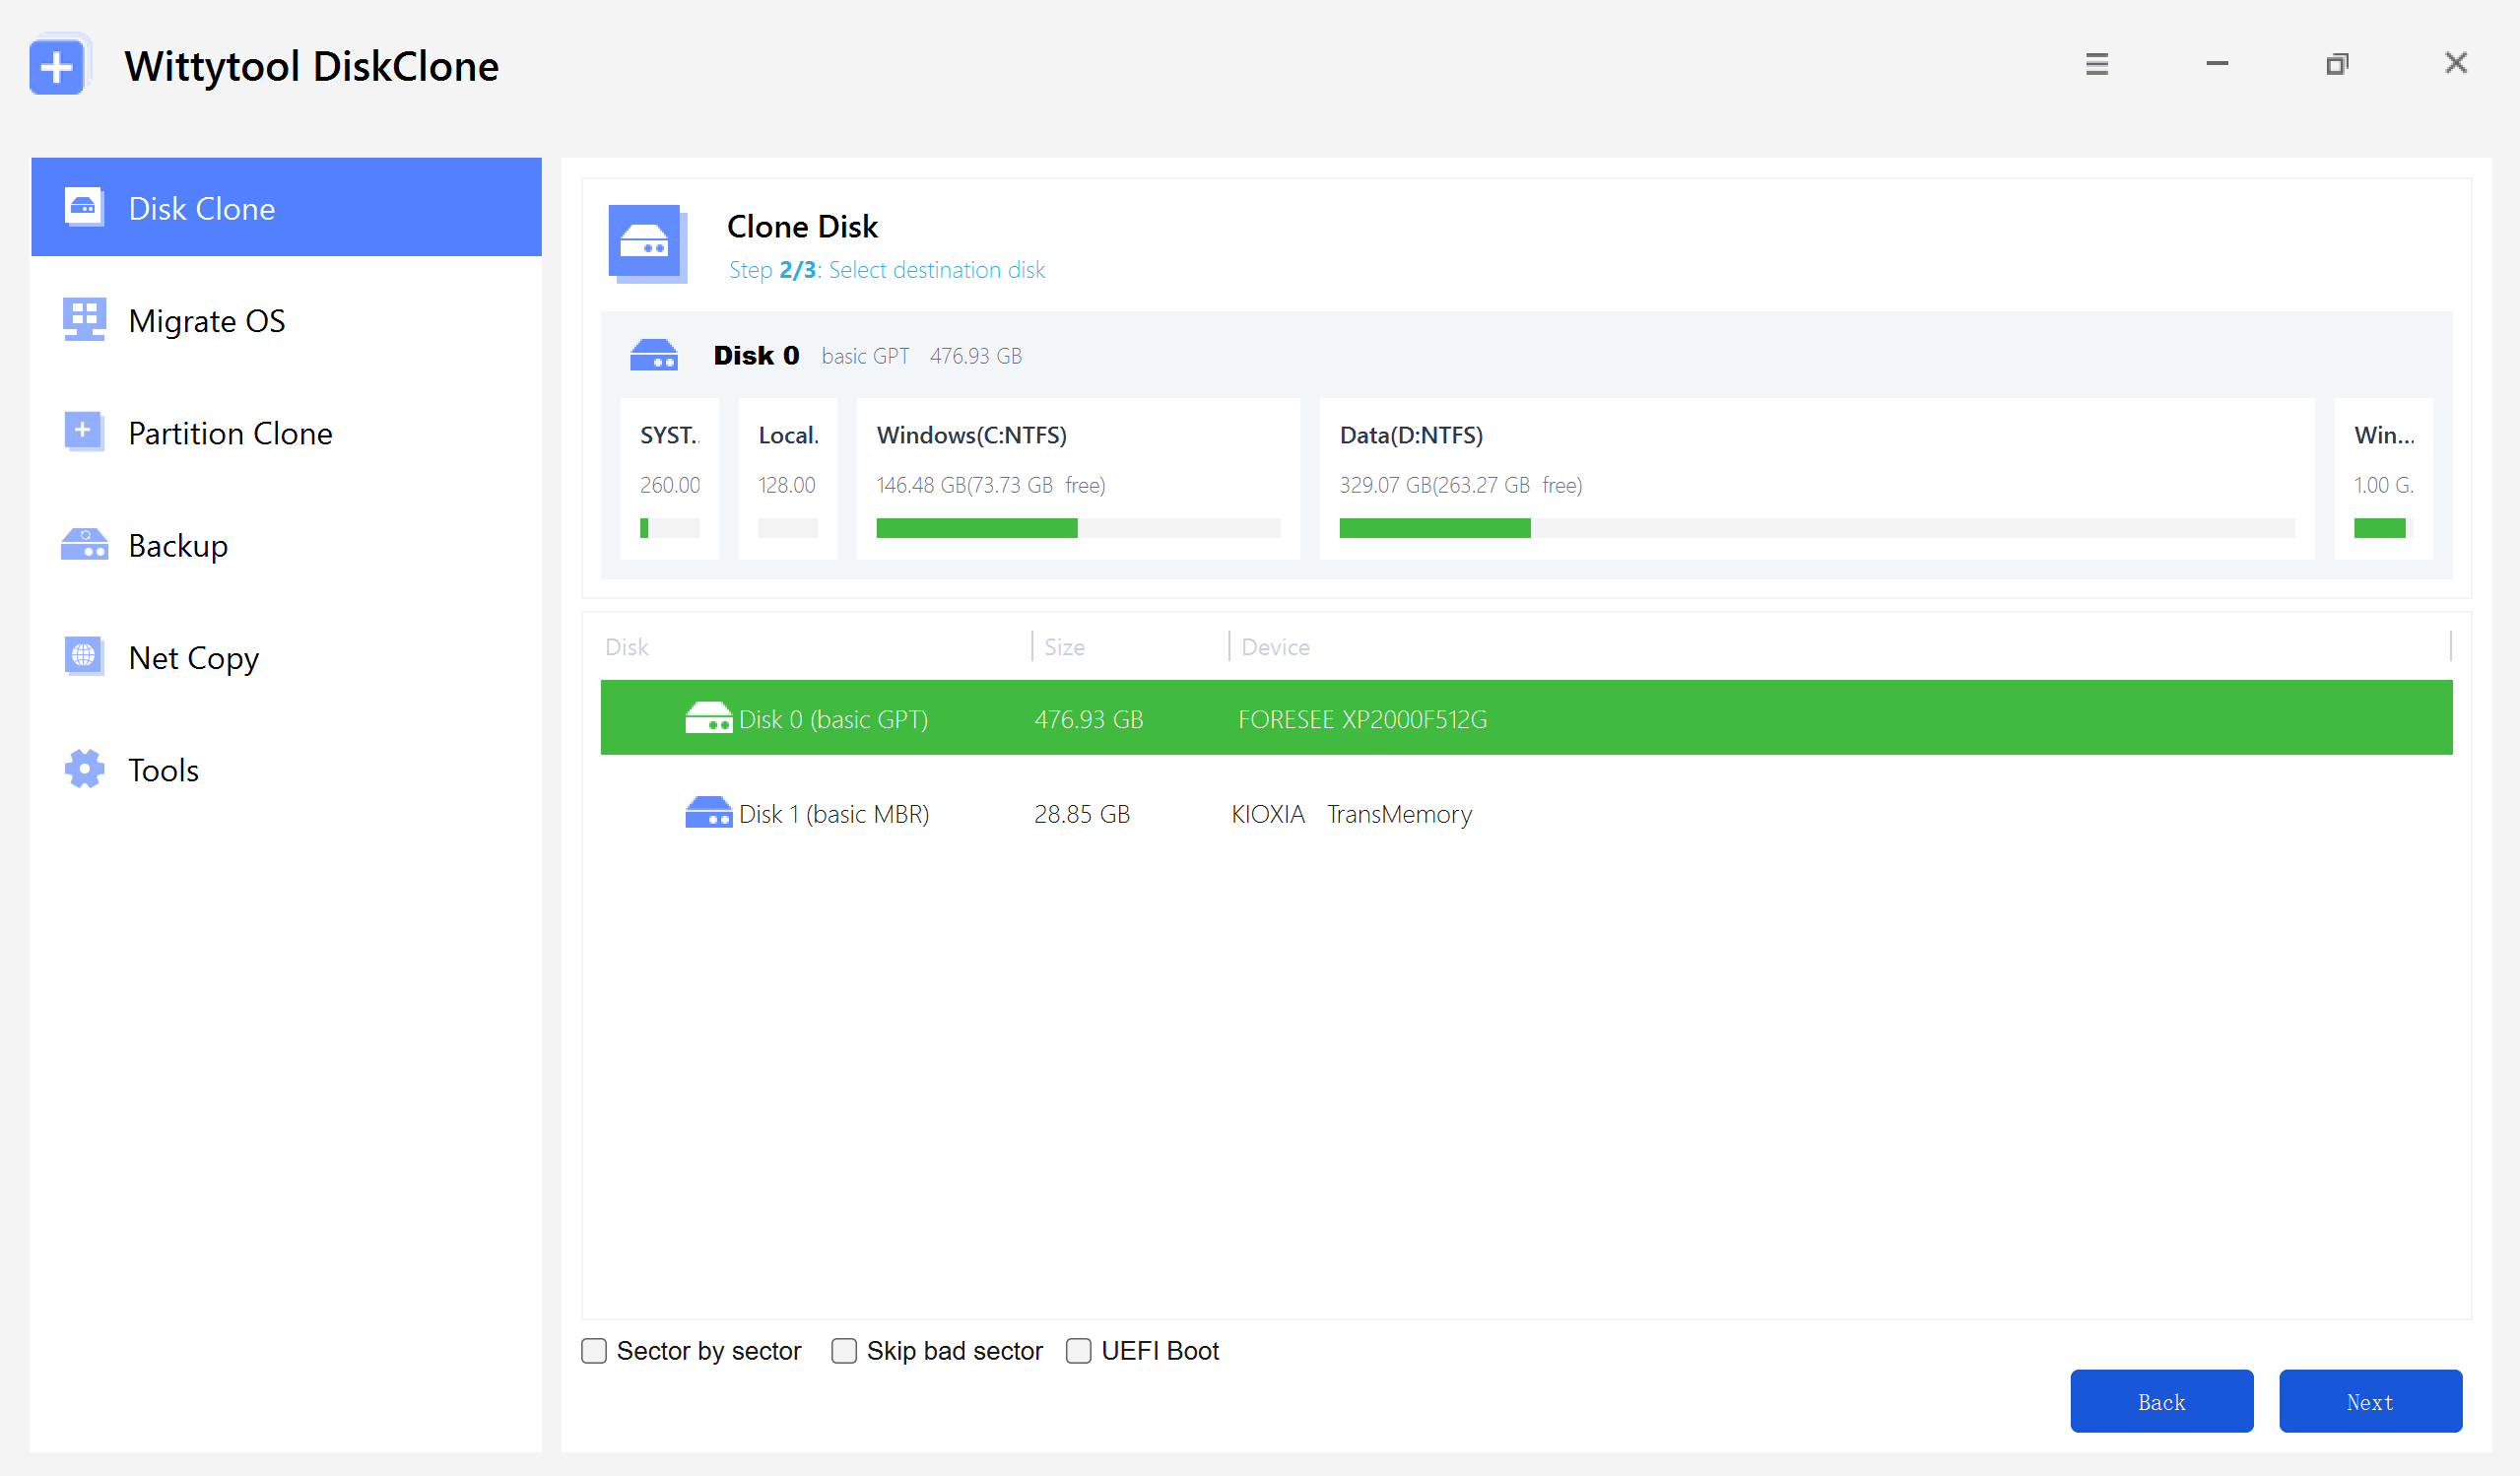
Step 2: After choosing your destination disk, click Next to view the available setup options. You have the flexibility to enable sector-by-sector cloning, ignore bad sectors, or check the UEFI BOOT box to switch the boot mode for seamless compatibility with modern UEFI-based hardware.
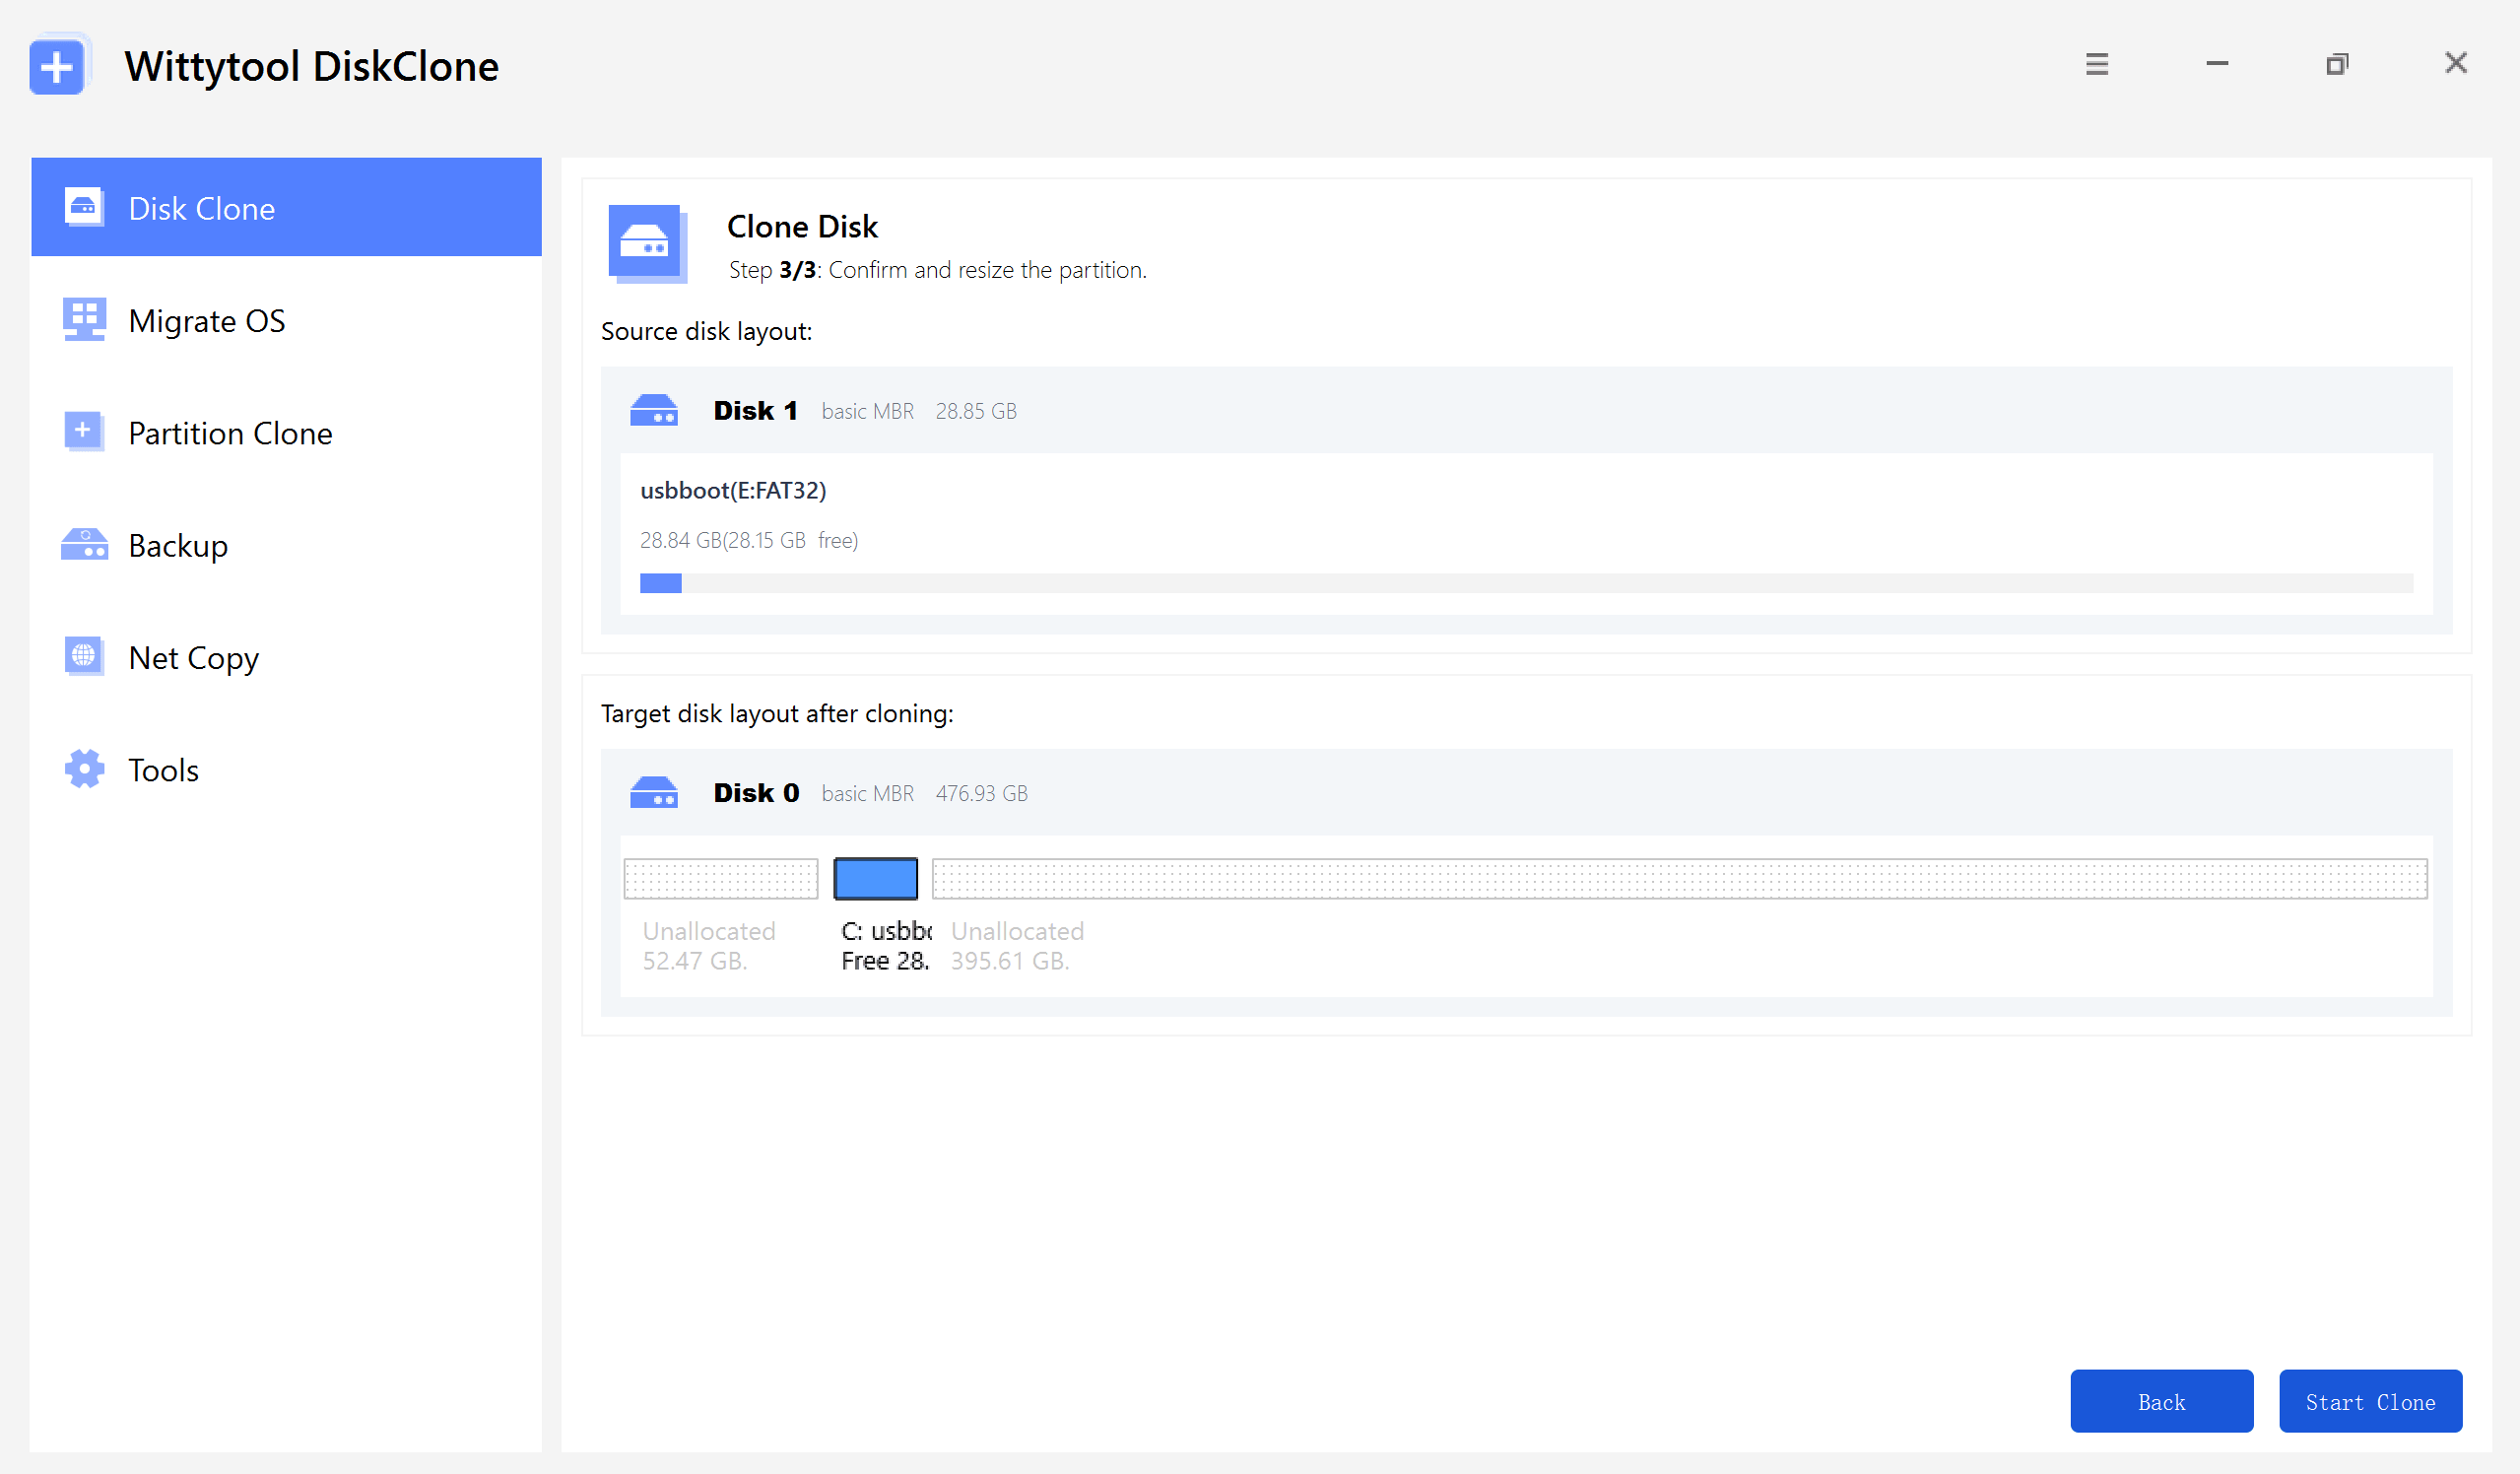
Step 3: Adjust the partition sizes on your target drive as required by your specific layout. Once finished, click the “Start Clone” button to kick off the cloning operation.
Video guide on how to clone HDD/SSD using Wittytool Disk Clone:
- Handle with Care: Physical shock is a primary killer of hard drives. Always place your desktop tower on a stable surface and handle laptops with care.
- Keep it Cool: Ensure your computer has adequate airflow and that fans are free of dust. Overheating drastically shortens drive lifespan.
- Use a UPS (Uninterruptible Power Supply): A UPS protects your computer from power surges and provides battery backup during outages, allowing for a safe shutdown.
- Monitor Drive Health: Use free tools like CrystalDiskInfo to monitor your drive’s S.M.A.R.T. data (Self-Monitoring, Analysis, and Reporting Technology). This data provides early warnings of potential hardware failures.
Hard Disk Repair: Answers to Your Frequently Asked Questions
Q: My computer says “Disk Boot Failure. Insert system disk and press enter.” Can I fix this with free software?
A: Yes, often. This error is frequently caused by file system corruption or a damaged boot sector. You can use the Windows Installation Media to access “Repair your computer” options and run the Startup Repair tool or open a Command Prompt to run CHKDSK and bootrec /fixboot commands.
Q: I accidentally formatted my hard drive. Can I get my files back?
A: There’s a very high chance, yes. Stop using the drive immediately to avoid overwriting the deleted data. Then, use a dedicated free data recovery software like Wittytool Data Recovery or Recuva. These tools can scan the formatted drive and reconstruct the lost file structure.
Q: How can I tell if my hard drive is physically damaged versus just having software errors?
A: Listen and observe. Physical damage signs: Repetitive clicking or grinding noises, the drive is not detected by the BIOS at all, or it feels excessively hot to the touch. Software error signs: The drive is detected but access is slow, you see file corruption, or the operating system fails to load but the drive is silent.
Q: Is it safe to use free hard drive repair software from the internet?
A: It is, if you download from official sources. Stick to the official websites of the software mentioned in this guide (e.g., the developer’s site for HDD Regenerator). Avoid downloading from third-party “download.com” style sites, which often bundle unwanted software or outdated versions.
Q: Can these methods also repair a Solid State Drive (SSD)?
A: Partially. Tools like CHKDSK and SFC can repair file system and Windows errors on SSDs. However, SSDs work very differently from HDDs. They don’t have “bad sectors” in the traditional sense but can have bad memory blocks. For SSD-specific issues (like wear leveling, TRIM, SSD not boot), it’s best to use the manufacturer’s proprietary diagnostic tool (e.g., Samsung Magician, Crucial Storage Executive).