

You can clone a domain-joined Windows PC to preserve its installed applications, files, and existing setup. Before you use the clone as a separate computer, however, you need to prepare its local identity, computer name, and domain membership. Copying the disk is only one part of that process.
For example, you might take over a hotel where the previous IT provider left working PCs but no deployment image. One workstation already has the applications and settings you need. Reusing that environment can reduce the work of preparing another workstation.
This guide covers Windows domain-member workstations, with a Windows 11 example. It does not cover cloning a domain controller or migrating user profiles between different domains. The workflow below prepares the source reference PC in a workgroup before cloning, so schedule time to take that PC out of normal service.
Can You Clone a Domain-Joined PC and Keep Its Apps?
Replacing a Drive vs. Creating an Additional PC
First, identify what you are creating. Replacing a drive in the same PC continues the life of one workstation. Creating an additional PC means the source and target will operate as separate devices. This article focuses on the second situation.
Plan a distinct computer name and a separate domain-computer account for the target. Do not let two active machines use the source computer’s existing domain identity.
What Is Preserved, and What Still Needs Configuration?
Wittytool Disk Clone copies your Windows environment and supports SID modification while preserving existing accounts, applications, settings, and data. Its SID process can automatically back up and restore certain applications, including their associated data.
| Part of the setup | What to expect |
|---|---|
| Installed applications and files | Included in the cloned system. Test the applications and their required data on the target PC. |
| Local accounts and settings | Preserved during SID modification. Local account SIDs derived from the machine SID change. |
| Domain accounts | Their domain-assigned SIDs are not changed by the local SID operation. |
| Computer name | The SID tool offers a choice to preserve the current name or generate a new one. Confirm the target has an appropriate, unused name before joining it to the domain. |
| Domain membership and software licensing | Handle the target’s domain join separately and confirm its software licensing requirements. |
A local account SID uses the machine SID as its base, while a domain account SID uses the domain SID. These are separate identities, as explained in Microsoft’s SID documentation. Preserving a profile on disk also does not automatically transfer it to a different domain user.
Before You Clone: Protect the Source PC and Prepare Domain Access
Back Up the Existing System and Confirm the Destination Disk
Create a separate backup of the source system before changing its domain membership or starting the clone. Keep that backup available until both computers have passed your checks.
Cloning overwrites the selected destination disk. Back up anything you need from that disk first. Identify the source and destination by model, capacity, and connection, rather than relying only on a disk number.
For the hotel example, the source is the configured workstation you want to copy. The destination is the drive that will run Windows in the additional workstation.
Verify Local Administrator Access and Plan a Maintenance Window
Before removing the source PC from the domain, test a permitted local administrator account and its password. You need a working local sign-in after the domain change and on the target during its initial setup.
Arrange the following with the administrator responsible for your environment:
- A maintenance window for the source PC, including its return to normal domain use.
- Authorized access for domain removal and joining, plus an approved target computer name.
- A record of the source name, domain, important network settings, and business applications to test.
- Suitable target hardware, sufficient disk capacity, and any required storage or network drivers.
- Required Windows and application licenses, application sign-ins, and recovery material for encrypted data.
Use a Windows edition that supports joining an Active Directory domain, such as Pro or Enterprise. Windows Home is not an option for this workflow. Download and license the tools you need before the target’s isolated setup; local SID processing does not mean every installation or activation step works offline.
Choose How to Prepare Windows for the Clone
Preserve the Existing Setup with Wittytool Disk Clone
Wittytool Disk Clone provides SID modification within its cloning workflow, as well as a separate tool for an existing Windows installation. It generates a random machine SID rather than asking you to specify one manually.
The steps below use a prepared workgroup source and enable SID modification for the target during cloning. This brings the disk-copying and target SID tasks into one application while retaining the existing setup, including local accounts and Microsoft Store applications.
SID uniqueness matters beyond the computer’s display name. Microsoft documents duplicate-SID authentication failures on Windows 11 24H2, Windows 11 25H2, and Windows Server 2025 after relevant updates released on or after August 29, 2025. These can affect Kerberos and NTLM authentication, including shared-folder and remote-desktop access. See Microsoft’s duplicate-SID support notice.
Use Sysprep for a Microsoft-Supported Deployment Image
If your organization requires Microsoft’s supported Windows imaging process, use Sysprep to prepare an appropriate reference installation before capturing it. Sysprep generalizes more than the SID, so a SID-changing tool does not provide the same preparation or Microsoft support status. Microsoft’s imaging policy explains this requirement.
For that route, Wittytool Disk Clone can handle the subsequent image or clone operation; you do not need its separate SID modification step after proper generalization. Prepare and test the reference environment before proceeding. Microsoft also states that using Sysprep on an already deployed installation is unsupported; do not treat it as a routine reset for your only working business PC. See the Sysprep overview.
Plan and test the Sysprep image-preparation process separately from the steps below. For further detail, read how to use Sysprep to change a Windows SID.
Clone the Prepared System with Wittytool Disk Clone
The following steps use the Wittytool Disk Clone SID workflow described above. The source starts as a domain member, becomes a workgroup reference PC, and is then cloned to the target drive.
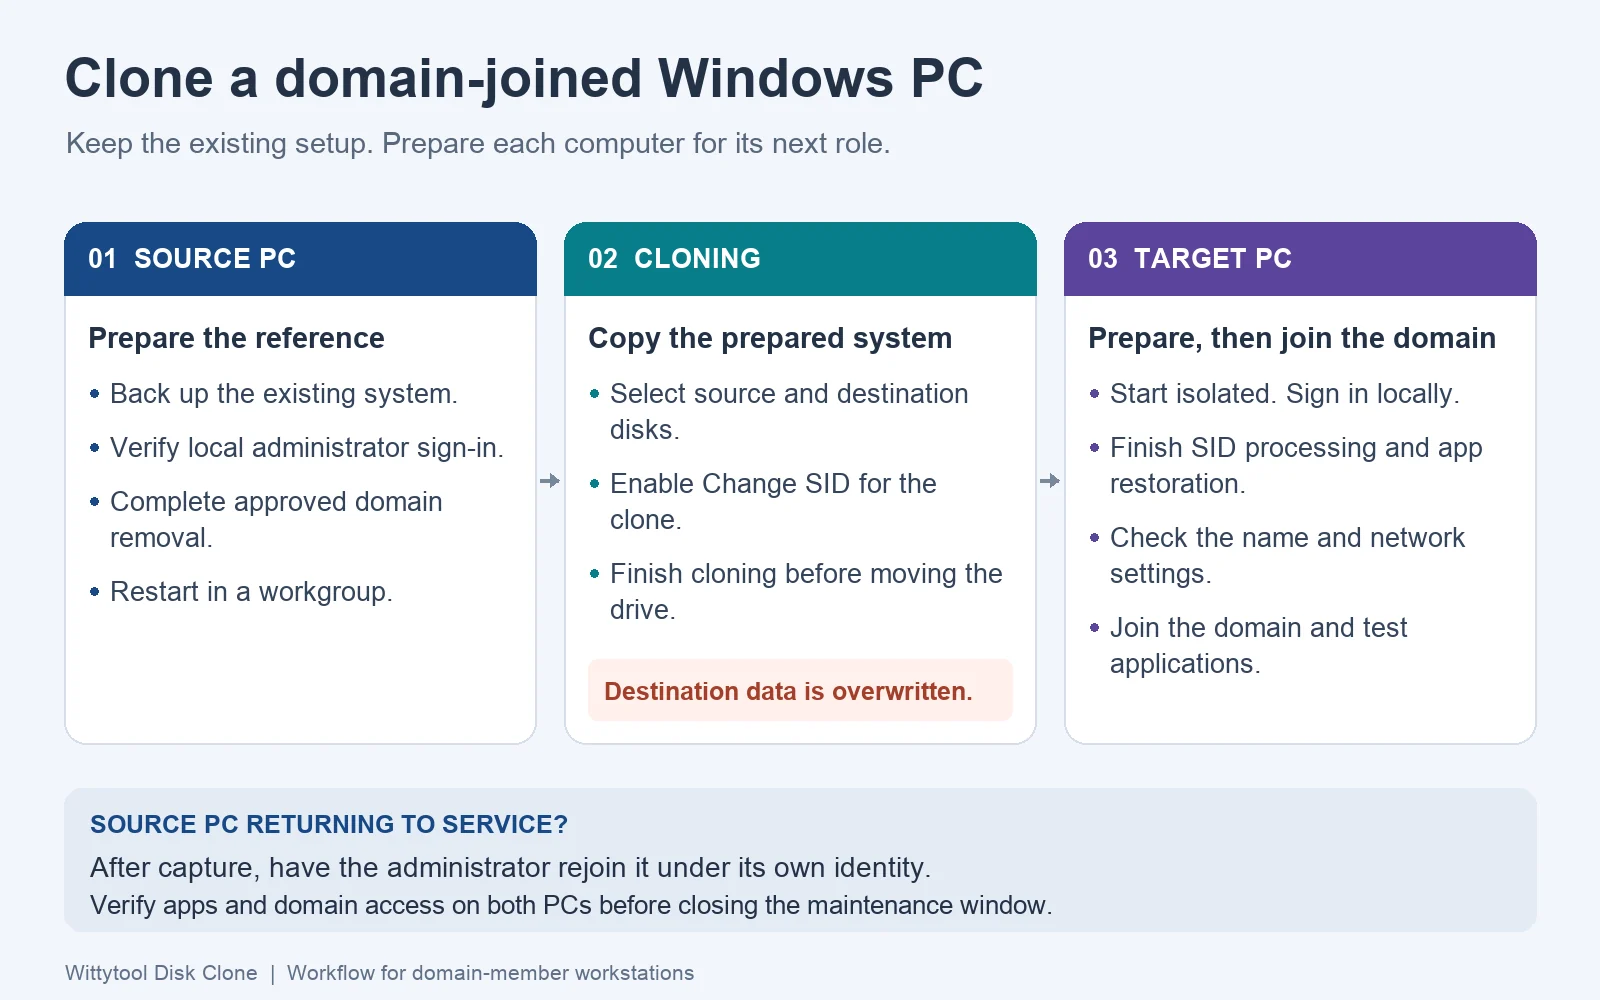
Step 1: Prepare the Reference PC in a Workgroup
On the source PC: Close business applications and have the domain administrator carry out the planned domain removal. This temporarily changes the source PC’s domain membership.
Open System Properties > Computer Name > Change, select Workgroup, and complete the authorized prompts. Restart, then sign in with the local administrator account you tested earlier.
Confirm that the system is in the workgroup before capturing it. Keep the original backup separate from this prepared reference system.
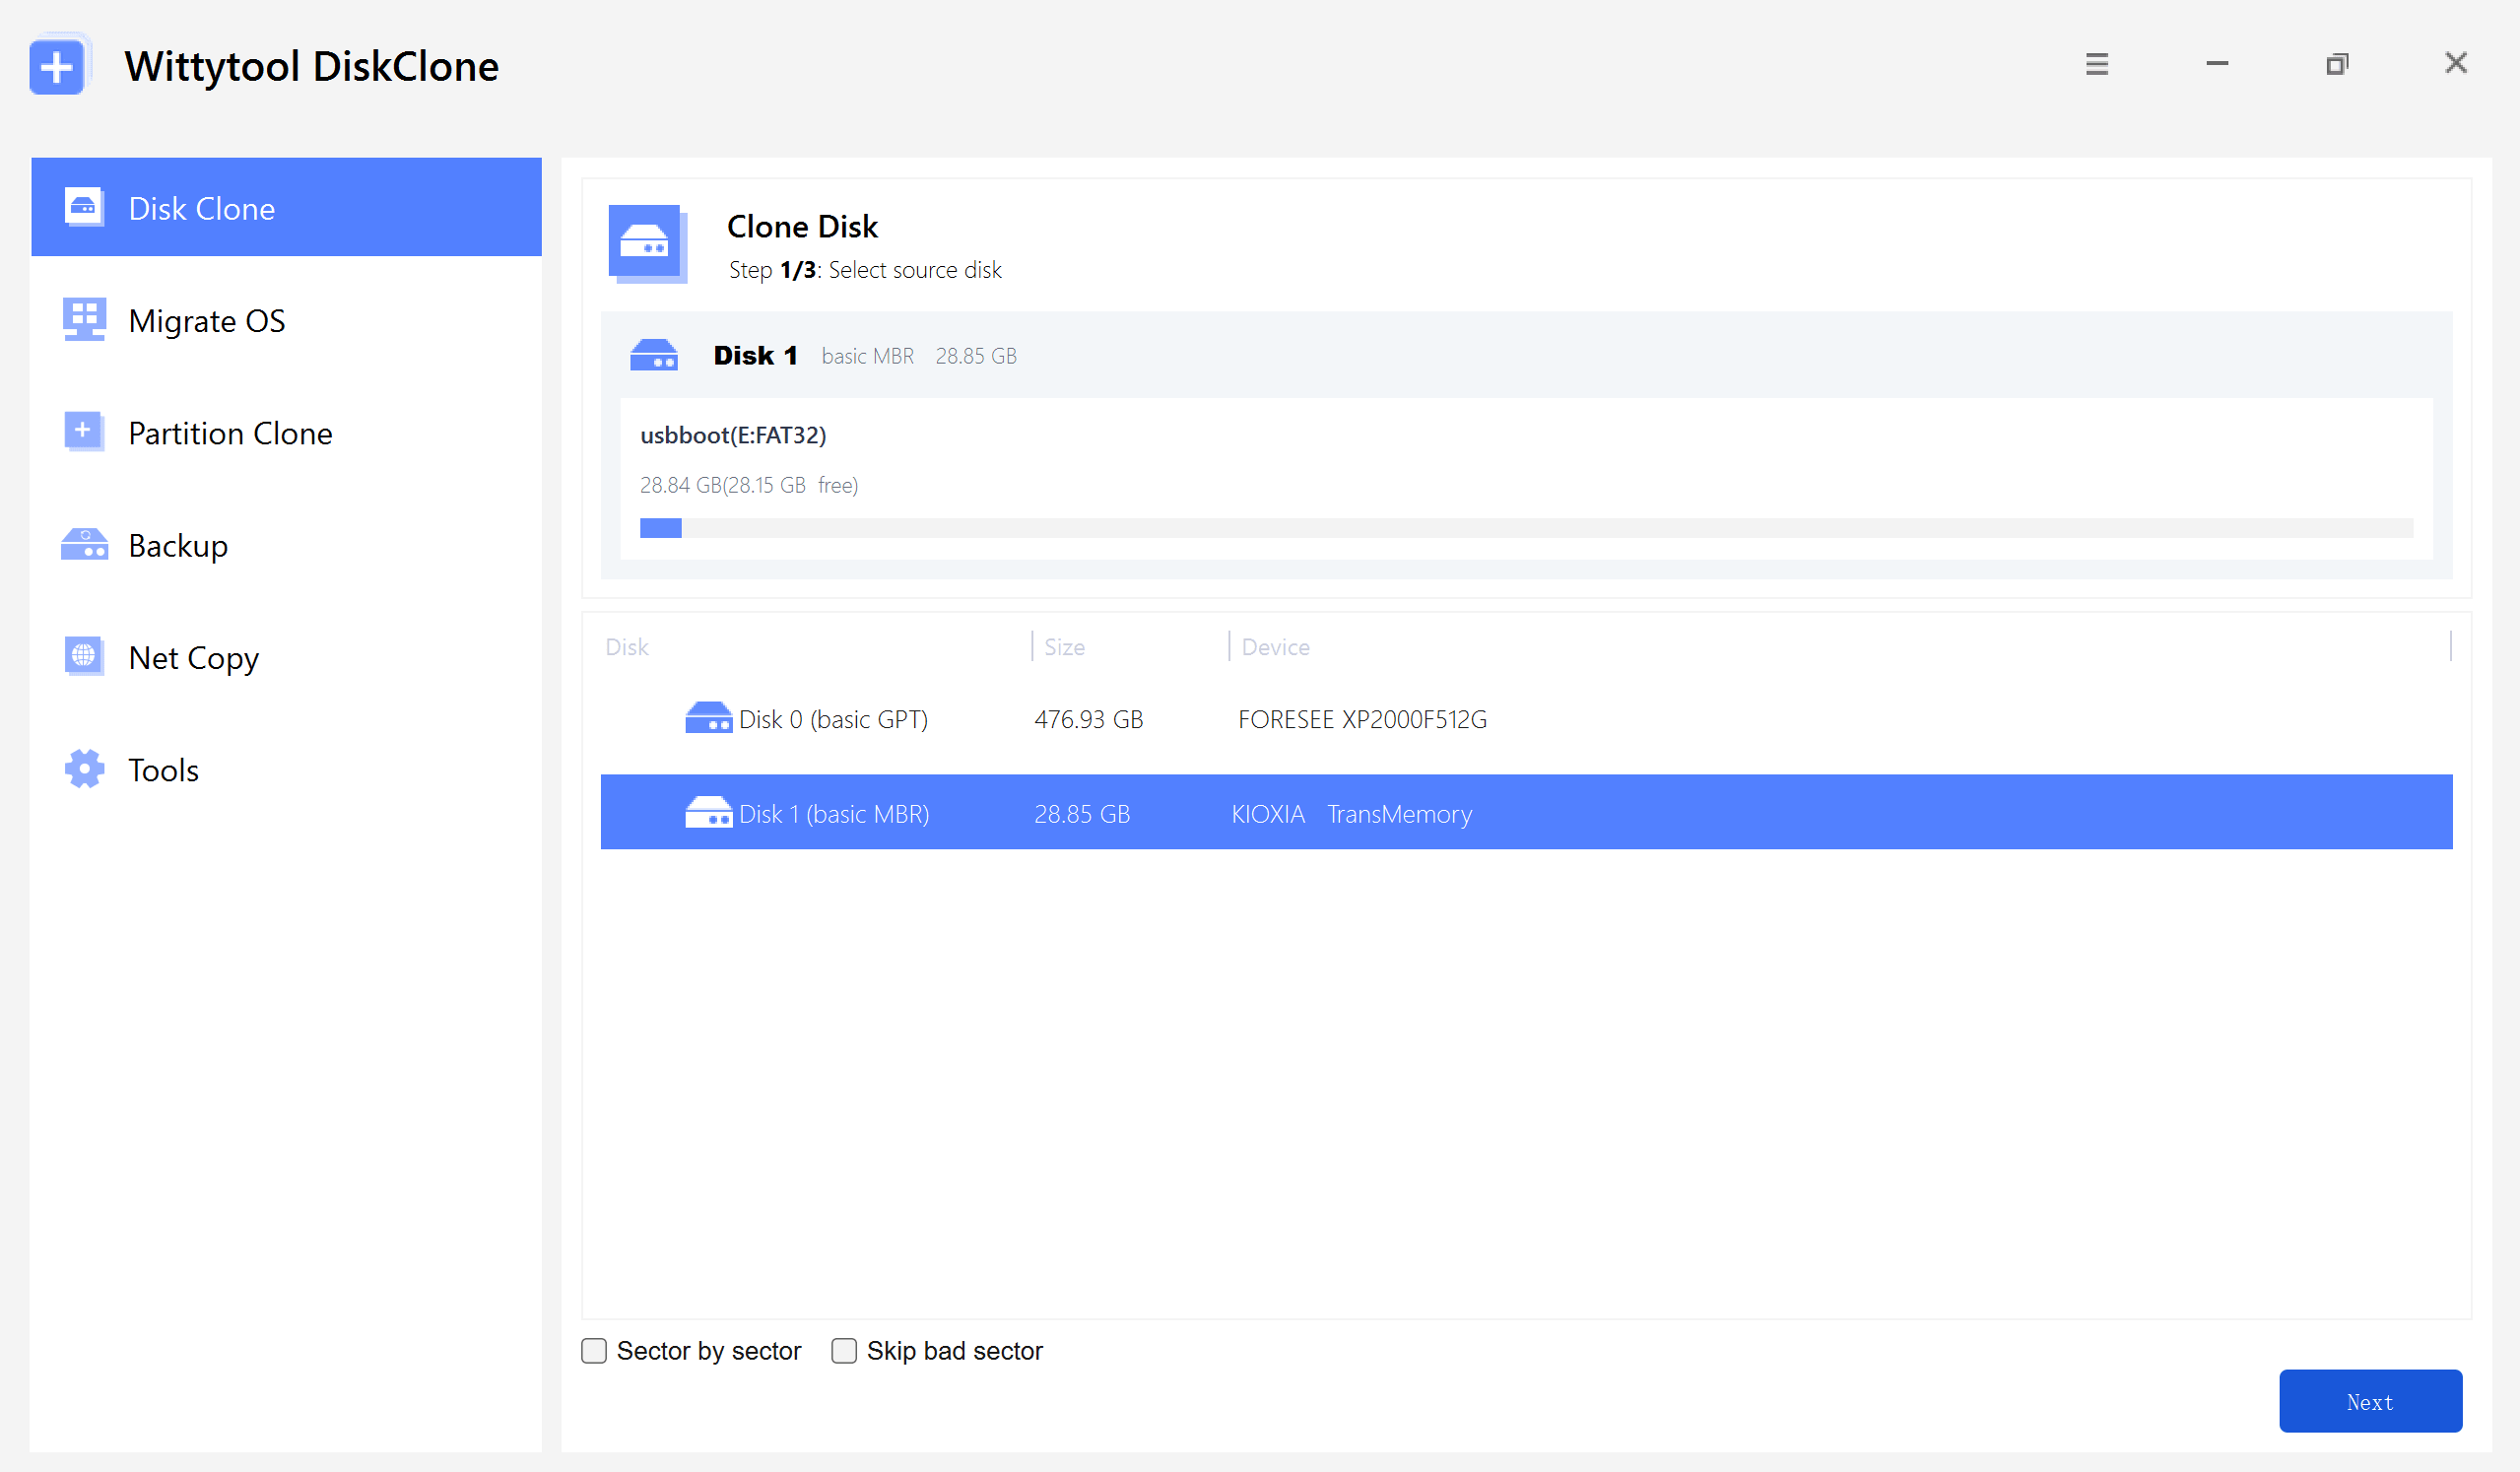
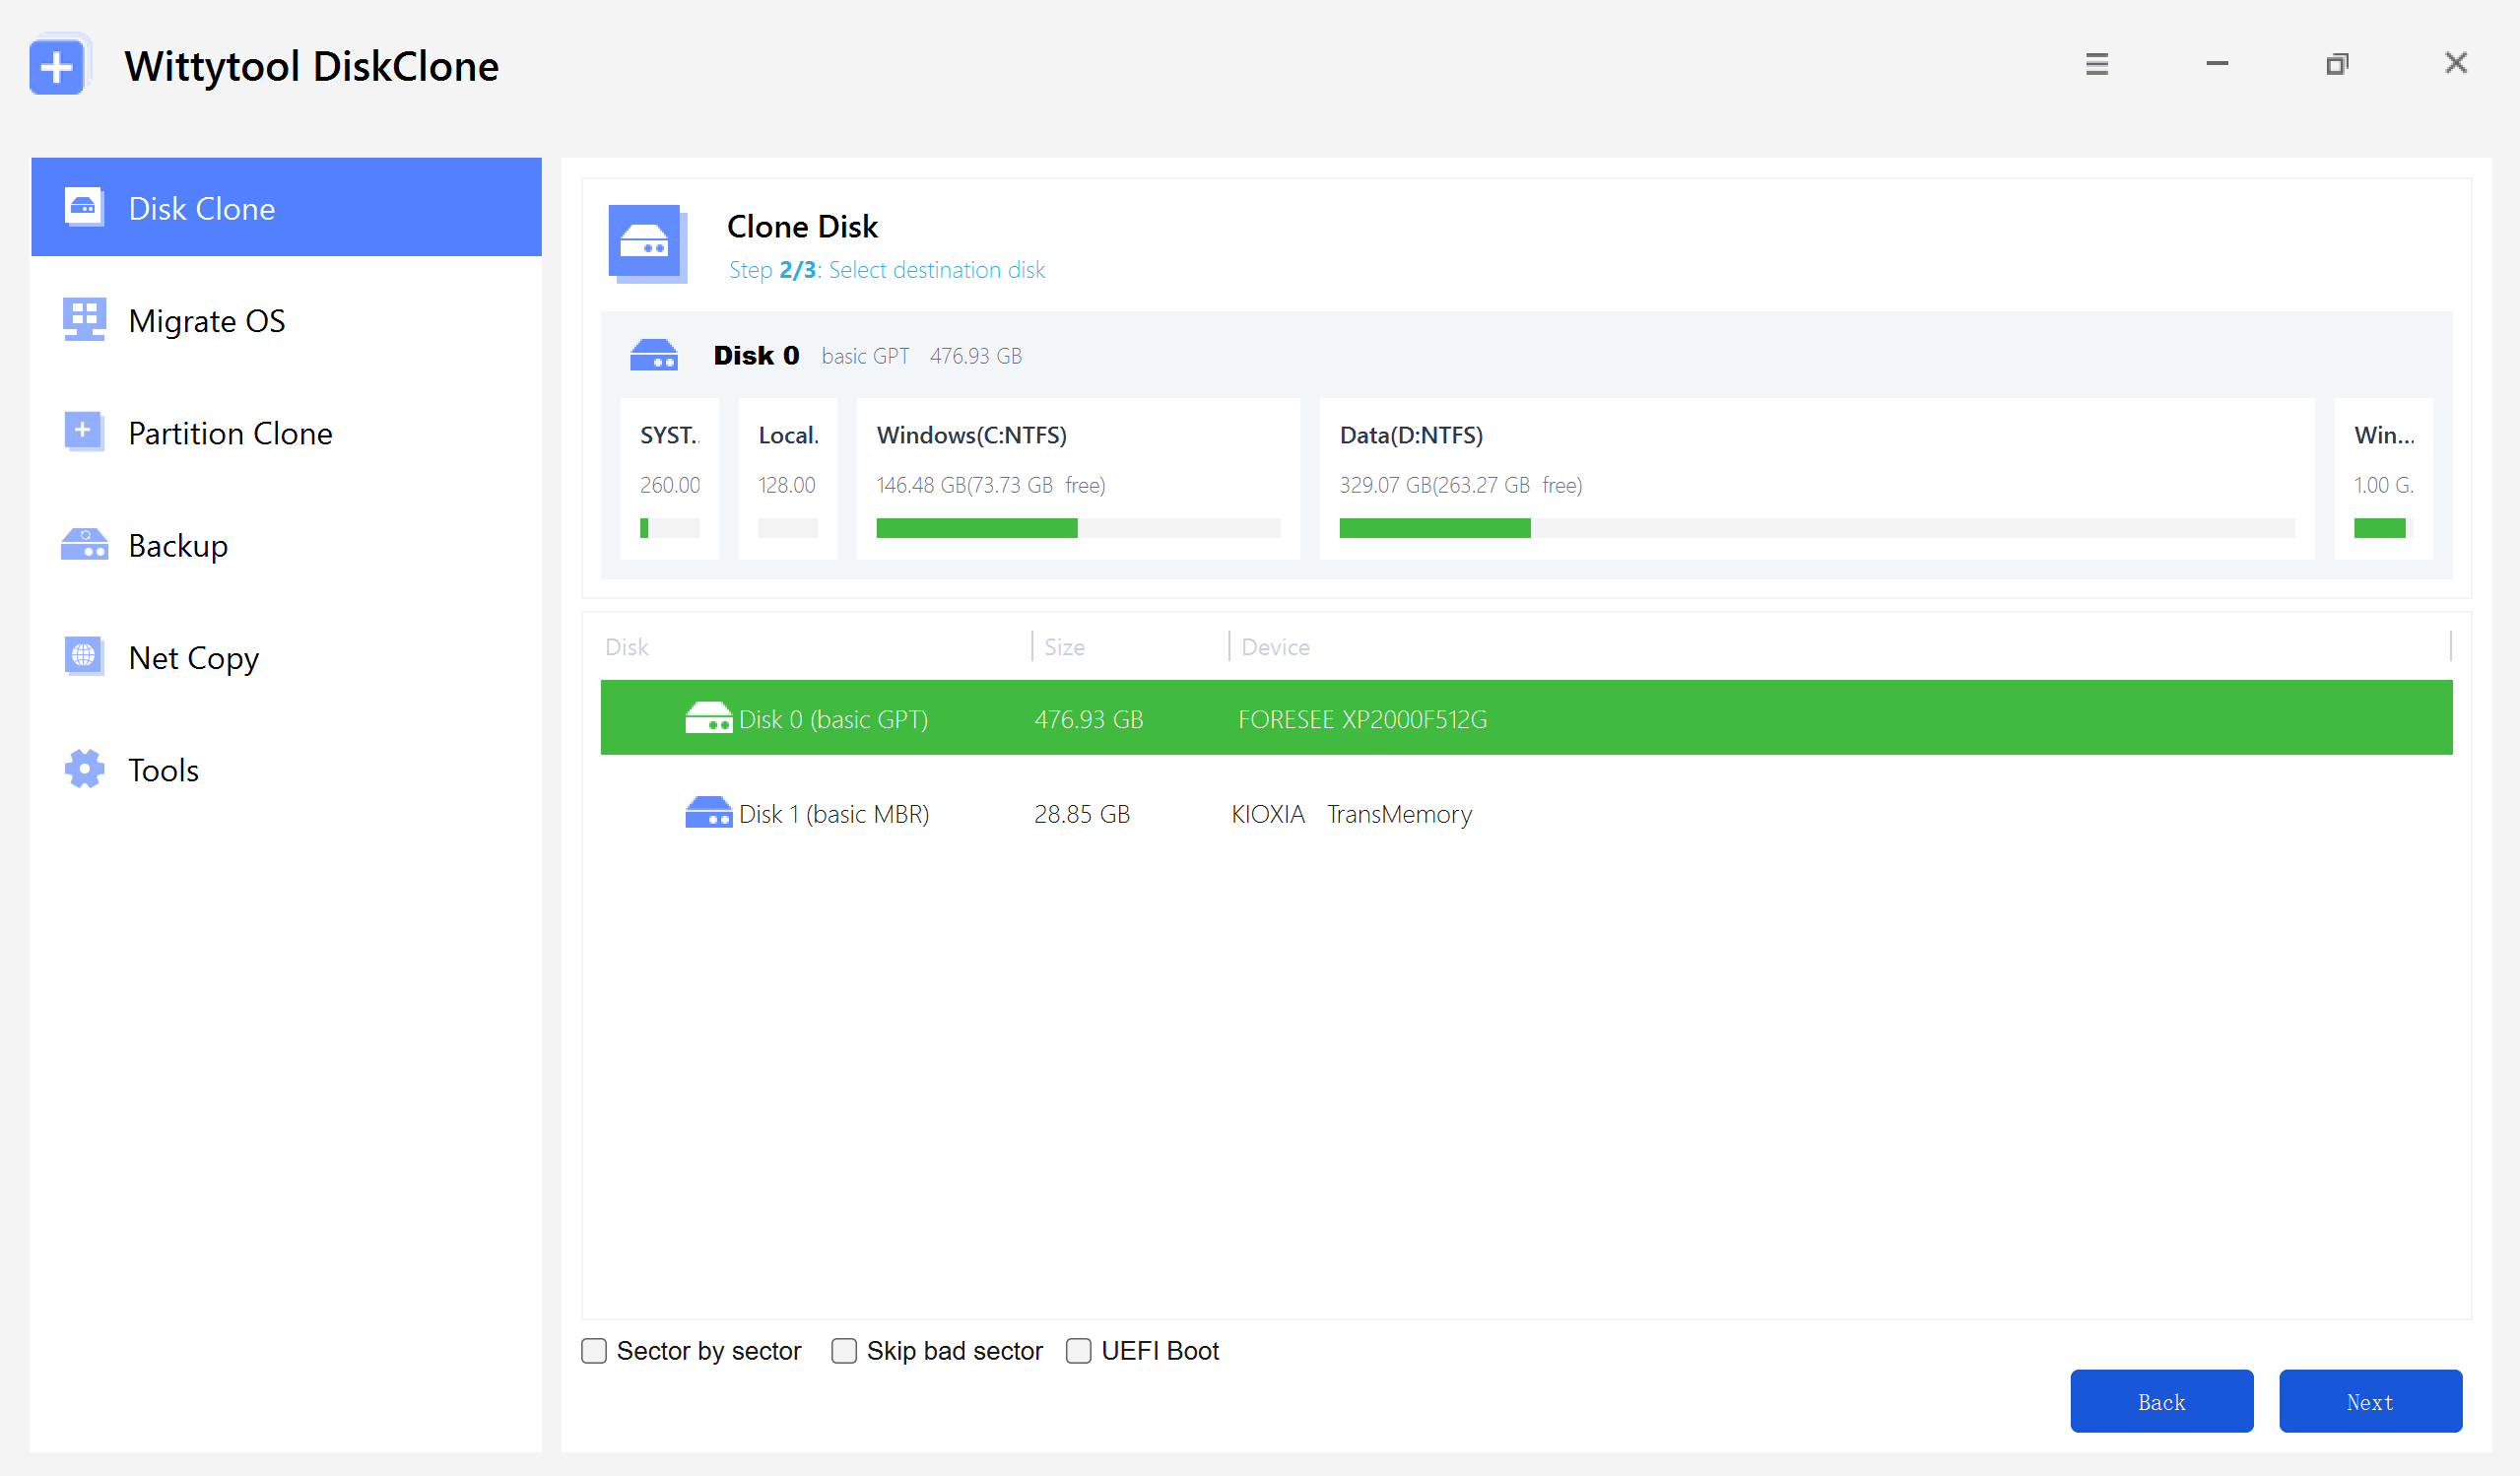
Step 2: Select the Source and Destination Disks
On the source PC: Connect the destination drive and open Wittytool Disk Clone. Select the Windows source disk, then select the destination disk.
Review the complete system layout, including the partitions required to start Windows. Check the proposed destination layout and any partition-size adjustments. Confirm again that the destination contains nothing you need to retain.
Step 3: Enable SID Modification for the Clone
Select the Change SID option during cloning. The Wittytool Disk Clone SID feature guide explains that the target’s SID update is applied when you first sign in to its Windows installation.
For this workflow, select the option for the clone. You do not need to run a separate SID change on the source first. Changing a reference machine’s SID once and then copying that same state repeatedly would not, by itself, give every copy a different SID.
Step 4: Complete the Clone and Start the Target PC
Review your selections and click Start Clone. Wait for the operation to finish, then shut down before disconnecting or installing the drive.
On the target PC: Install the cloned drive and keep the target disconnected from the production network during its initial preparation. Start Windows from that drive and sign in with the prepared local account.
If Windows does not start, resolve the boot or hardware issue before attempting the domain join.
Step 5: Let SID Processing and App Restoration Finish
Allow the SID process, any requested restarts, and application restoration to finish. Certain applications are preserved through an automatic backup-and-restore process, so wait until that processing is complete before testing them.
Wittytool Disk Clone lets you preserve the current computer name or have the program generate a new one when modifying the SID. If you retain the source name, assign the target a different approved name before it joins the domain. If a new name is generated, check it against your naming plan.
You can compare the source and target machine SIDs with Microsoft’s PsGetSid. Query the computer SID, rather than the SID of the signed-in domain user. A different local SID does not establish domain membership by itself.
Join the Cloned PC to the Domain and Verify the Setup
Check the Computer Name, Network Settings, and Domain Connection
Before reconnecting the target, confirm its name and network configuration. If the source used a static IP address, do not leave the target with that same address.
Connect the prepared target to the managed network. Use the organization’s domain DNS configuration, confirm access to a domain controller, and check that its date and time are correct.
Join the Target PC as a Separate Domain Member
On the target PC: Open System Properties > Computer Name > Change, select Domain, and enter your organization’s domain name. Use an account authorized to join the computer, then restart when prompted. Microsoft’s domain-join guide covers the Windows procedure.
Have the administrator manage a separate computer account for the target. Do not delete or repurpose the source PC’s account while that PC is still needed.
Test Applications, User Settings, and Access on Both PCs
Sign in to the target with its intended domain user and test the actual work that user needs to perform:
- Open the required business applications and Microsoft Store applications.
- Confirm the expected settings, local files, and application data are available.
- Test required shared folders, printers, and remote access.
- Check application activation, account sign-ins, and any device-management registration.
To check the domain secure channel on the joined workstation, open Windows PowerShell as administrator and run:
Test-ComputerSecureChannelTrue means that the secure channel is working; False calls for investigation. This check applies to domain-member computers, not domain controllers, and does not validate every application’s access. See Microsoft’s command documentation.
| Problem after cloning | What to investigate first |
|---|---|
| Windows does not start | Boot selection, required boot partitions, storage drivers, and target hardware. |
| The target cannot join the domain | DNS, connectivity, join permissions, and the target computer account. |
| A trust relationship error appears | The domain secure channel and computer-account state. Do not assume that another SID change will fix it. |
| An application or profile is not working as expected | Restoration status, the signed-in account, licensing, and application-specific dependencies. |
If the source PC will remain in service, have the administrator rejoin it under its own identity after the reference capture is complete. Verify its applications and domain access separately. Keep your backup until both PCs work as intended.
If you already have a clone and only need the separate SID workflow, see the Sysprep alternative guide for post-clone SID changes. Handle any existing domain membership before applying that workflow.
FAQs
Do I Need to Leave the Domain Before Cloning?
The workflow in this guide prepares the source reference PC in a workgroup before cloning. Wittytool Disk Clone technical support recommends performing SID modification in a workgroup, then joining the computer to the domain. Plan the source PC’s removal and return with your administrator.
Can Wittytool Disk Clone Change the SID During Cloning?
Yes. Enable the Change SID option during cloning. According to the product guide, the SID update is applied when you first sign in to Windows on the target PC. Let the processing finish before joining that computer to the domain.
Does Changing the SID Require a Connection to the Domain Controller?
No. The SID modification itself runs locally and does not require access to a domain controller. The domain-join step in this guide does require that access. This does not mean downloading, licensing, or every other step can be completed offline.
Is Renaming the Cloned PC Enough?
No. A different name does not change the local machine SID or establish separate domain membership. Wittytool Disk Clone offers a choice to retain the current name or generate a new one during SID modification. Confirm the final name and complete the target’s domain join separately.
Will the Clone Keep My Existing User Accounts and Applications?
Wittytool Disk Clone preserves existing accounts, applications, settings, and data during SID modification, with some applications backed up and restored automatically. It changes the machine SID and derived local account SIDs, not domain-assigned account SIDs. Test the intended user’s applications and access after joining the target to the domain.