Last updated on May 8, 2026
In Windows administration, a Duplicate SID (Security Identifier) is a critical technical hurdle that often goes unnoticed until a network conflict occurs. This issue typically arises after cloning a hard drive or deploying a virtual machine without resetting its identity. Duplicate SIDs can lead to Active Directory domain conflicts, software licensing failures, and persistent network resource errors.
To resolve this, Microsoft recommends the Sysprep (System Preparation Tool) as the only official and safe method to change a machine’s SID. If you are preparing for a large-scale deployment, understanding how to clone your disk and change Windows SID correctly is essential for maintaining a healthy IT environment.
Essential Precautions for Using Sysprep
Before running the utility, you must perform a few preparatory steps to ensure the stability of your operating system and data.
- Data Backup: While Sysprep is designed not to delete personal files, it resets system configurations. Always back up your important data before proceeding.
- Software Compatibility: Certain third-party software licenses are tied to the specific SID of a machine. Be aware that you may need to re-activate some applications after the change.
- Remove Residual Files: For a cleaner generalization, clear your temporary files and remove any unnecessary user accounts.
- Technical Limit: Windows allows you to run Sysprep on a single system image only 3 times. After this, you must reset the rearm count or reinstall the OS.
Once you have secured your data, you can proceed to the standard manual process.
How to Change SID with Sysprep in Windows 11/10
The most common way to modify a Windows SID is through the graphical interface. This method is user-friendly and allows you to select the necessary cleanup options easily.
Step 1: Open the Sysprep Utility
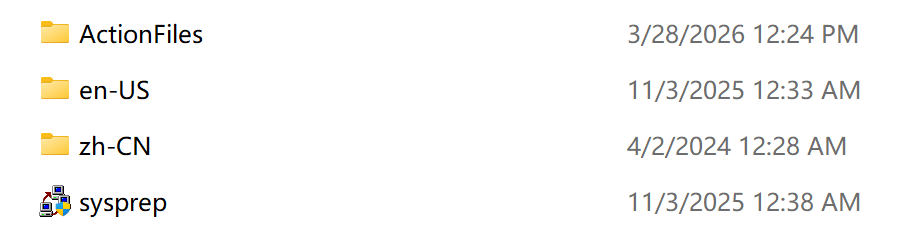
First, you need to locate the Sysprep executable. Press Win + R on your keyboard, type the following path, and press Enter: C:\Windows\System32\sysprep
In the folder that opens, right-click on sysprep.exe and select Run as Administrator.
Step 2: Configure System Preparation Tool Settings
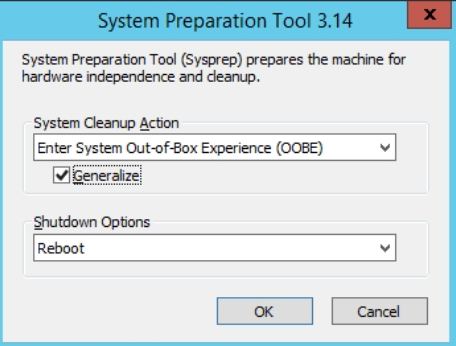
When the System Preparation Tool window appears, configure the following settings:
- System Cleanup Action: Select Enter System Out-of-Box Experience (OOBE).
- Check the “Generalize” Box: This is the most critical step. Checking “Generalize” ensures the old SID is removed and a new one is generated.
- Shutdown Options: Select Reboot.
Step 3: Complete the Windows Initial Setup
After clicking OK, the system will process the generalization and reboot. Upon restarting, you will see a setup screen similar to a new PC. While the system identity is reset, your original user data is still preserved in the C:\Users directory.
Note: In some cases, users might encounter login issues after a reset; if so, refer to our guide on fixing incorrect username or password errors during Windows login.
Advanced Operation: Running Sysprep via Command Line (CMD)
For IT administrators who need to automate deployments or handle Windows Server environments, the Command Prompt provides a faster way to trigger the generalization. While the client OS process is similar, there are specific nuances when you need to change SID in Windows Server for domain controllers or specialized server roles.
Open Command Prompt as Administrator and execute:
sysprep.exe /oobe /generalize /rebootParameter Breakdown:
- /oobe: Initiates the Out-of-Box Experience.
- /generalize: Removes system-specific data, including the SID.
- /reboot: Restarts the computer once the process is complete.
How to Verify if the SID Was Successfully Changed by Sysprep
To confirm the operation worked, you can use the Whoami command. Open CMD and type: whoami /user.
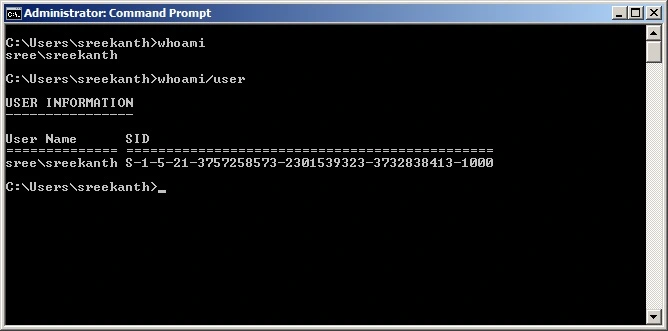
The string of numbers at the end of the output is your SID. If the generalization was successful, these numbers will be different from your original records. Verifying this is important, as duplicate SIDs are a known cause for Windows 11 sharing failures and other network discovery bugs.
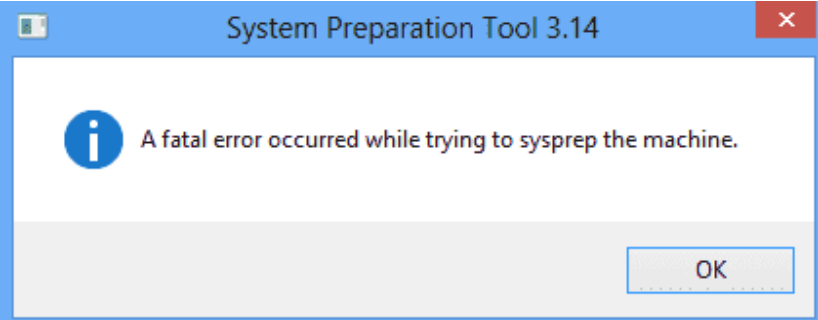
Troubleshooting: How to Fix Sysprep ‘Fatal Error’
The message “Sysprep was unable to validate your Windows installation” usually occurs because the system isn’t “clean” enough for generalization. Follow these high-impact steps to resolve it quickly.
Step 1. Identify the Root Cause in Logs
Don’t guess – check the official log. Open C:\Windows\System32\Sysprep\Panther\setuperr.log with Notepad. Look for lines mentioning specific “Packages” (UWP apps) that failed to validate.
Step 2. Remove Conflicting UWP (Microsoft Store) Apps
Most failures are caused by built-in apps updated for a specific user but not the whole system.
- The Fix: Open PowerShell (Admin) and run: Get-AppxPackage -AllUsers -Name “PackageName” | Remove-AppxPackage -AllUsers (Replace “PackageName” with the app identified in your log.)
Step 3. Reset Sysprep Registry State
If Sysprep failed previously, Windows might be stuck in a “failed” state. Reset these registry keys to try again:
Open regedit and go to: HKEY_LOCAL_MACHINE\SYSTEM\Setup\Status\SysprepStatus
Set CleanupState to 2 and GeneralizationState to 7.
Go to: …\Microsoft\Windows NT\CurrentVersion\SoftwareProtectionPlatform and set SkipRearm to 1.
Step 4. Stop the Media Sharing Service
The Windows Media Player Network Sharing Service often locks files required for SID modification. Open services.msc, locate the service, right-click it, and select Stop.
Pro Tip: How to Avoid SID Conflicts Without Resetting Settings
While Sysprep is the official Microsoft method, it has a major drawback: it resets your system settings, app configurations, and user profiles to the OOBE (initial setup) state. For many users, the goal is to resolve SID conflicts while keeping every custom setting and installed application intact.
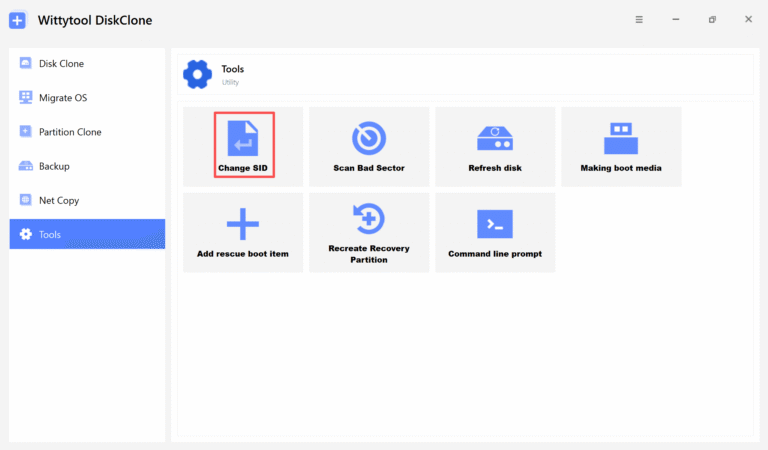
If you are looking for a Windows SID changer tool that bridges this gap, Wittytool Disk Clone offers a more efficient solution to change Windows SID while retaining all your apps and settings. By the way, you can trigger the “Change SID” function directly during the disk cloning or system migration process. Now just download the tool freely and follow the steps:
Now download the software and follow One-Click SID Modification Workflow:
Step 1. Click “Change SID” and then press “Start.”
Step 2. Auto-Backup & Prep: The system will temporarily remove apps that have permission conflicts.
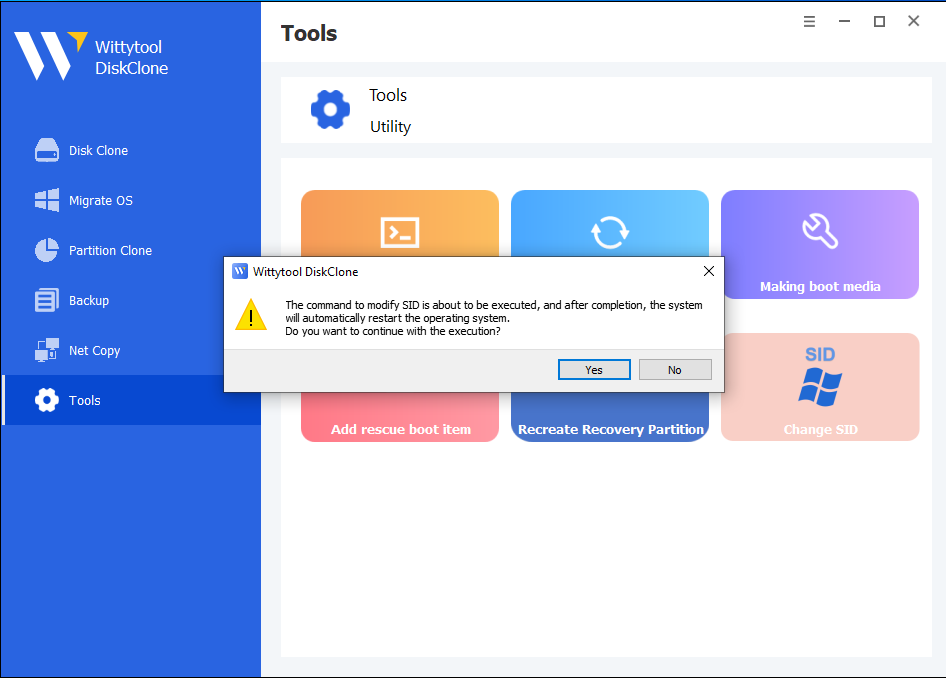
Rest assured, all apps and data are backed up and will be restored automatically later.
Step 3. System Reboot: The computer will automatically restart to finalize the SID changes.

Step 4. Auto-Restoration: Upon your first login after the reboot, Wittytool will automatically restore all uninstalled programs and their data.
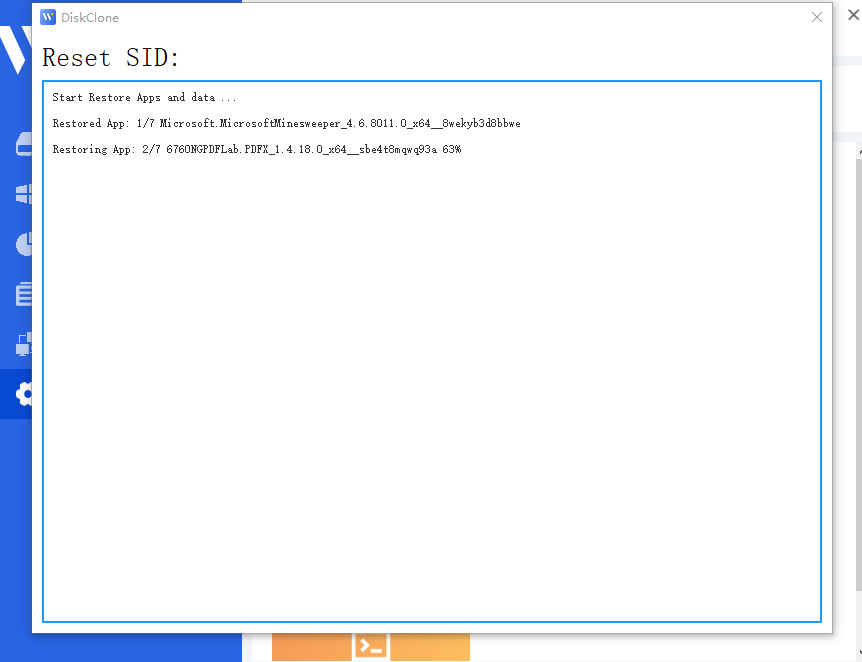
The process is officially complete once the restoration finishes.
Key Changes & Notifications
Computer Name: The computer name will be changed to a randomized name to prevent network naming conflicts (duplicate names).
Local Accounts: All Windows local accounts remain completely unaffected.

Microsoft Accounts: If you are using a Microsoft account, you will need to reset your PIN during the first login after the restart.

Video tutorial – How to change Windows SID via Wittytool Disk Clone (Walkthrough)
Conclusion
While the Sysprep generalize command is the standard way to fix duplicate SIDs, its tendency to reset settings and trigger “Fatal Errors” can be a headache. Whether you use the manual Microsoft method or a professional SID change utility like Wittytool Disk Clone after cloning, ensuring a unique SID is vital for a stable network.
FAQ about SID change with Sysprep
Will changing the SID delete my files?
No. Sysprep generalizes the OS identity but does not wipe your personal data. However, it will reset some system settings to their defaults.
Can I use NewSID instead of Sysprep?
No. NewSID is an obsolete tool that is no longer supported or safe for modern Windows versions. Sysprep remains the only official method.
Why hasn’t the SID changed after running Sysprep?
This usually happens because the “Generalize” box was not checked. Ensure you use the /generalize parameter in CMD or check the box in the GUI.