

Last updated on June 23, 2025
Tired of cramped storage on your Samsung SSD? Upgrading to a larger drive doesn’t mean reinstalling Windows or losing files. Cloning your SSD is like photocopying your entire digital life—effortlessly. Let’s break down why cloning beats manual transfers and how to do it right, whether you’re a DIY enthusiast or a “just-make-it-work” user.
Why Clone Instead of Starting Fresh? 3 Wins You’ll Love
- Save Time: No reinstalling apps, tweaking settings, or hunting for licenses.
- Preserve Everything: Keep your OS, hidden system files, and personalized setups intact.
- Avoid Downtime: Swap drives and get back to work (or gaming) in minutes.
3 Methods to Clone Samsung SSD to a Larger SSD
Method 1: Use Dedicated Cloning Software (For Effortless Precision)
Tools like Wittytool DiskClone streamline cloning with error-proof automation. It simplifies the process of cloning disks and migrating operating systems. With its intuitive interface, you can easily clone your disk and even change the Windows SID for a fresh setup. Learn how to clone your disk and modify your Windows SID here: How to Clone Your Disk and Change Windows SID. This tool is ideal for users looking to upgrade their storage or create backups without losing data. It’s a must-have for anyone managing multiple drives or systems.
To perform a clone, firstly, connect both SSDs: Attach your new, larger Samsung SSD via USB enclosure or SATA cable, then download WittyTool DiskClone and follow the steps below to get started.
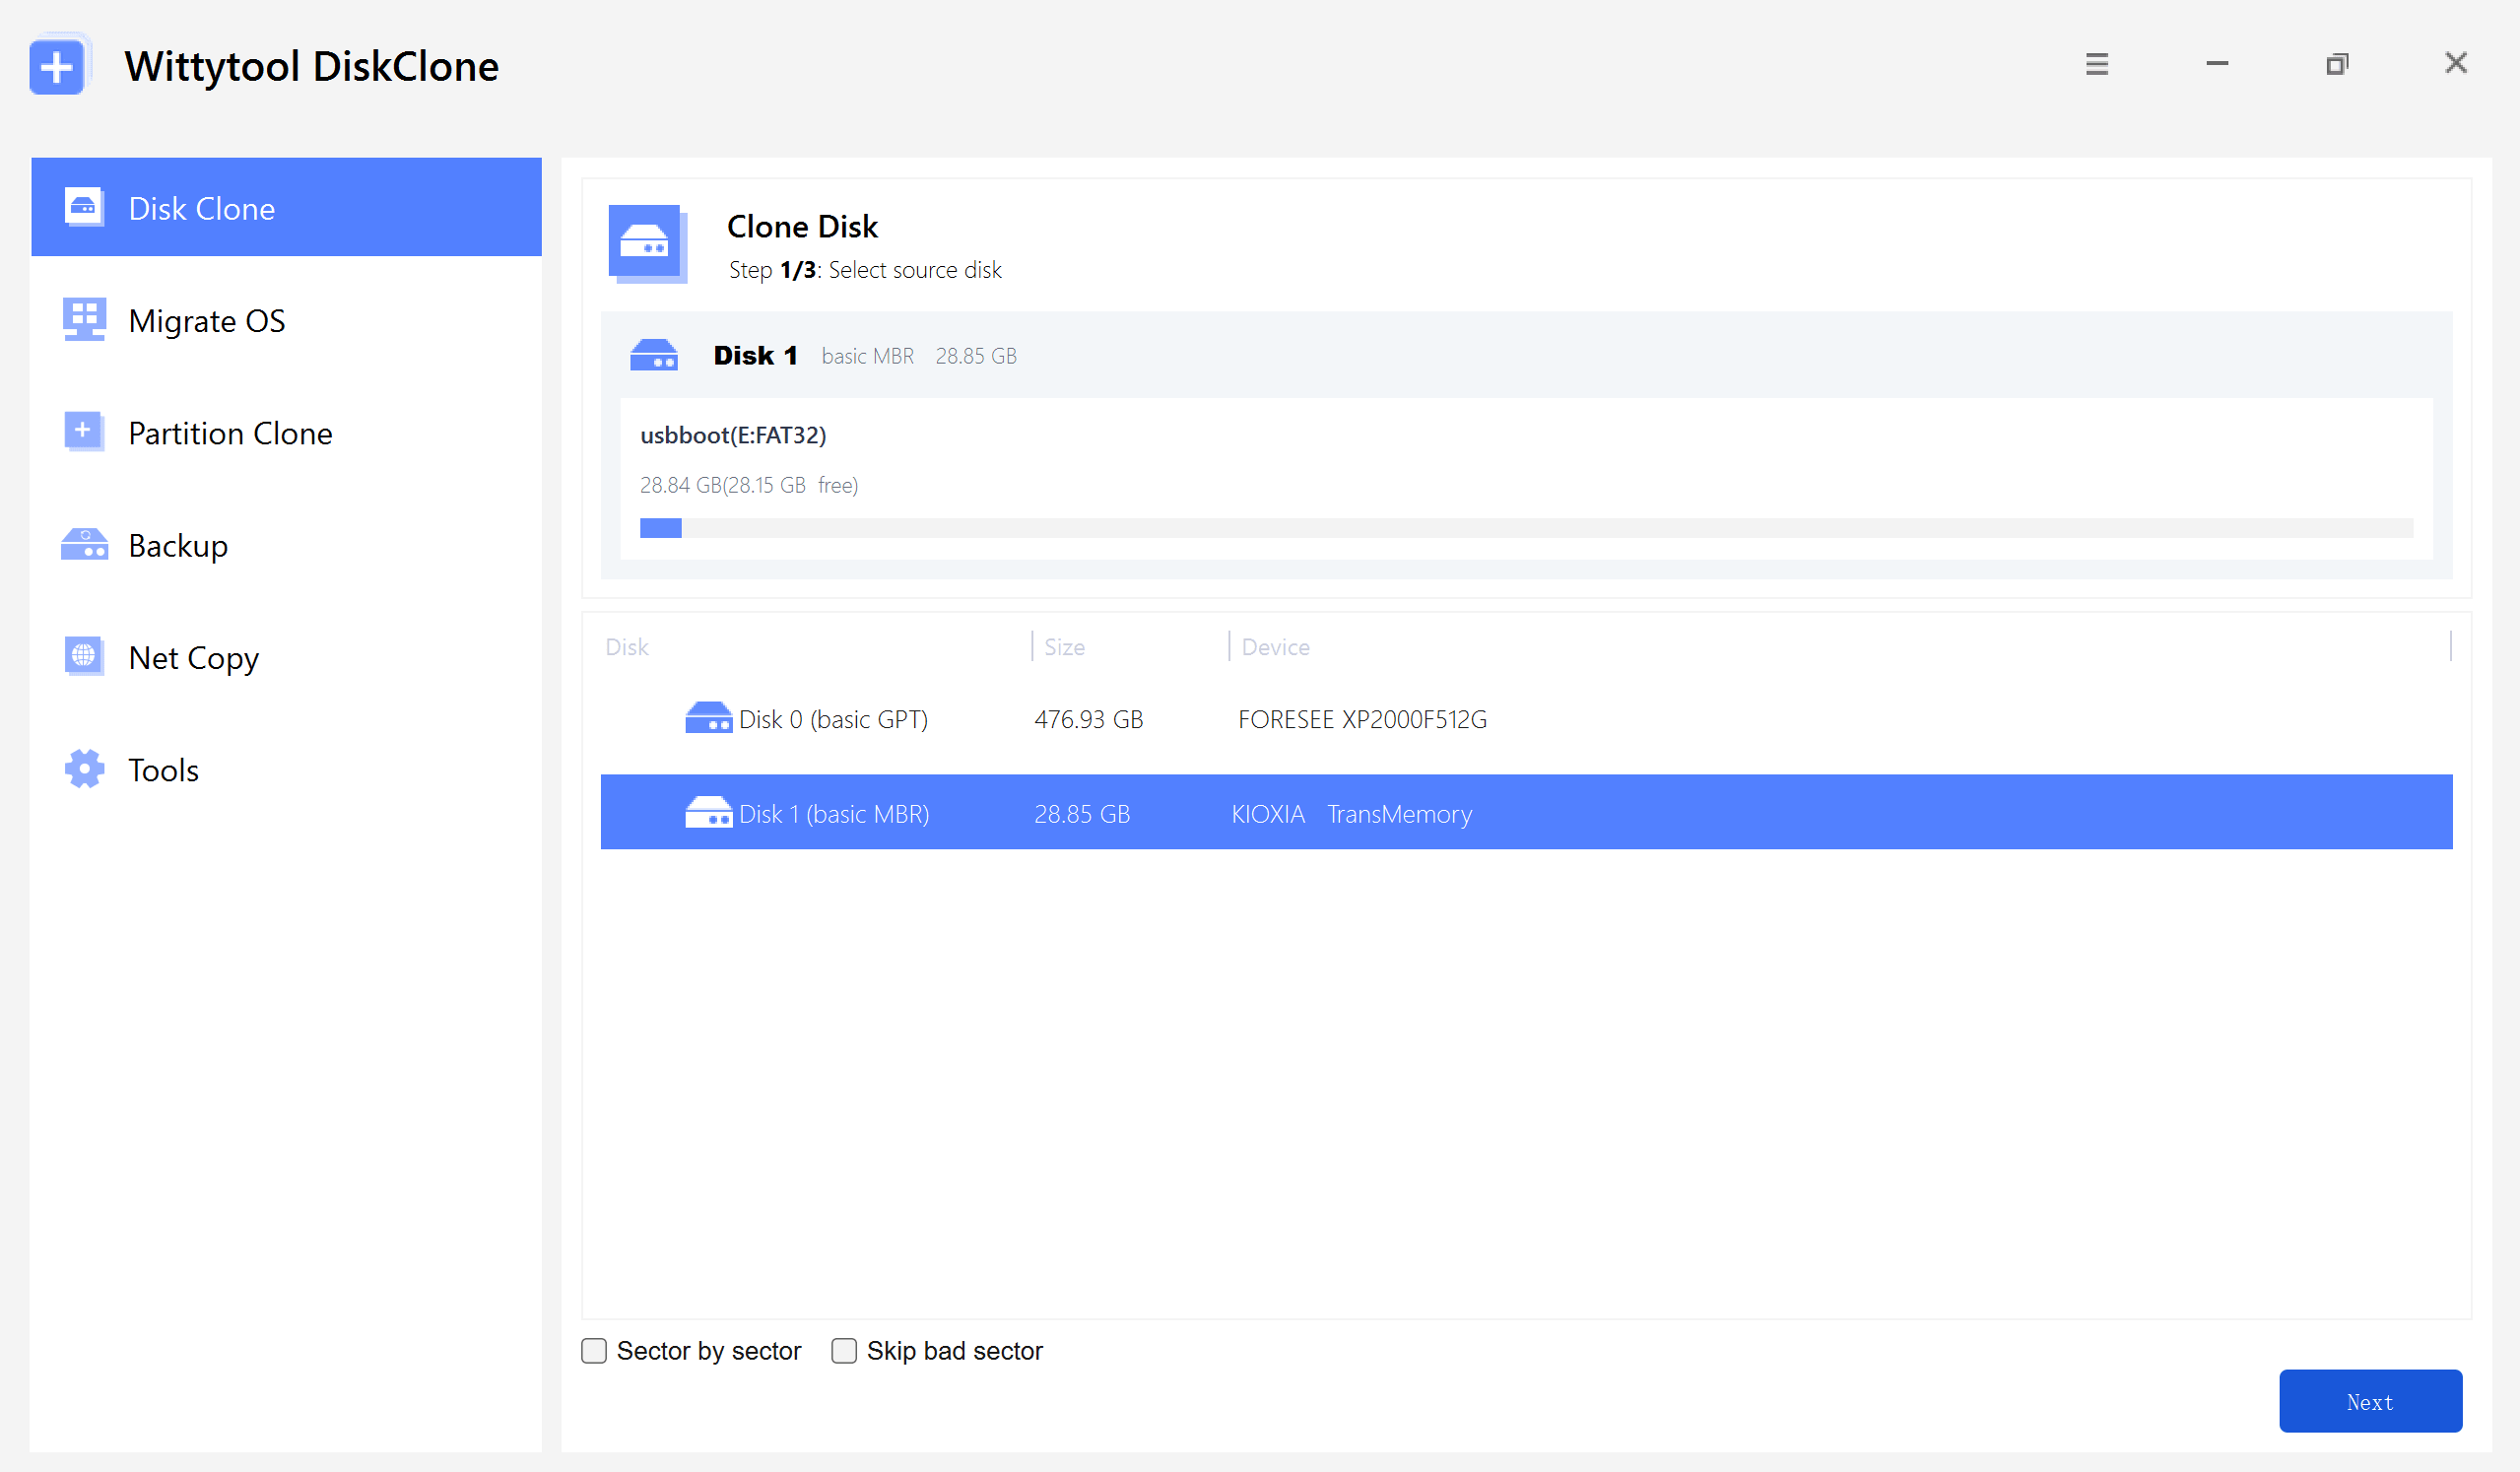
Step 1: Select Disk Clone (or Partition Clone for a nearly identical workflow), then choose your source disk and click Next.
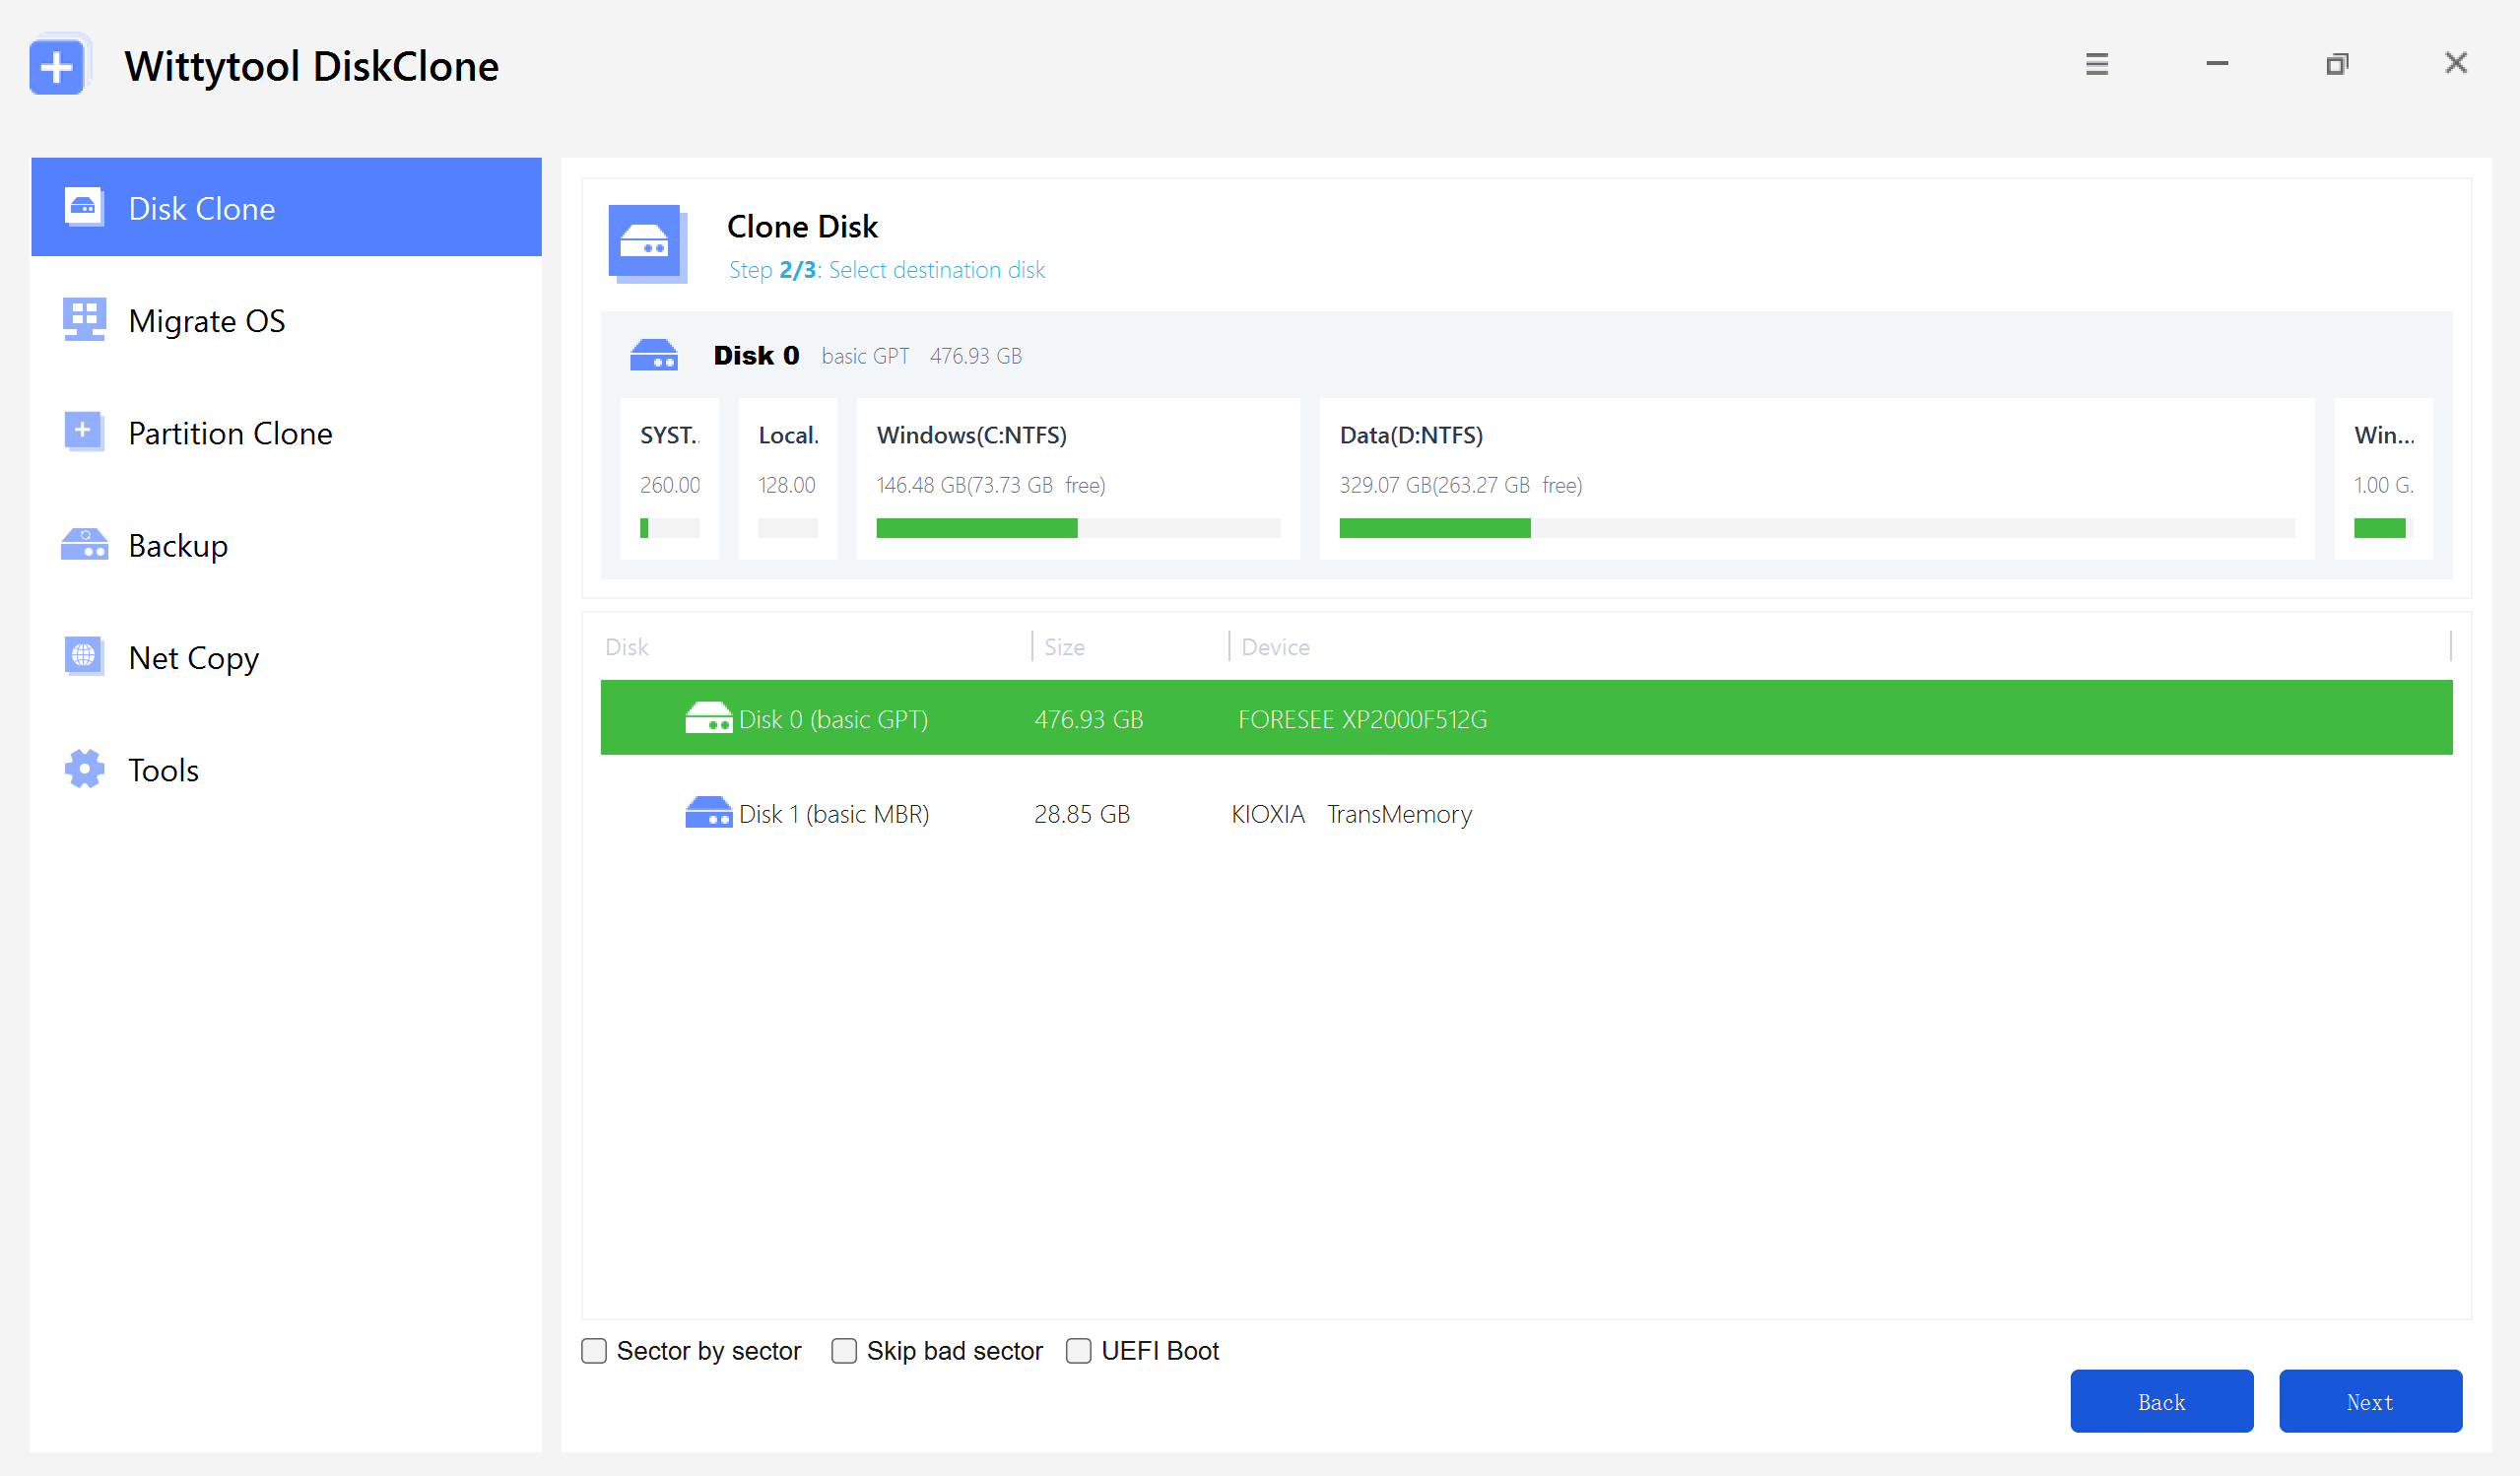
Step 2: Choose your destination disk and click Next to access the configuration settings.
Here, you can enable sector-level cloning, skip bad sectors, or check the UEFI BOOT option to convert the boot mode, ensuring the drive is fully compatible with the UEFI firmware of modern motherboards.
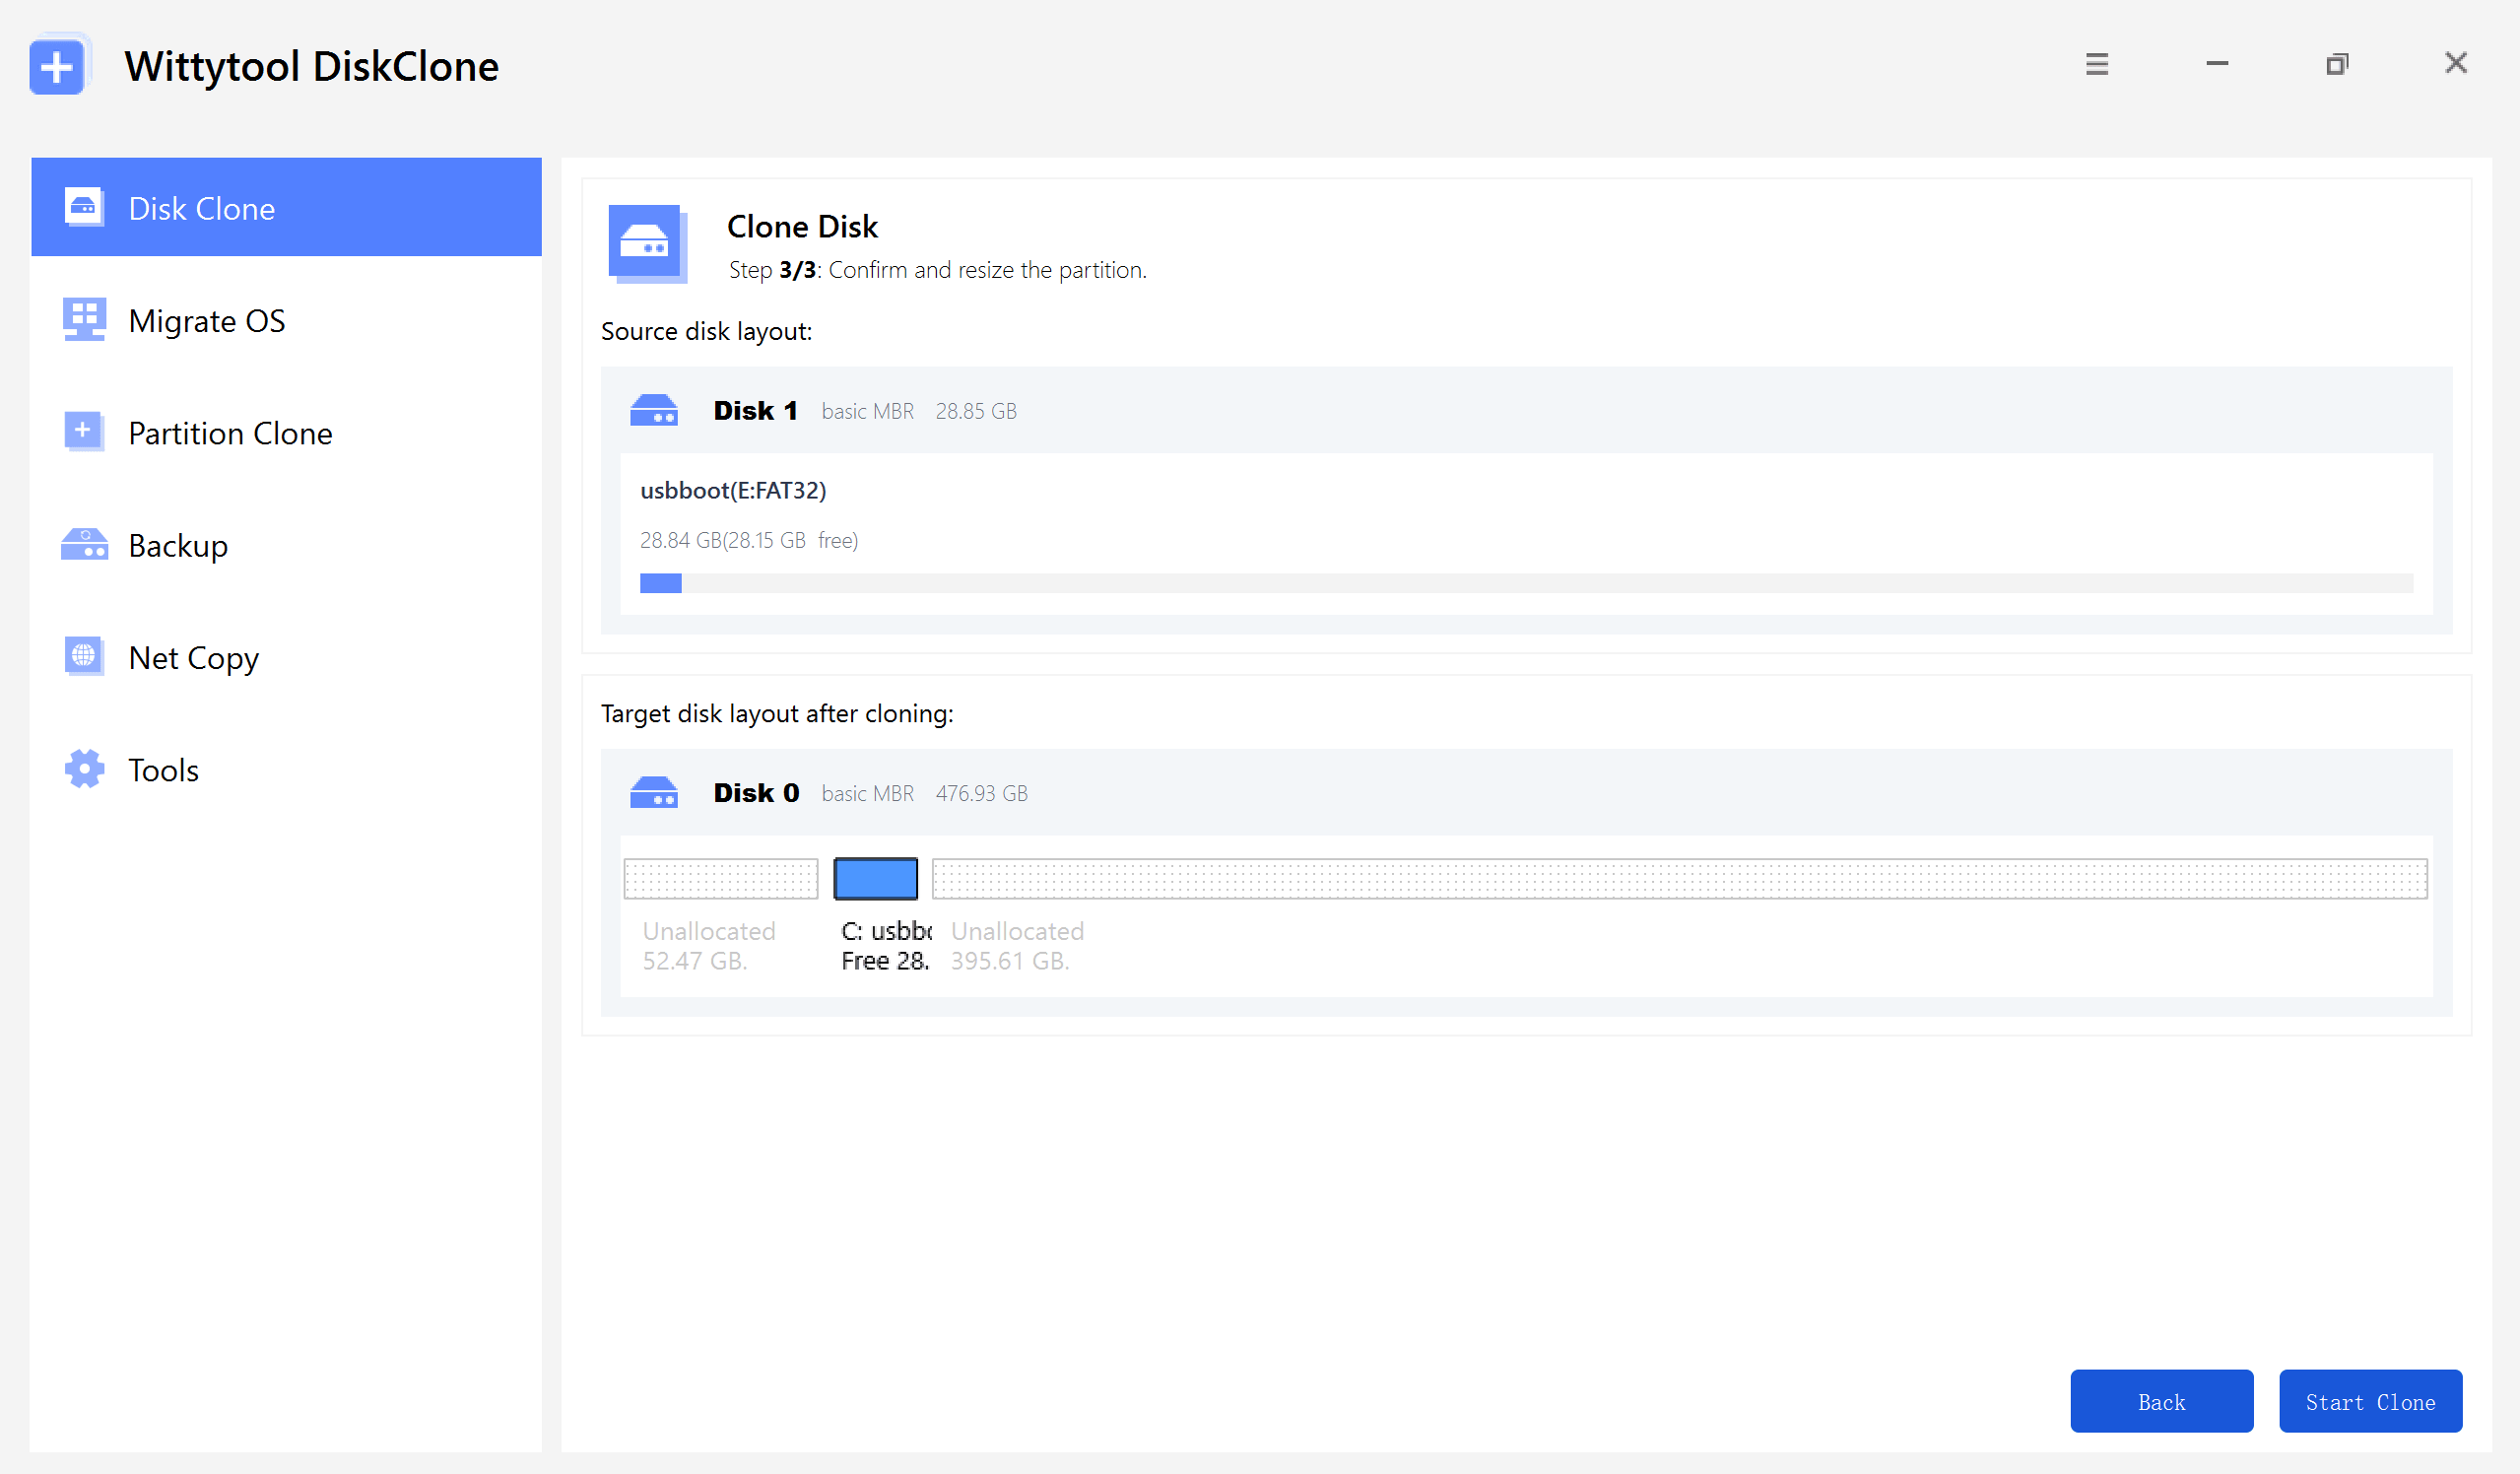
Step 3: Resize the partitions on the target disk layout as needed to fit your requirements, then click the “Start Clone” button to begin the cloning process.
Watch the Disk Cloning Video Guide with Wittytool Disk Clone:
Method 2: Samsung Data Migration (For Brand Loyalists)
Samsung’s free tool is tailor-made for their drives:
- Install Samsung Data Migration on your PC.
- Connect the new SSD and launch the tool.
- Follow prompts to select source/target drives.
- Start cloning—it even auto-resizes partitions to fit the larger drive!
⚠️ Catch: Only works with Samsung SSDs.
Method 3: Manual Cloning via Windows/Mac (For No-Software Purists)
- Backup your data (seriously—don’t skip this).
- Use built-in tools:
- Windows:
Disk Management> “Mirror Volume” (limited) orRobocopyfor advanced users. - Mac:
Disk Utility> “Restore” function.
- Windows:
- Resize partitions post-cloning to utilize extra space.
Best for: Small-scale transfers or users avoiding third-party apps.
Post-Cloning Checklist: Don’t Stop Here!
- Test the new SSD: Boot from it to confirm everything works.
- Wipe the old drive: Use
Secure Erasein Samsung Magician to repurpose/sell it safely. - Update firmware: Check Samsung’s site for your SSD’s latest firmware.
FAQs: Cloning Concerns, Solved
Q: Can I clone to a smaller SSD?
A: Only if the used space on your old drive fits. Tools like Wittytool can shrink partitions during cloning.
Q: Why isn’t my PC detecting the new SSD?
A: Check connections, initialize the drive via Disk Management, or update drivers.
Q: How long does cloning take?
A: Depends on data size—anywhere from 10 minutes to a few hours. Use USB 3.0 or SATA for speed!
Final Tip: Clone Smart, Not Hard
Cloning your Samsung SSD isn’t just about storage—it’s about seamless growth. Whether you choose automated software, Samsung’s native tool, or manual methods, always verify the clone before ditching your old drive. Now go enjoy that extra space for your Steam library or 4K edits!