Last updated on December 8, 2025
If you have been struggling with a computer that takes forever to boot or opens applications at a snail’s pace, you are not alone. As a technician who has spent over a decade reviving dying computers, I can tell you that the bottleneck is almost always the hard drive. The most effective solution isn’t buying a new PC; it is to clone OS (Operating System) from your old hard drive to a lightning-fast SSD.
Many beginners hesitate because the word “cloning” sounds technical and risky. It doesn’t have to be. In this guide, I will walk you through exactly how to perform a Windows clone operation by an SSD Cloning Software. We will move your entire system – files, settings, and that specifically configured Windows environment you love – to a new drive without reinstalling a single thing.
Why You Should Clone Windows: Common Scenarios
In my ten years of experience handling data migration, I have found that most users don’t realize they need cloning software until disaster looms or frustration peaks. Cloning isn’t just ‘copy-pasting’; it creates an identical 1:1 replica of your system partitions, ensuring the new drive is bootable.
Here are the primary reasons why using OS cloning software is necessary:
1. Upgrading from HDD to SSD (Performance Boost)
This is the most common scenario. Traditional Hard Disk Drives (HDDs) rely on spinning platters. Solid State Drives (SSDs) use flash memory. According to recent market analysis by TrendForce, SSD adoption in laptops has surpassed 90% simply because they are up to 5x to 20x faster than HDDs.
- The Benefit: Your Windows boot time can drop from 2 minutes to 15 seconds just by cloning your system to an SSD.
2. Expanding Storage Space
If your “C: Drive” bar has turned red, your computer will slow down significantly.
- The Fix: You can clone Windows from a smaller 256GB drive to a larger 1TB or 2TB drive. The cloning software will expand the partition to fill the new space, giving your system room to breathe.
3. System Backup and Disaster Recovery
💡 Expert Tip: Ransomware and drive failure are unpredictable, making it crucial to backup your data regularly. Having a cloned drive sitting in a drawer is the ultimate protection. If your main drive fails, you simply swap in the clone to get back up and running in minutes – saving you the stress and high cost of relying on data recovery software to salvage your files later.
How to Use OS Cloning Software to Migrate Windows
For this tutorial, we are focusing on a tool that strikes the right balance between power and simplicity: Wittytool Disk Clone. In the professional sector, we look for software that handles “Partition Alignment” automatically—this ensures your new SSD runs at top speed. Wittytool handles this well, making it ideal for the Windows 11/10/8/7 clone process, which is far quicker and retains your settings compared to the tedious steps required to install windows 7 on ssd or Windows 10 from scratch.
Preparation Phase (Don’t Skip This!) ❗
Before you start the software, ensure you have the following:
- The New Drive: An SSD or HDD with enough capacity to hold your current data.
- Connection Method: If you are on a desktop, use a SATA cable. If you are on a laptop, you will need a SATA-to-USB adapter or an NVMe enclosure.
- Power: Ensure your laptop is plugged in to avoid shutdown during the process.
The Cloning Process
Download Wittytool Disk Clone and Follow these steps to clone OS to your new drive:
Step 1: Select Migrate OS in left pannel, then choose the destination disk from the list.
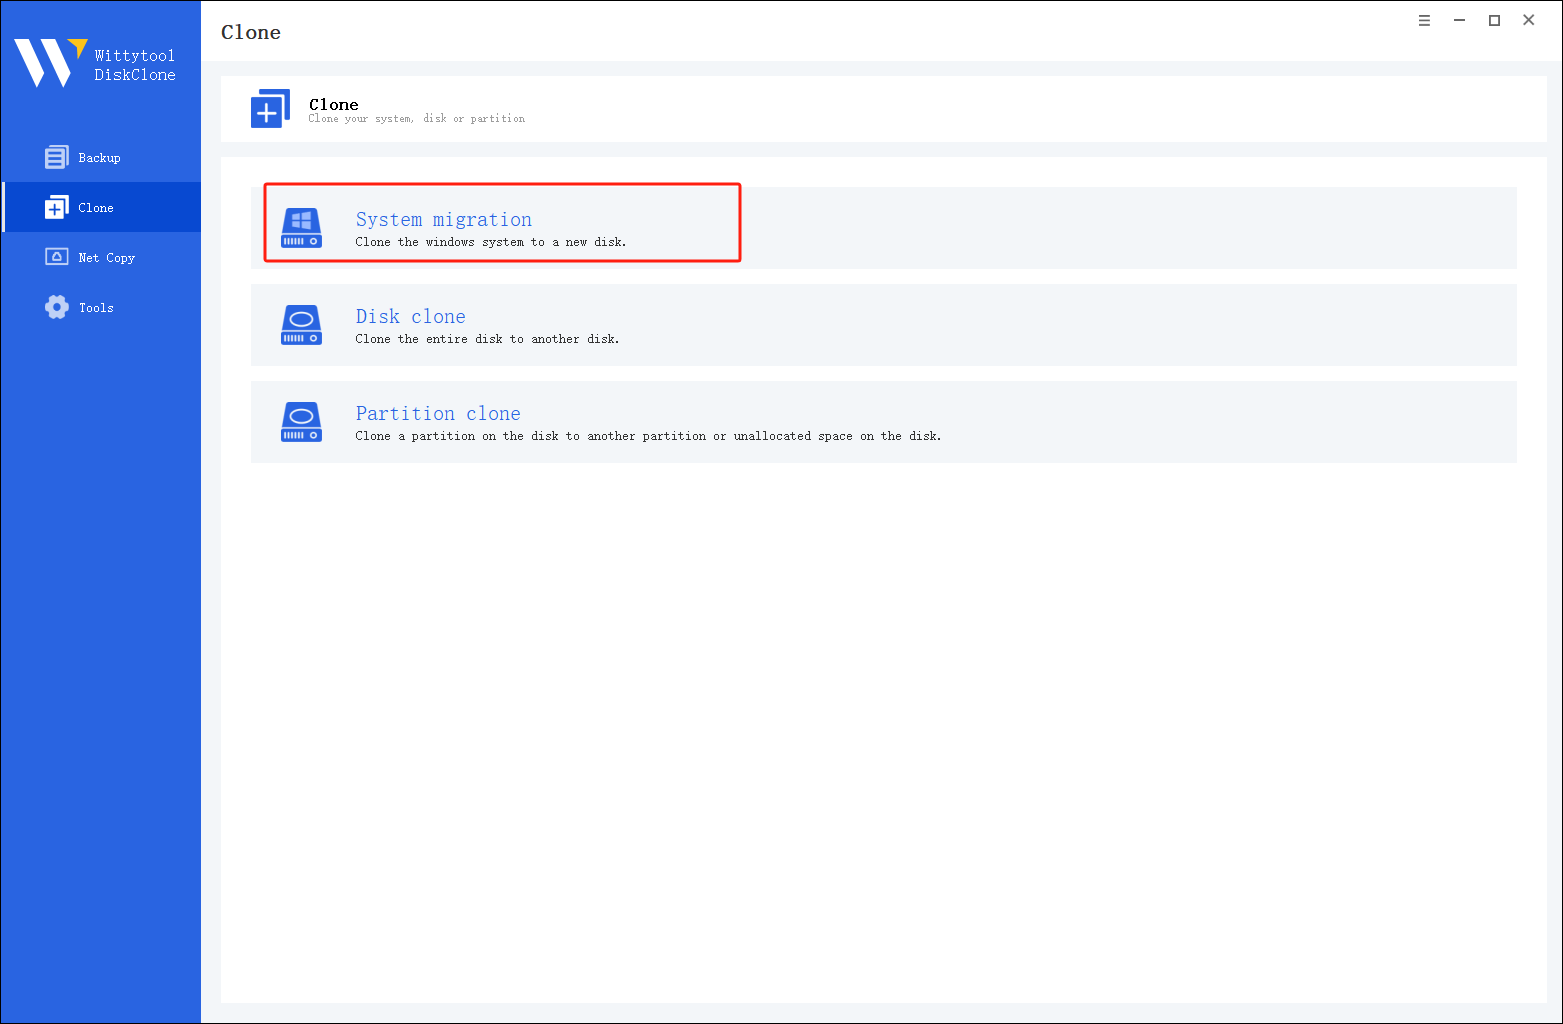
*Change Windows SID: When cloning multiple machines on the same network, select “Change Windows SID” to prevent SID duplicated issues related to network access. This direct approach allows you to change windows sid without sysprep, making large-scale cloning operations much quicker and more efficient.
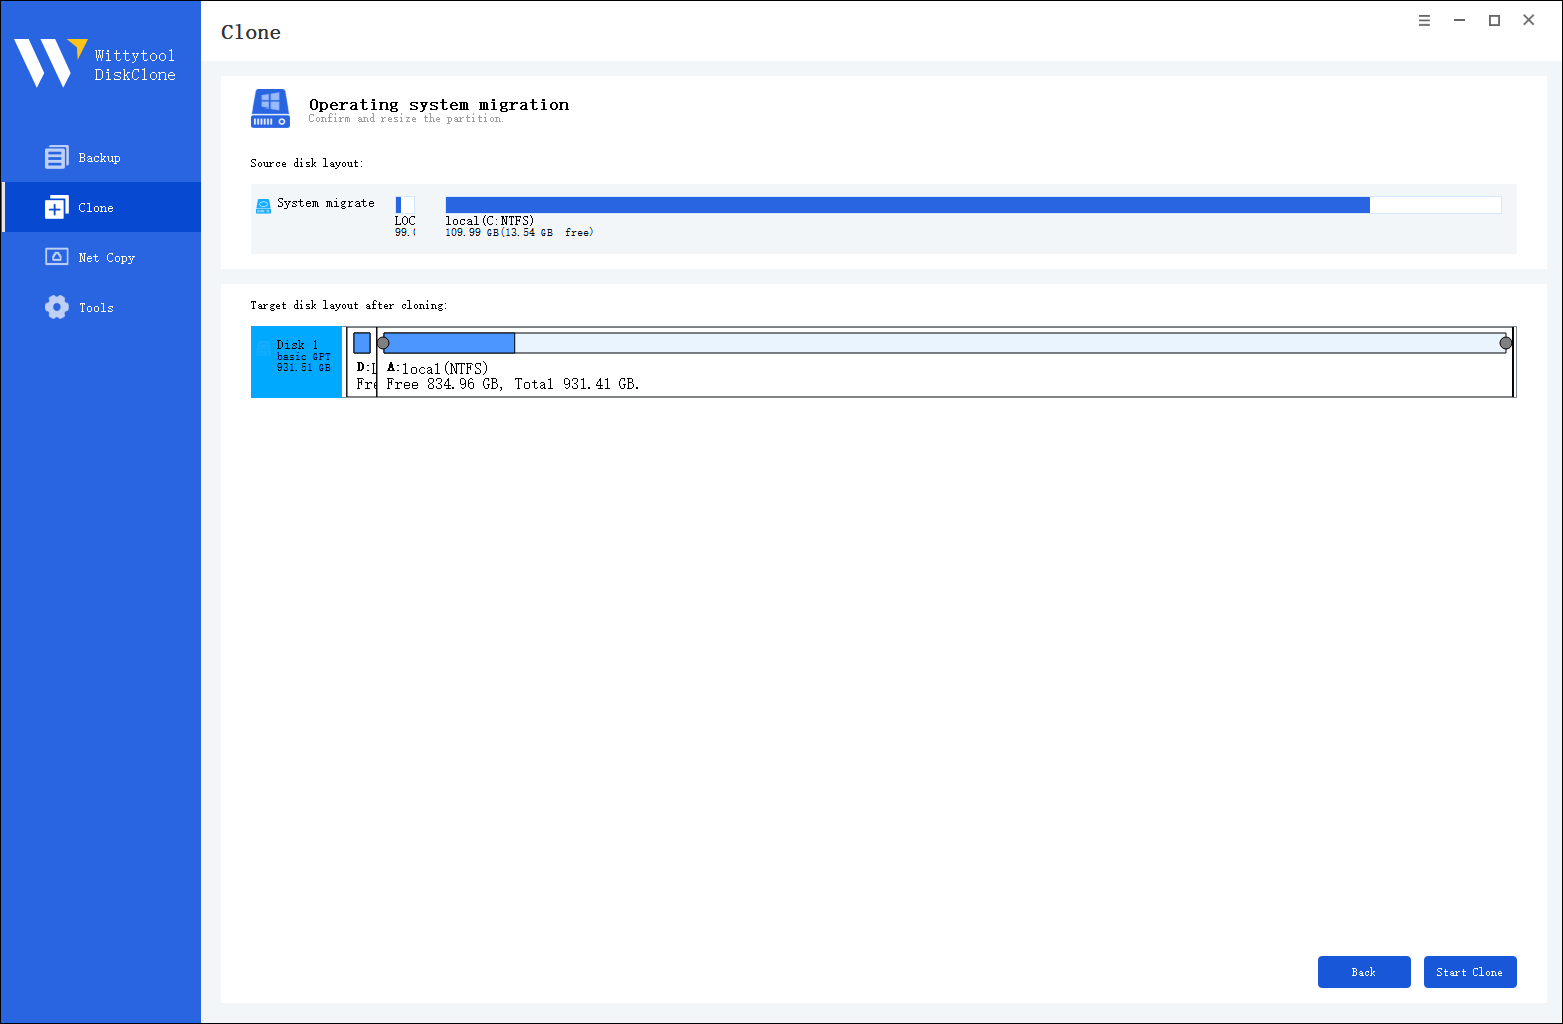
Step 2: Confirm Partition Size. Review and resize the partitions on the target disk as needed. Once ready, click the “Start Clone” button to begin the cloning process.
Once the cloning process is complete, you must tell your computer to load Windows from the new drive:
Step 3. Restart your PC and immediately press the BIOS key (usually F2, F12, or Del) repeatedly as the computer starts up.
Step 4. Navigate to the Boot menu or Boot Priority settings. Move your new disk to the top of the list to make it the primary boot device.
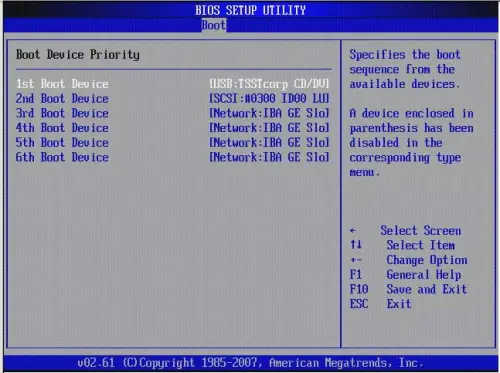
Step 5. Save your changes (often by pressing F10), exit the BIOS, and allow the PC to restart.
Watch this video guide to learn how to clone your system with Wittytool Disk Clone:
Frequently Asked Questions About Windows Cloning
As a technician, I hear the same questions repeatedly. Here are the answers to the most common concerns regarding OS cloning software.
1. How do I clone the entire OS into a new drive properly?
To ensure the OS boots, you cannot simply copy the C: folder. You must use cloning software to copy the C: drive plus the hidden partitions (like the System Reserved Partition or EFI partition).
- My advice: Use the “Disk Clone” feature in your software to ensure the partition table (MBR or GPT) is copied correctly.
2. Can I clone just the operating system (and leave data behind)?
Yes, this is a feature known as System Clone or “OS Migration.” It detects the Windows system files and required boot partitions and copies only those to the new drive. This is extremely useful if you bought a smaller SSD (e.g., 250GB) for Windows speed but want to keep your massive 2TB HDD for storing movies and games.
3. How can I clone my entire OS to a bootable USB stick?
This requires a specific feature often called “Windows To Go.” Standard cloning usually targets internal drives. However, some advanced OS cloning software allows you to create a portable Windows drive. 💡 Note: Running Windows from a USB stick will be significantly slower than an internal SSD due to USB bandwidth limits.
4. How do I make a copy of my operating system for backup?
The process is identical to cloning to a new drive.
- Connect an external hard drive.
- Run the clone OS function.
- Once finished, disconnect the drive and store it in a safe place.
- Expert View: For regular backups, I recommend “Disk Imaging” rather than cloning. Imaging compresses your OS into a single file, whereas cloning requires a dedicated physical drive.
5. How to clone OS to a new SSD using Wittytool’s System Clone?
If you are upgrading to a new, smaller SSD primarily for speed, you should specifically use the System Clone or OS Migration function within your chosen OS cloning software (like Wittytool Disk Clone).
Final Thoughts on OS Migration
Upgrading your computer doesn’t require a degree in computer science. In my professional opinion, learning how to clone Windows 11/10/8/7 is one of the most valuable skills a PC user can have. It saves you money on repair shops and hours of reinstalling software.
Whether you use Wittytool or other utilities, the logic remains the same: Source (Old) → Target (New) → Boot.
Don’t let a slow mechanical hard drive bottle up your computer’s potential. Grab a new SSD, run the OS cloning software, and enjoy a PC that feels brand new.