Seeing the frustrating “The disk is write protected” message when you try to add or delete files can stop your work in its tracks. This common issue prevents you from modifying any data on your USB flash drive, pen drive, SD card, or other external storage devices. The good news is that it’s usually simple to fix. This guide will walk you through the best methods to remove write protection on Windows 11, 10, 8, and 7, explain what causes it, and show you how to recover your precious data if anything goes wrong.
Key Insights: Quick Solutions to Remove Write Protection
- The error is often caused by a physical lock switch on the device, corrupted system settings, or virus infections.
- Always check for a tiny physical lock switch on your USB or SD card adapter first—this is the most common fix.
- Using built-in Windows tools like Diskpart and the Registry Editor can effectively remove software-based write protection.
- Before formatting a newly unlocked drive, use a free data recovery software like WittyTool to rescue your files, as formatting will erase everything.
Effective Solutions to Fix “The Disk Is Write Protected” Error
Fixing a write-protected disk doesn’t require advanced technical skills. The solutions range from checking a simple switch to using Windows’ built-in utilities. We recommend following these methods in order, starting with the easiest and most common fix first.
What Caused Write Protection on USB
Understanding why your drive became write-protected can help you choose the right solution and prevent it from happening again. Common causes include:
- Physical Lock Switch: Many USB drives and most SD cards have a small sliding switch that physically enables or disables write protection.
- Virus or Malware Infection: Malicious software can sometimes lock your drive to protect itself from being removed.
- Corrupted File System: Errors on the drive can trigger Windows to set it to read-only mode to prevent further damage.
- Windows Registry Settings: A specific key in the Windows Registry might have been set to enable write protection for all USB devices connected to your PC.
- Drive Errors: Bad sectors or other physical issues can cause the system to protect the drive.
- BitLocker Encryption: If the drive was encrypted with BitLocker, it will be locked until unlocked with the correct password.
Industry reports suggest that a significant percentage of storage device errors are due to logical issues like file system corruption rather than physical failure, making software fixes highly effective.
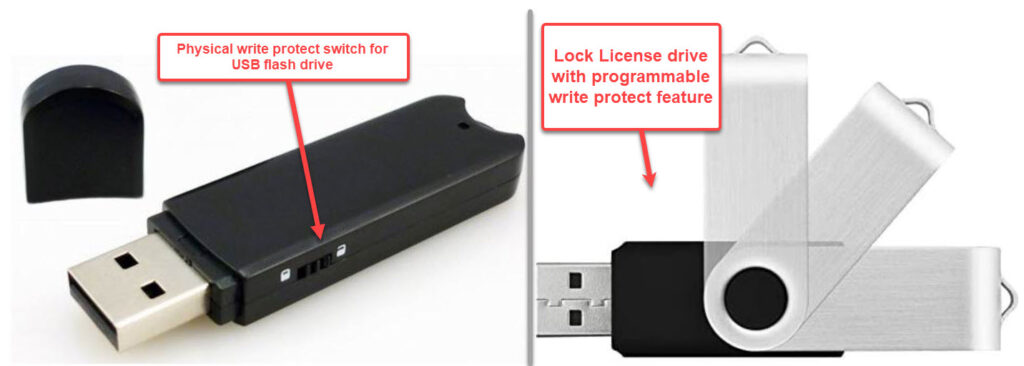
Method 1: Remove Write Protection by Checking Physical Lock Switch
❗ This is the first and most important step. Before you try any software solutions, always check your device for a physical switch.
Many USB flash drives and almost all SD card adapters come with a small sliding switch on the side. This switch acts as a lock to prevent accidental deletion of your photos or files. If this switch is slid towards the “lock” position (often indicated by a closed lock icon), your computer will see the disk as write-protected.
💡 Simply slide the switch to the opposite, unlocked position and reconnect the drive to your computer. This resolves the issue for a vast number of users.
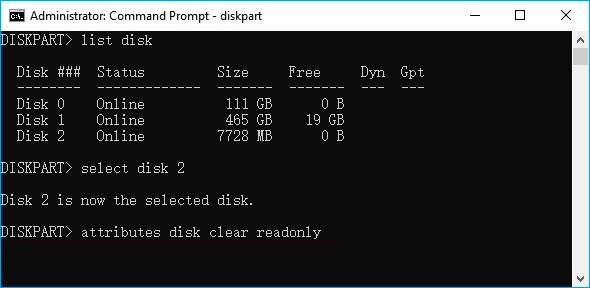
Method 2: Remove Write Protection from USB via Diskpart Command Line Tool
Diskpart is a powerful command-line tool built into Windows. It can be used to clear the read-only attribute from your storage device.
⚠ Note: Use this tool carefully. Always ensure you are selecting the correct disk, as operations on the wrong disk can lead to data loss.
- Type “cmd” in your Windows search bar.
- Right-click on “Command Prompt” and select “Run as administrator”.
- Type diskpart and press Enter.
- Type list disk and press Enter. This will show all storage disks connected to your PC. Identify your USB drive based on its size (e.g., Disk 1, 8GB).
- Type select disk X (replace X with your disk number) and press Enter.
- Type attributes disk clear readonly and press Enter.
- Type exit to close Diskpart.
This command tells Windows to remove the read-only flag from the entire disk. Afterward, check if you can now write to the drive.
Method 3: Remove Disk Write Protection by Modifying Windows Registry Settings
The Windows Registry controls many system settings. A specific key might be forcing all connected USB drives to be read-only. Modifying this key can solve the problem.
⚠ Crucial Warning: Editing the registry can cause system instability if done incorrectly. Please follow these steps exactly.
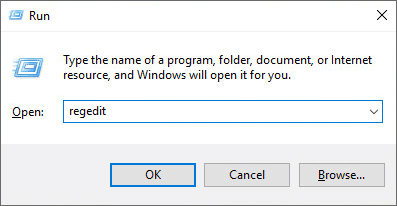
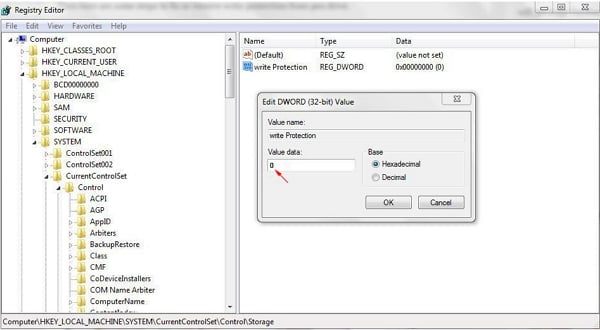
- Press Windows + R, type regedit, and press Enter to open the Registry Editor.
- Navigate to this path: HKEY_LOCAL_MACHINE\SYSTEM\CurrentControlSet\Control\StorageDevicePolicies
- Note: If you don’t see the StorageDevicePolicies folder, you may need to create it. Right-click on the Control folder, select New > Key, and name it StorageDevicePolicies.
- Right-click on the right pane, select New > DWORD (32-bit) Value, and name it WriteProtect.
- Double-click the new WriteProtect value and ensure its data is set to
0. - Click OK, close the Registry Editor, and restart your computer.
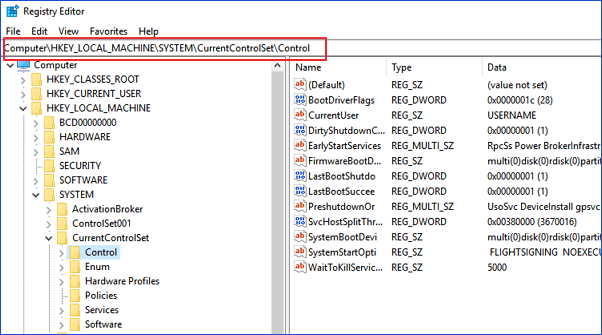
This method ensures that Windows is not applying a system-wide write protection policy to your removable drives.
Method 4: Unlock Write Protected USB Drive by Disabling BitLocker Drive Encryption
When BitLocker encryption is active on a hard drive partition or removable device, it secures your data by making it inaccessible without proper authentication. This security measure also prevents any modifications, meaning you cannot add, edit, or delete files while the drive is locked. If you need to manage or transfer data on the encrypted drive, you’ll need to disable BitLocker first. Below is a clear, step-by-step guide to turning off BitLocker and unlocking your disk:
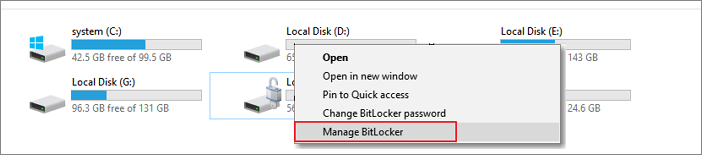
- Open File Explorer, locate your encrypted drive, right-click on it, and choose ”Manage BitLocker” from the menu.
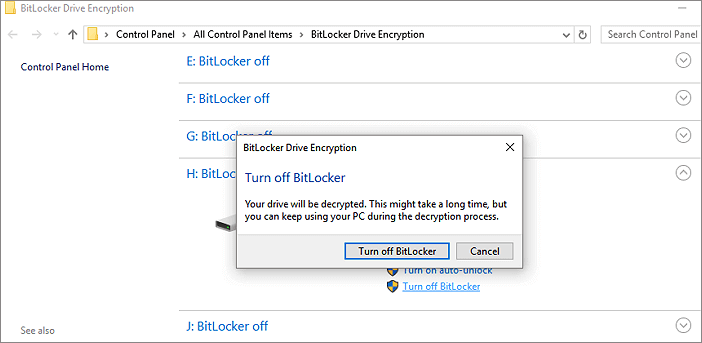
- In the BitLocker management window, find the locked drive and click the option that says ”Turn off BitLocker”.
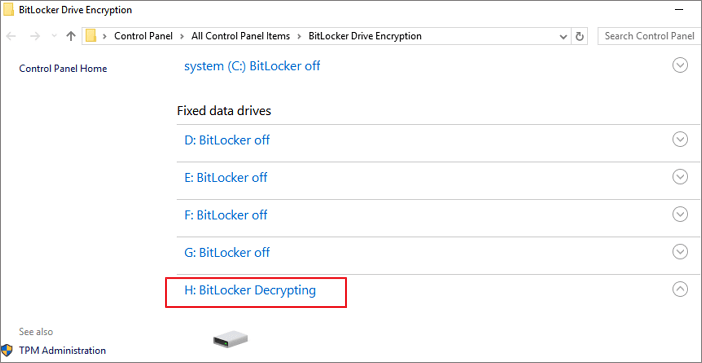
- The decryption process will begin automatically. Please wait patiently for the drive to fully decrypt.
Recover Data and Format USB after Write Protection Removal
Once you’ve successfully removed the write protection, you might find that your drive still isn’t working correctly, or you may want to format it to start fresh. It’s crucial to recover your data before formatting, as the process will erase all data on the drive.
#1. Recover Your Files with Data Recovery Software
After dealing with errors like write protection, your files might become inaccessible or get accidentally deleted during troubleshooting. This is where having a reliable data recovery tool is essential.
We highly recommend using WittyTool Data Recovery Free. This powerful file recovery software is designed for exactly these situations. It can deeply scan your USB drive—or even perform a full partition recovery—to find and recover hundreds of file types, including documents, photos, videos, and emails, even from corrupted, formatted, or inaccessible drives. Its intuitive interface makes it perfect for beginners—you simply select the drive, click scan, and preview the found files before recovery. It’s a safe and non-destructive way to recover deleted files before you take any further action like formatting. Having this free data recovery software on hand is a smart way to protect your important data from unexpected loss.
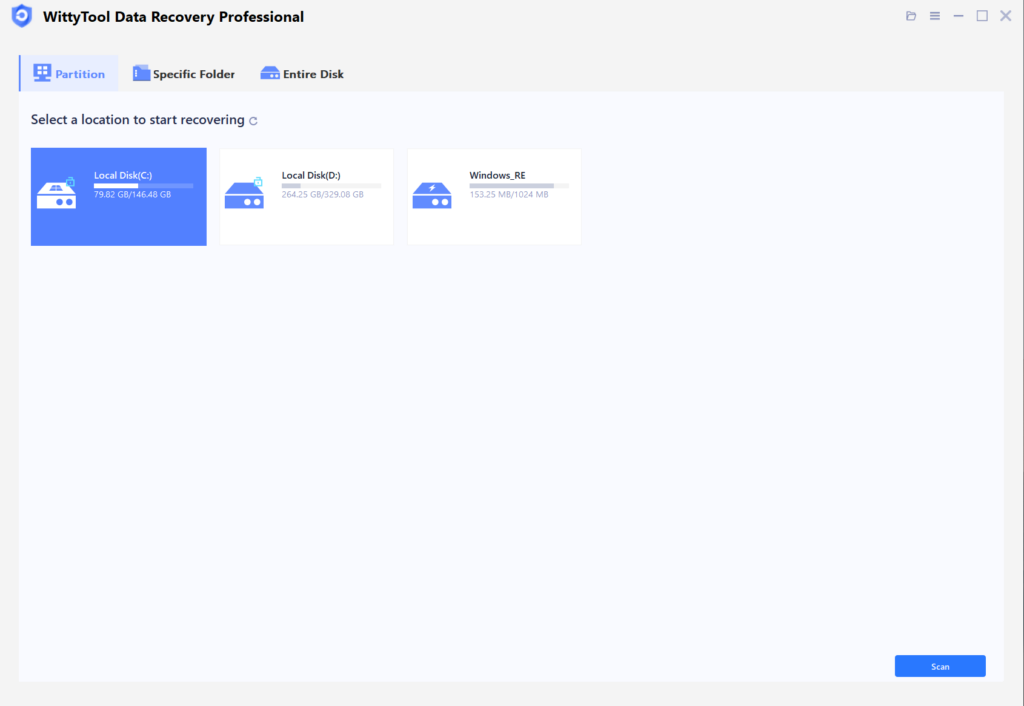
Step 1: Select Location and Initiate Scan
Launch Wittytool Data Recovery. Select the partition or drive where your deleted files were originally stored. Click “Scan” to begin searching for lost files.
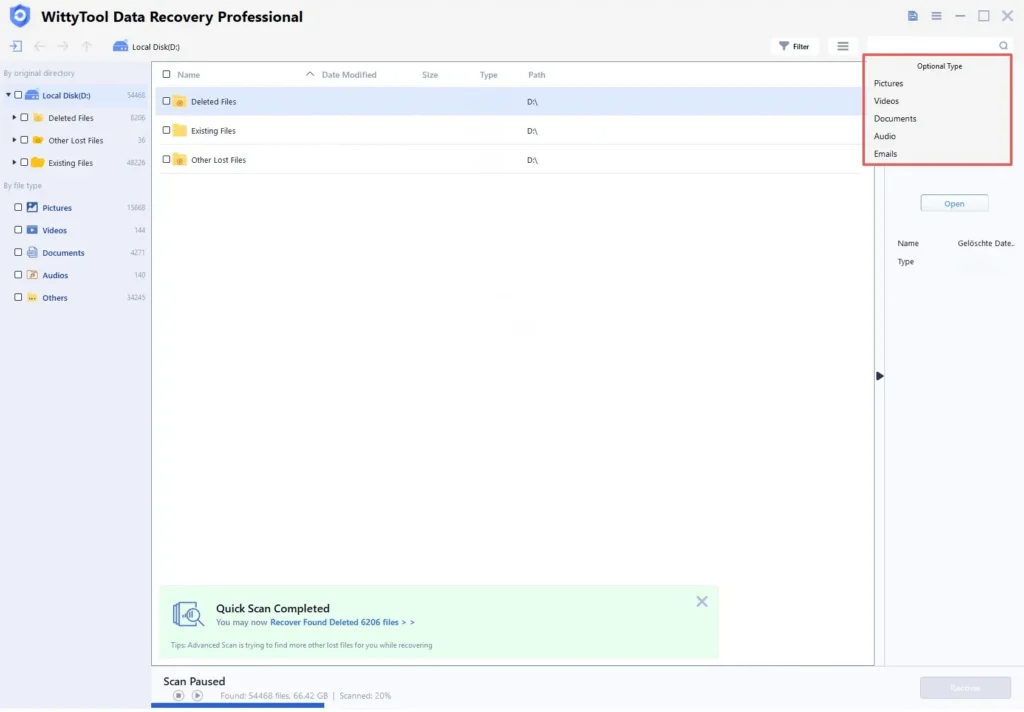
Step 2: Identify Files for Recovery
Once the scan completes, browse the results and select files you wish to recover. Utilize these options to locate files efficiently:
- Search by filename using the search box for fastest results
- Click the filter icon to display specific file types
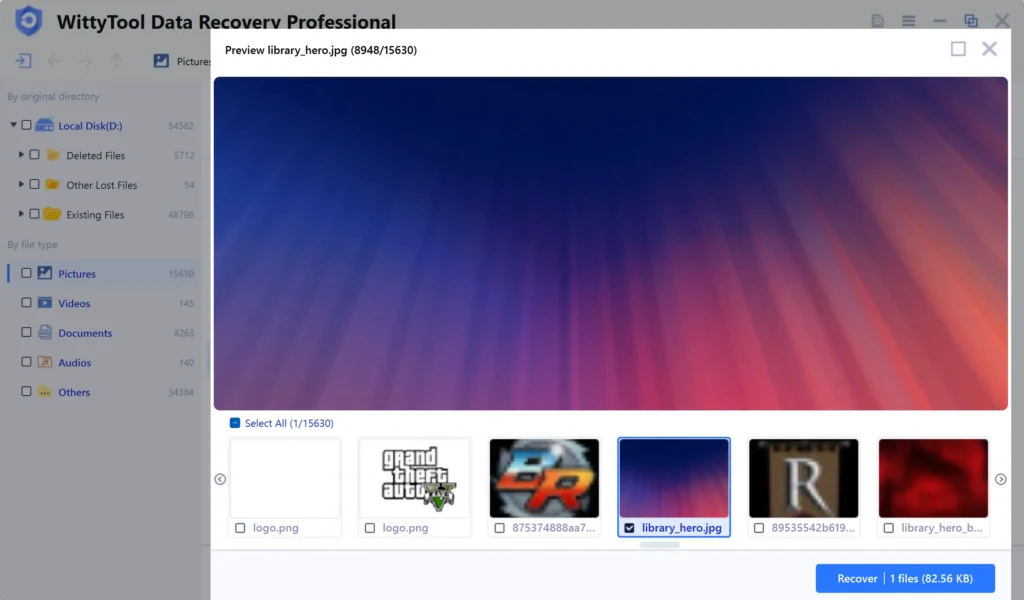
Step 3: Preview and recover your files
After previewing your recoverable files to verify content, select the target files and click “Recover”. Immediately choose a new storage location for saving recovered files.
CRITICAL: DO NOT select the original drive where data loss occurred to prevent overwriting – then click “Save” to complete the restoration.
#2. Format Your USB Drive for a Fresh Start
Formatting is a great way to reset your drive and fix underlying errors. Remember, this will delete everything.
- Back up your data first using the recovery method above.
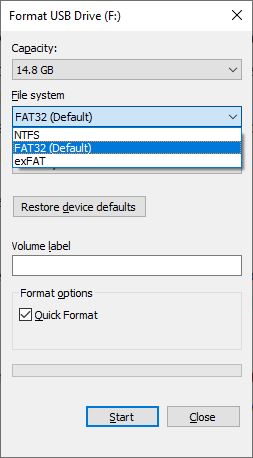
- Right-click your USB drive in “This PC” and select “Format”.
- Choose a file system. FAT32 is best for compatibility with other devices like game consoles or TVs. NTFS is better for use only with Windows computers and supports larger files.
- Check “Quick Format” and click “Start”.
Conclusion
The “disk is write protected” error is a common but solvable problem. The key is to methodically work through the solutions, starting with the physical switch. By using Windows tools like Diskpart and the Registry Editor, you can almost always regain control of your USB drive, pen drive, or SD card. And remember, for any data loss scare along the way, a tool like WittyTool Data Recovery Free is your best bet for getting your files back safely.
This Disk Is Write Protected FAQs
1. How can I fix a write-protected Micro SD card?
Micro SD cards often use a physical lock switch on their card adapter. Ensure this switch is in the unlocked position. If the problem persists, try the software methods listed above using a card reader.
2. Why is my disk suddenly write-protected?
Sudden write protection can be triggered by a virus infection, file system errors, or a change in the Windows Registry. It’s also possible the physical switch was accidentally moved.
3. Can I add write protection to my flash drive myself?
You can add protection by sliding the physical switch to the lock position (if available) or by using the Diskpart command in the Command Prompt (Admin). Instead of clear readonly, you would use attributes disk set readonly.
4. The disk is write protected pendrive how to format?
You cannot format a drive while it is write-protected. First, you must remove the write protection using one of the methods in this article. Once the protection is removed, you can then right-click the drive in File Explorer and select Format.