We’ve all been there – that heart-sinking moment when you realize you’ve permanently deleted precious photos from your gallery, or perhaps you’re facing a situation where your ssd not showing up on your computer. Whether it’s no backup, no cloud copy, just the terrifying “permanently deleted” message, or a missing drive, the feeling of panic is the same. But before you give up hope, you should know that “permanent” deletion isn’t always what it seems. This guide will walk you through tested methods to get those lost memories back, even without a backup.
Is It Possible to Recover Permanently Deleted Photos?
❗ The short answer is: Yes, it’s often possible.
When you delete a photo and then empty the “Recently Deleted” folder, your device doesn’t immediately erase the actual data. Instead, it marks the space that photo occupied as “available for new data.” The photo remains on your storage drive, invisible to you, until it gets overwritten by new files. This fundamental principle of how data storage works is precisely what makes partition recovery possible through specialized software.
This is your critical recovery window! The key to success is acting quickly. The more you use your device (taking new photos, downloading apps, browsing the web), the higher the chance the deleted data will be overwritten and lost for good.
💡 Industry Insight: According to data recovery experts, the success rate for recovering recently deleted files from internal storage can be as high as 90% if you attempt recovery immediately after deletion. This rate drops significantly with continued device use.
Recover Permanently Deleted Photos from Gallery Without Backup via Computer Software
If you have an Android device, one of the most reliable ways to recover photos without a backup is by using a professional data recovery tool on your computer. This method works by scanning your phone’s internal storage directly for traces of deleted files.
For this guide, we’ll use WittyTool Data Recovery, a powerful yet user-friendly data recovery software perfect for beginners. It stands out not only for its straightforward interface but also for its advanced capabilities, such as its effectiveness to remove shortcut virus and securely recover files deleted from recycle bin. This makes it an all-in-one tool for tackling various data loss scenarios, ensuring your files are retrieved safely and efficiently.
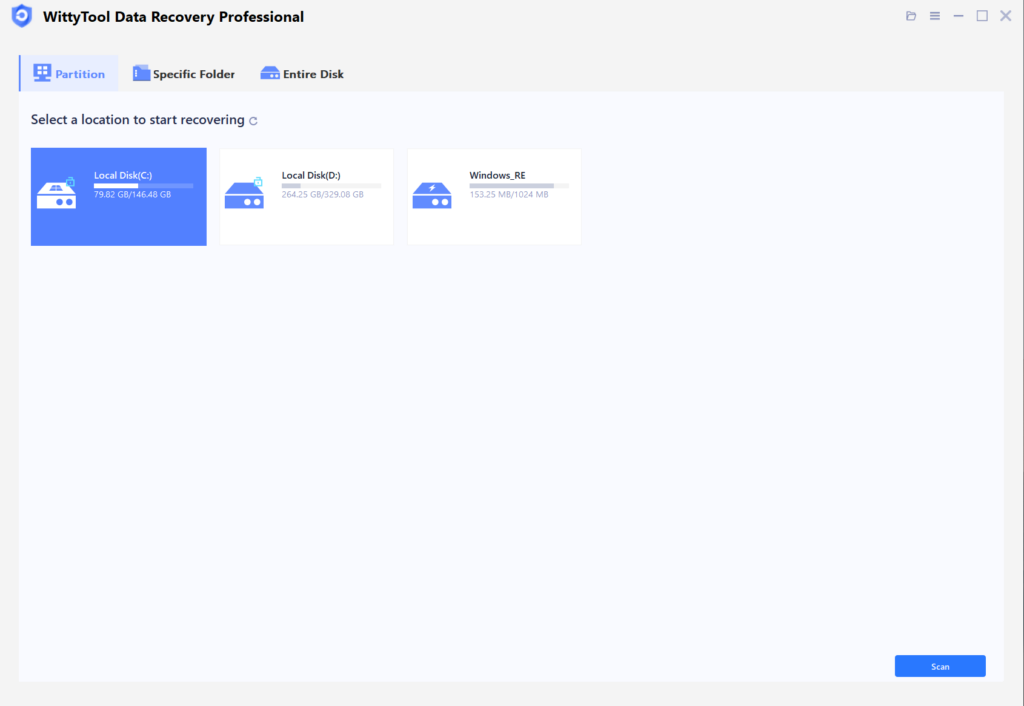
Step 1: Select Location and Initiate Scan
Launch Wittytool Data Recovery. Select the partition or drive where your deleted files were originally stored. Click “Scan” to begin searching for lost files.
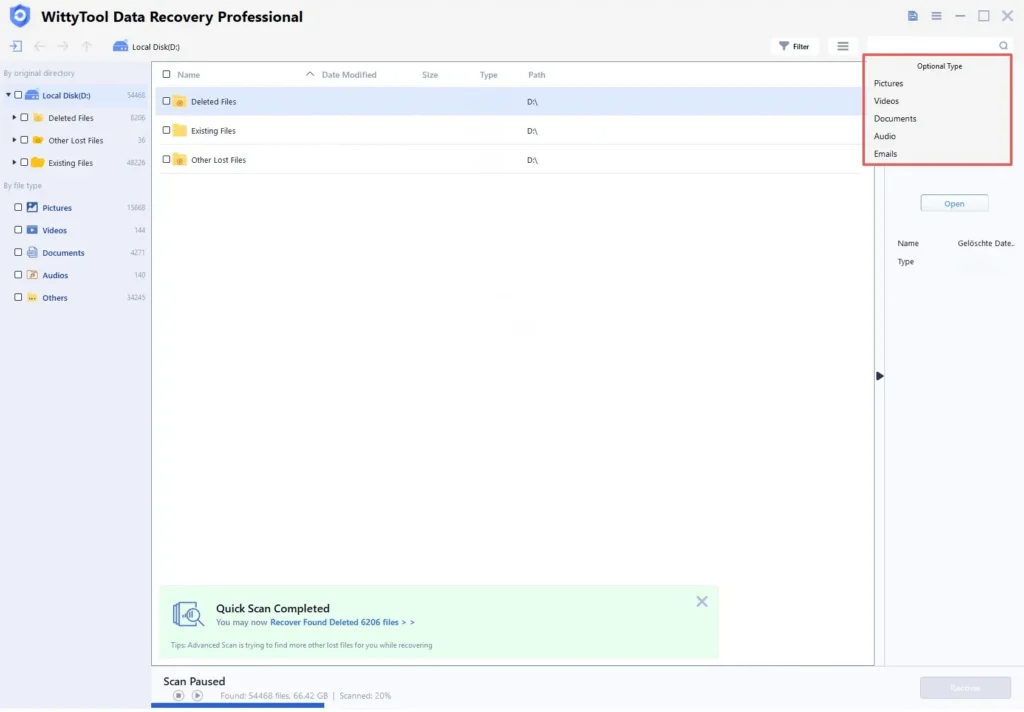
Step 2: Identify Files for Recovery
Once the scan completes, browse the results and select files you wish to recover. Utilize these options to locate files efficiently:
- Search by filename using the search box for fastest results
- Click the filter icon to display specific file types
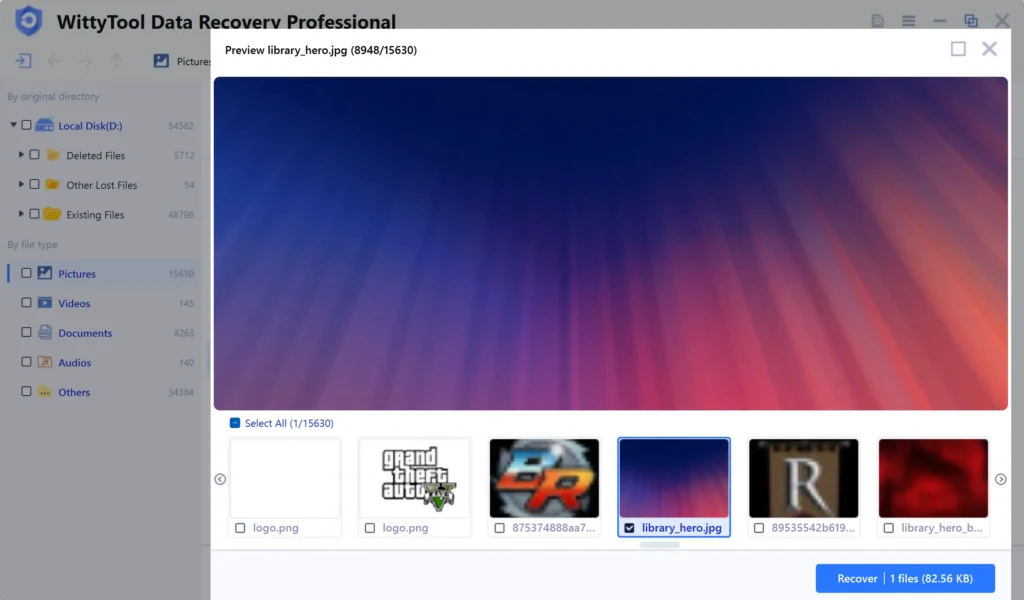
Step 3: Preview and recover your files
After previewing your recoverable files to verify content, select the target files and click “Recover”. Immediately choose a new storage location for saving recovered files.
CRITICAL: DO NOT select the original drive where data loss occurred to prevent overwriting – then click “Save” to complete the restoration.
Restore Permanently Deleted Pictures from the Gallery on Your Android Device
Sometimes, using a computer isn’t an option. Thankfully, there are also Android recovery apps designed to work directly on your device. It’s important to choose a reputable app from the Google Play Store.
💡 Note: For these apps to work effectively, your phone often needs to be rooted. Rooting gives the app deeper access to scan for deleted data, but it can also void your warranty and has risks. Some apps offer non-root scans, but their success rate might be lower.
How to Use a Recovery App:
- Choose a Trusted App: Search the Play Store for “photo recovery” or “data recovery.” Read reviews and check ratings. Popular options include DiskDigger, Dumpster, and EaseUS MobiSaver.
- Install and Scan: Install the app and grant it the necessary permissions. Start a deep scan of your internal storage. This process can take some time.
- Select and Save: After the scan, the app will show you a list of recoverable photos. Select the ones you want to save. The app will usually ask you to save them to a new folder or cloud storage to prevent overwriting.
How to Retrieve Permanently Deleted Photos from Gallery with Google Drive
This method is a long shot but worth checking immediately, as it relies on a backup you may not know existed.
Google Drive’s backup service (for Android) and Google Photos can sometimes automatically back up your camera roll without you explicitly setting it up. This often depends on your default settings when you set up your phone.
Steps to Check Google Photos:
- Open the Google Photos app on your phone or go to the Google Photos website on your computer.
- Log in with the same Google account linked to your phone.
- Use the search bar or scroll through your library to see if your deleted photos are there.
- If you find them, you can simply select them and tap “Download” or “Restore” to save them back to your device.
❗ Important: This only works if you had automatic sync enabled before the photos were deleted. If the sync was off or the photos were never uploaded, they won’t be in Google Photos. This is not a recovery method but a restore-from-backup method, which is why it’s crucial to enable cloud sync for the future.
Summary of Methods
| Method | Best For | Success Rate | Key Consideration |
|---|---|---|---|
| Computer Software (WittyTool Data Recovery) | Deep, reliable recovery; unrooted phones | High | Requires a computer and USB cable |
| Android Recovery App | Quick recovery when no PC is available | Medium (often requires root) | Rooting can be complex and risky |
| Google Drive/Photos | Restoring from an unknown automatic backup | Low (only if backup existed) | Not a true recovery method; requires pre-existing backup |
The #1 takeaway: Stop using your phone the instant you realize photos are gone! The quicker you act, the better your chances of a successful recovery using data recovery software.
Android Permanently Deleted Photo Recovery FAQs
How do I recover permanently deleted pictures from my gallery?
The most effective way is to use a professional data recovery tool on a computer, like WittyTool, to scan your connected Android phone. This method avoids writing new data to the phone’s storage, increasing the chance of recovery.
How to recover 2 year old deleted photos?
Recovering photos deleted two years ago is extremely challenging. The data was most likely overwritten by new information a long time ago. You would have to check any existing backups you might have created back then, such as in Google Photos, a computer, or an external hard drive. Recovery software would have a very low chance of success after so much time.
Is there any way to recover permanently deleted photos on Samsung?
Yes, Samsung phones are Android devices, so the same methods apply. You can use computer software like WittyTool or an Android recovery app. Samsung also has its own “Recycle Bin” feature in the Gallery app on newer models (like the Galaxy S series), which holds deleted photos for 30 days. Check if this feature was enabled on your device.
Where do permanently deleted photos go?
They don’t “go” anywhere physically. The space they occupied on your phone’s internal storage is simply marked as “available.” The photo data remains in that space until it is overwritten by new data from apps, system processes, or new photos you take. This is why recovery is possible until that overwriting happens.