Last updated on December 11, 2025
Backing up your computer or cloning a hard drive doesn’t have to be confusing or expensive. Two popular free tools, Rescuezilla and Clonezilla, are often recommended for disk cloning and system recovery. But which one is right for you?
In this guide, we’ll break down both programs in simple terms, compare their strengths and weaknesses, and even show you an easier alternative. Let’s dive in!
Rescuezilla Review: What Is Rescuezilla and How Do You Use It?
Rescuezilla is an open-source disk cloning and backup solution designed to be user-friendly. It’s based on the popular Clonezilla but offers a graphical interface (GUI) that makes it easier for beginners to navigate.
❗ Key Features:
- Simple drag-and-drop interface.
- Supports creating full disk images or cloning directly.
- Can backup and restore both Linux and Windows systems.
- Boots from a USB drive.
💡 How to Use Rescuezilla to Clone a Disk (Basic Steps):
Step 1. Download the newest version of Rescuezilla from its official website.
Step 2. Download a tool called Rufus and open it on your Windows computer. Use it to “burn” the Rescuezilla file onto your USB drive—this makes the drive bootable.
Step 3. Restart your computer. As it turns on, repeatedly press the key (usually F2, Delete, or F12, depending on your computer brand) to enter BIOS settings. Here, change the boot order to make the USB drive the first option. Save the changes and exit. Your computer will restart again and load the Rescuezilla welcome screen. Select your language, then click “Start Rescuezilla.”
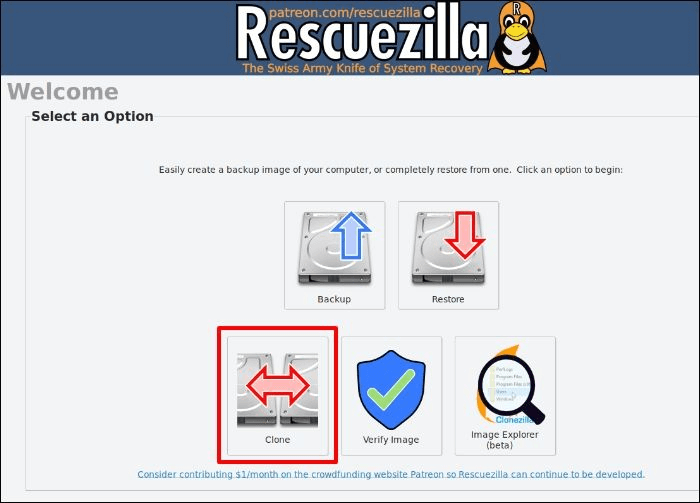
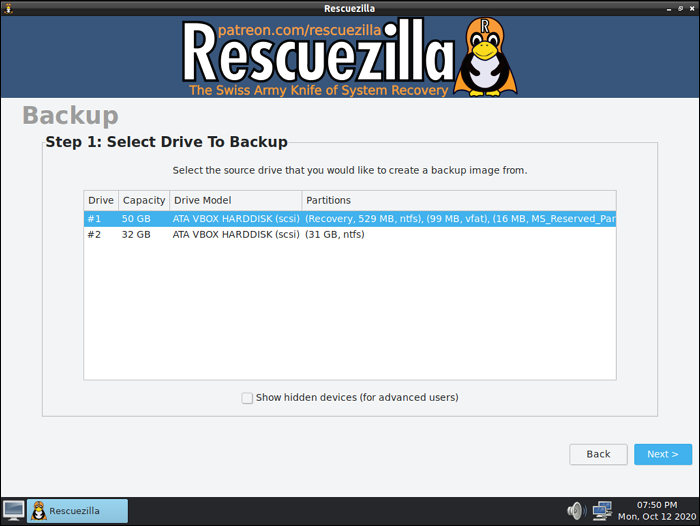
Step 4. On the main screen, choose the “Clone” option. You’ll see a note explaining the difference between cloning and imaging—click “Next.” Then, select the original hard drive you want to copy.
Step 5. Choose the destination drive (the new hard drive where you want the data to be copied). Click “Next.” Rescuezilla will show all the partitions that will be cloned—they’re already selected, so just click “Next” again.
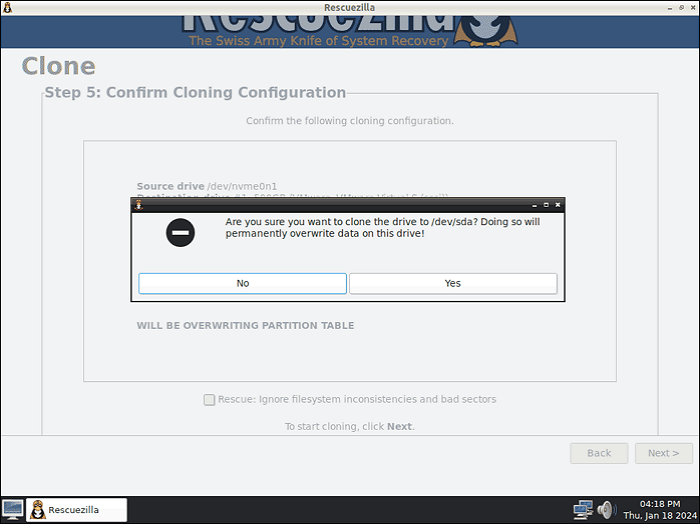
Step 6. A warning message will remind you that all data on the destination drive may be overwritten. If you’re sure, select “Yes” to continue.
Step 7. The cloning will begin and usually finishes in a few minutes. If any errors occur, they’ll be shown at the end—you can restart the process if needed. Once done, click the “Rescuezilla” button in the interface and choose “Shutdown.”
You’re all done! You’ve successfully cloned your hard drive using Rescuezilla.
Clonezilla Review: What Is Clonezilla and How Do You Use It?
Clonezilla is a powerful and highly respected open-source tool for disk imaging and cloning. It’s been around for years and is trusted by IT professionals. However, it uses a text-based menu system, which can be intimidating for new users.
❗ Key Features:
- Supports a wide range of file systems.
- Can clone individual partitions or entire disks.
- Offers advanced options for experts.
- Completely free and open-source.
💡 How to Use Clonezilla to Clone a Disk (Basic Steps):
First, head over to the official Clonezilla website to download the necessary files.
Next, you’ll need a tool called Rufus. Download and open Rufus, then use it to turn a USB drive into bootable media. Simply select the Clonezilla file you downloaded earlier and let Rufus write it to the USB.
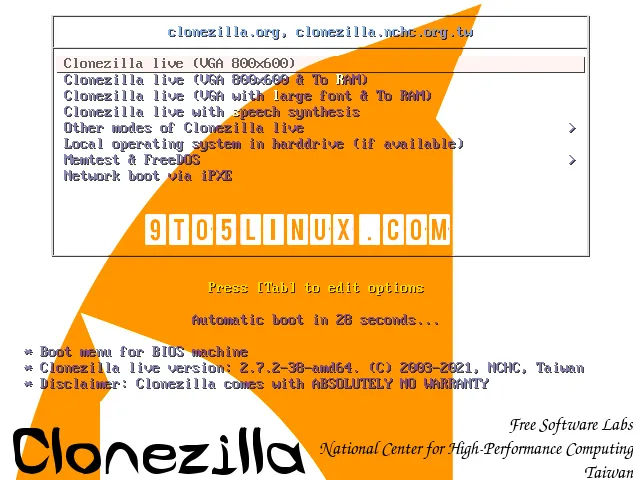
Now, restart your computer. As it powers back on, quickly press one of these keys—F2, F10, Esc, or Delete—to open the boot menu. From there, change the startup order so the computer boots from your USB drive. Once you see the Clonezilla screen, choose “Clonezilla live” and press Enter.
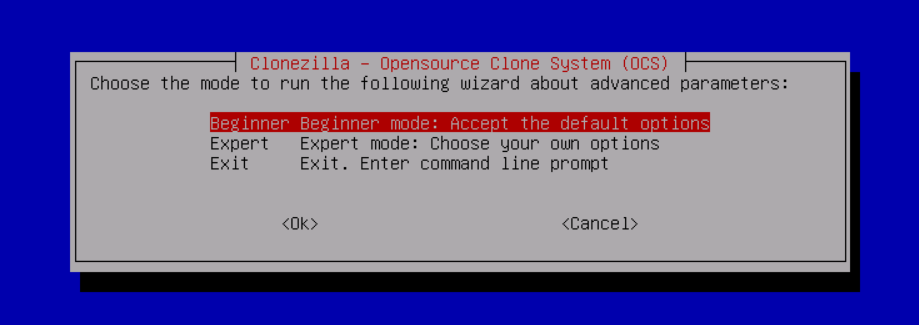
Select your language and keyboard layout. Then click “Start Clonezilla.” On the next screen, pick “device-device”—this lets you copy everything from one drive to another. To keep things simple, go with “Beginner mode.”
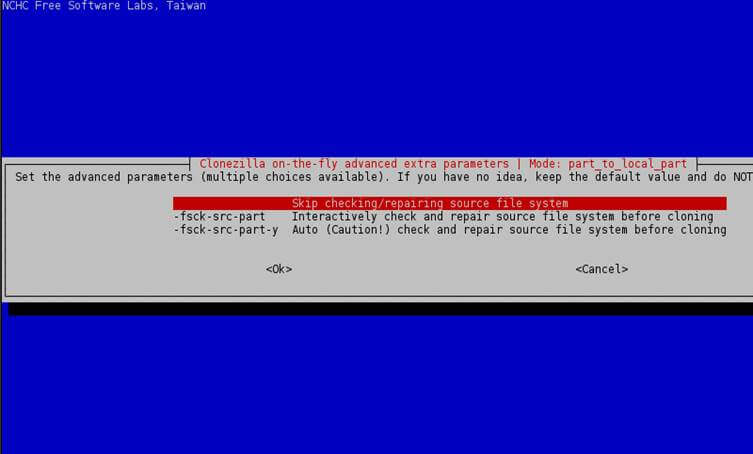
You’ll then be asked to choose which drive to copy from (the source) and which to copy to (the target). It’s a good idea to select “Skip checking/repairing source file system” to save time. Confirm everything by typing “Y” three times when prompted.
The cloning process will begin. This might take a while, so be patient. Once it’s done, you can turn off your computer. Congratulations! You’ve successfully cloned your hard drive.
Cloning with Clonezilla can feel a bit technical the first time. If you’re new to disk cloning, you might find Rescuezilla easier to use compared to Clonezilla. Here’s a quick side-by-side look at both tools.
Rescuezilla vs Clonezilla: Detailed Comparison
To help you decide, here’s a side-by-side comparison:
| Feature | Rescuezilla | Clonezilla |
|---|---|---|
| Ease of Use | ✅ Graphical interface, beginner-friendly | ❌ Text-based menus, steep learning curve |
| Platforms | Windows, Linux | Windows, Linux, macOS |
| Backup Speed | Moderate | Fast |
| Advanced Options | Limited | Extensive |
| Community Support | Growing | Large and established |
| Error Handling | Basic warnings | Detailed logs |
📊 According to a 2023 survey by Data Recovery Labs, approximately 42% of home users prefer GUI-based tools like Rescuezilla for personal backups, while IT departments favor Clonezilla for its control.
Which One Should You Choose?
- Choose Rescuezilla if: You’re a beginner and want a simple, visual way to backup or clone your drives.
- Choose Clonezilla if: You’re experienced or need advanced customization for complex tasks.
Both are legitimate and free, but your choice depends on your comfort level and needs. If you feel that neither of these two products is suitable for you, I will introduce you to a better choice below.
How to Clone a Hard Drive Easily with WittyTool Disk Clone
If neither Rescuezilla nor Clonezilla feels like the right fit, there’s a third option: WittyTool Disk Clone. This Windows-based tool is designed for simplicity and efficiency—perfect for casual users who want a straightforward cloning process.
🔥 Why Try WittyTool?
- Clean, intuitive interface—no technical knowledge needed.
- Faster cloning speeds compared to many open-source tools.
- Supports SSD, HDD, and various storage devices.
- A robust utility for cloning disks or partitions, featuring powerful network cloning capabilities that allow users to clone multiple computers simultaneously over a network.
- Uniquely offers the crucial ability to convert disk MBR to a GPT during the cloning process, ensuring full compatibility with modern UEFI boot systems to fix “secure boot enabled but not active” issue for example and simplifying upgrades to newer hardware.
💡 How to Use WittyTool Disk Clone:
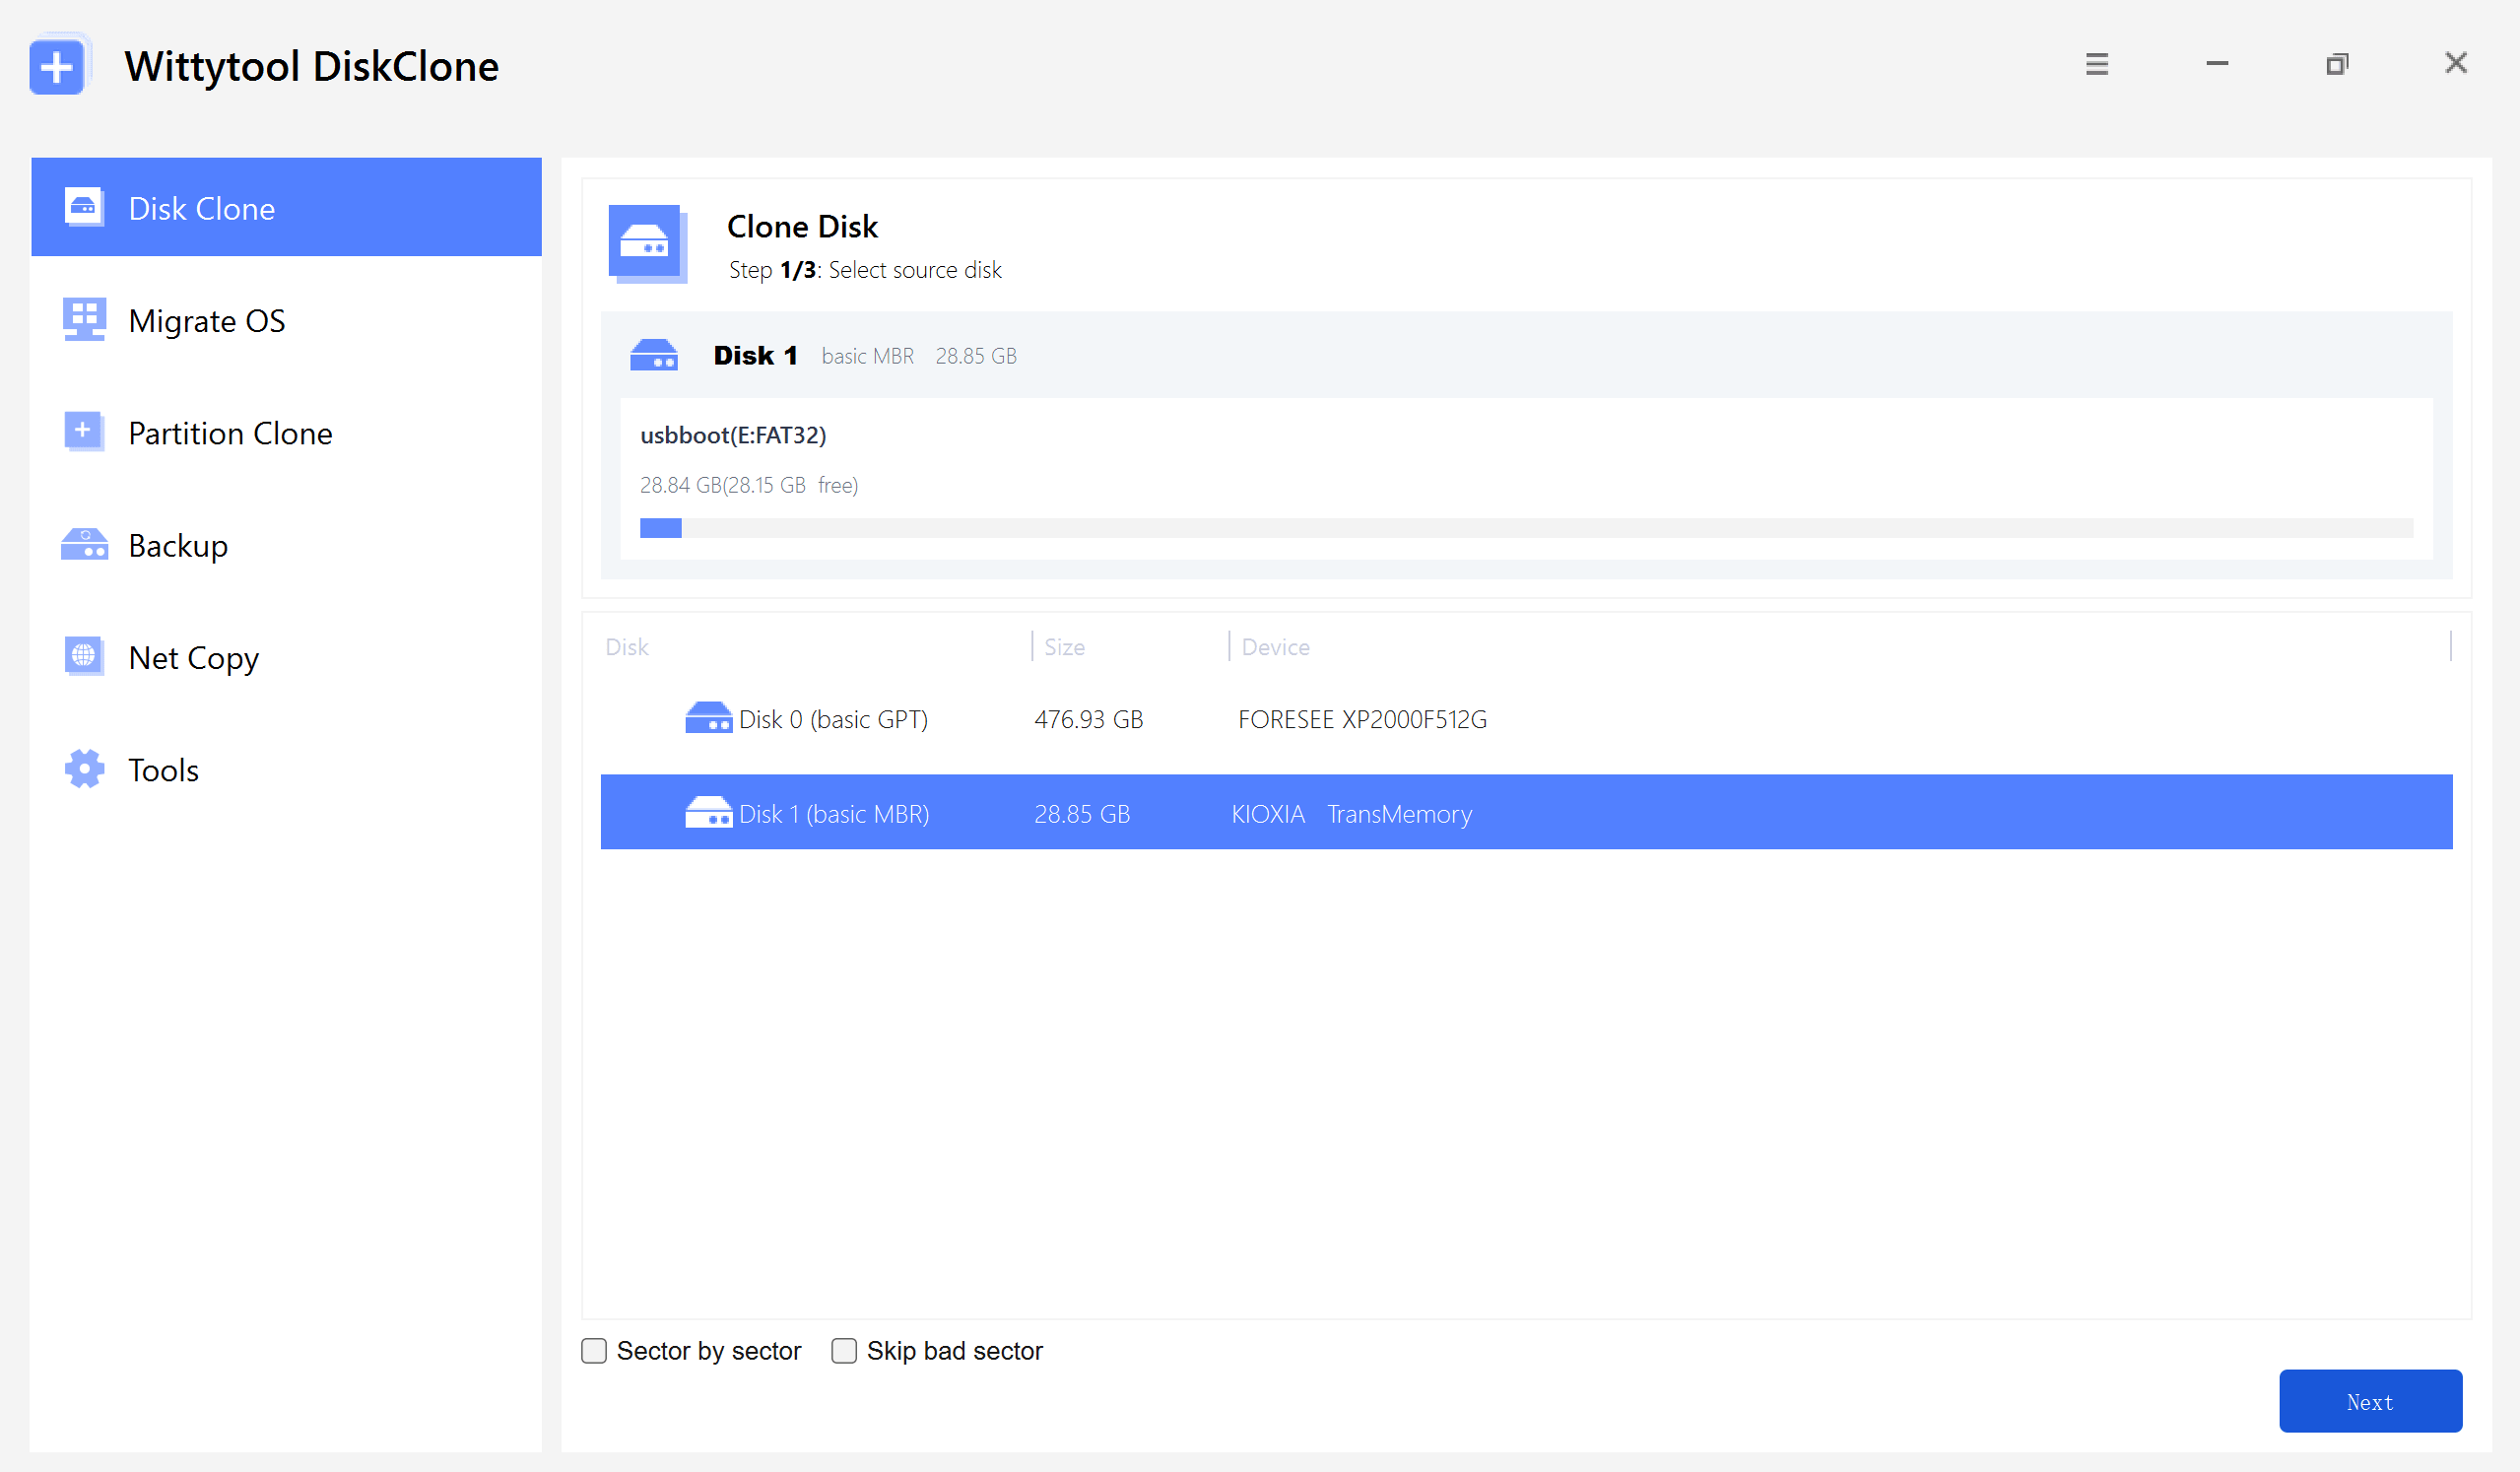
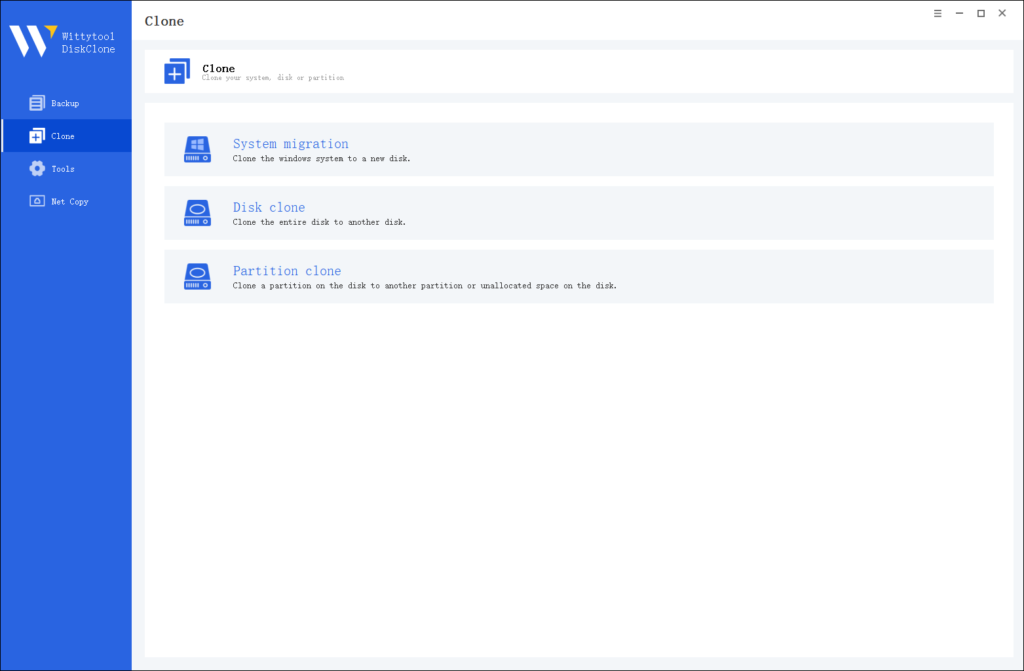
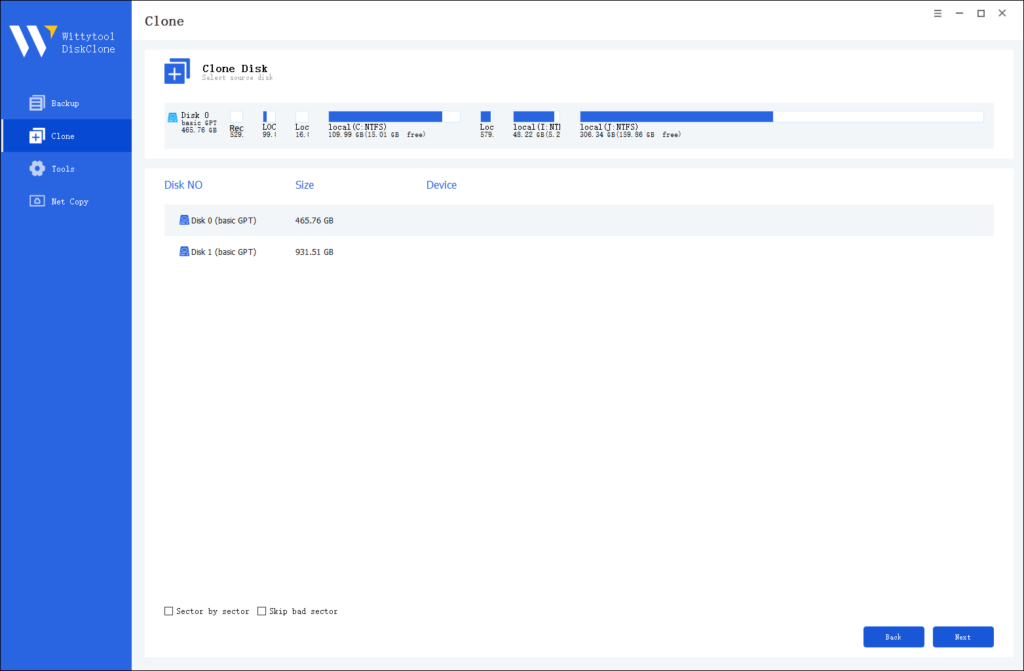
Step 1: Select Disk Clone (or Partition Clone for a nearly identical workflow), then choose your source disk and click Next.
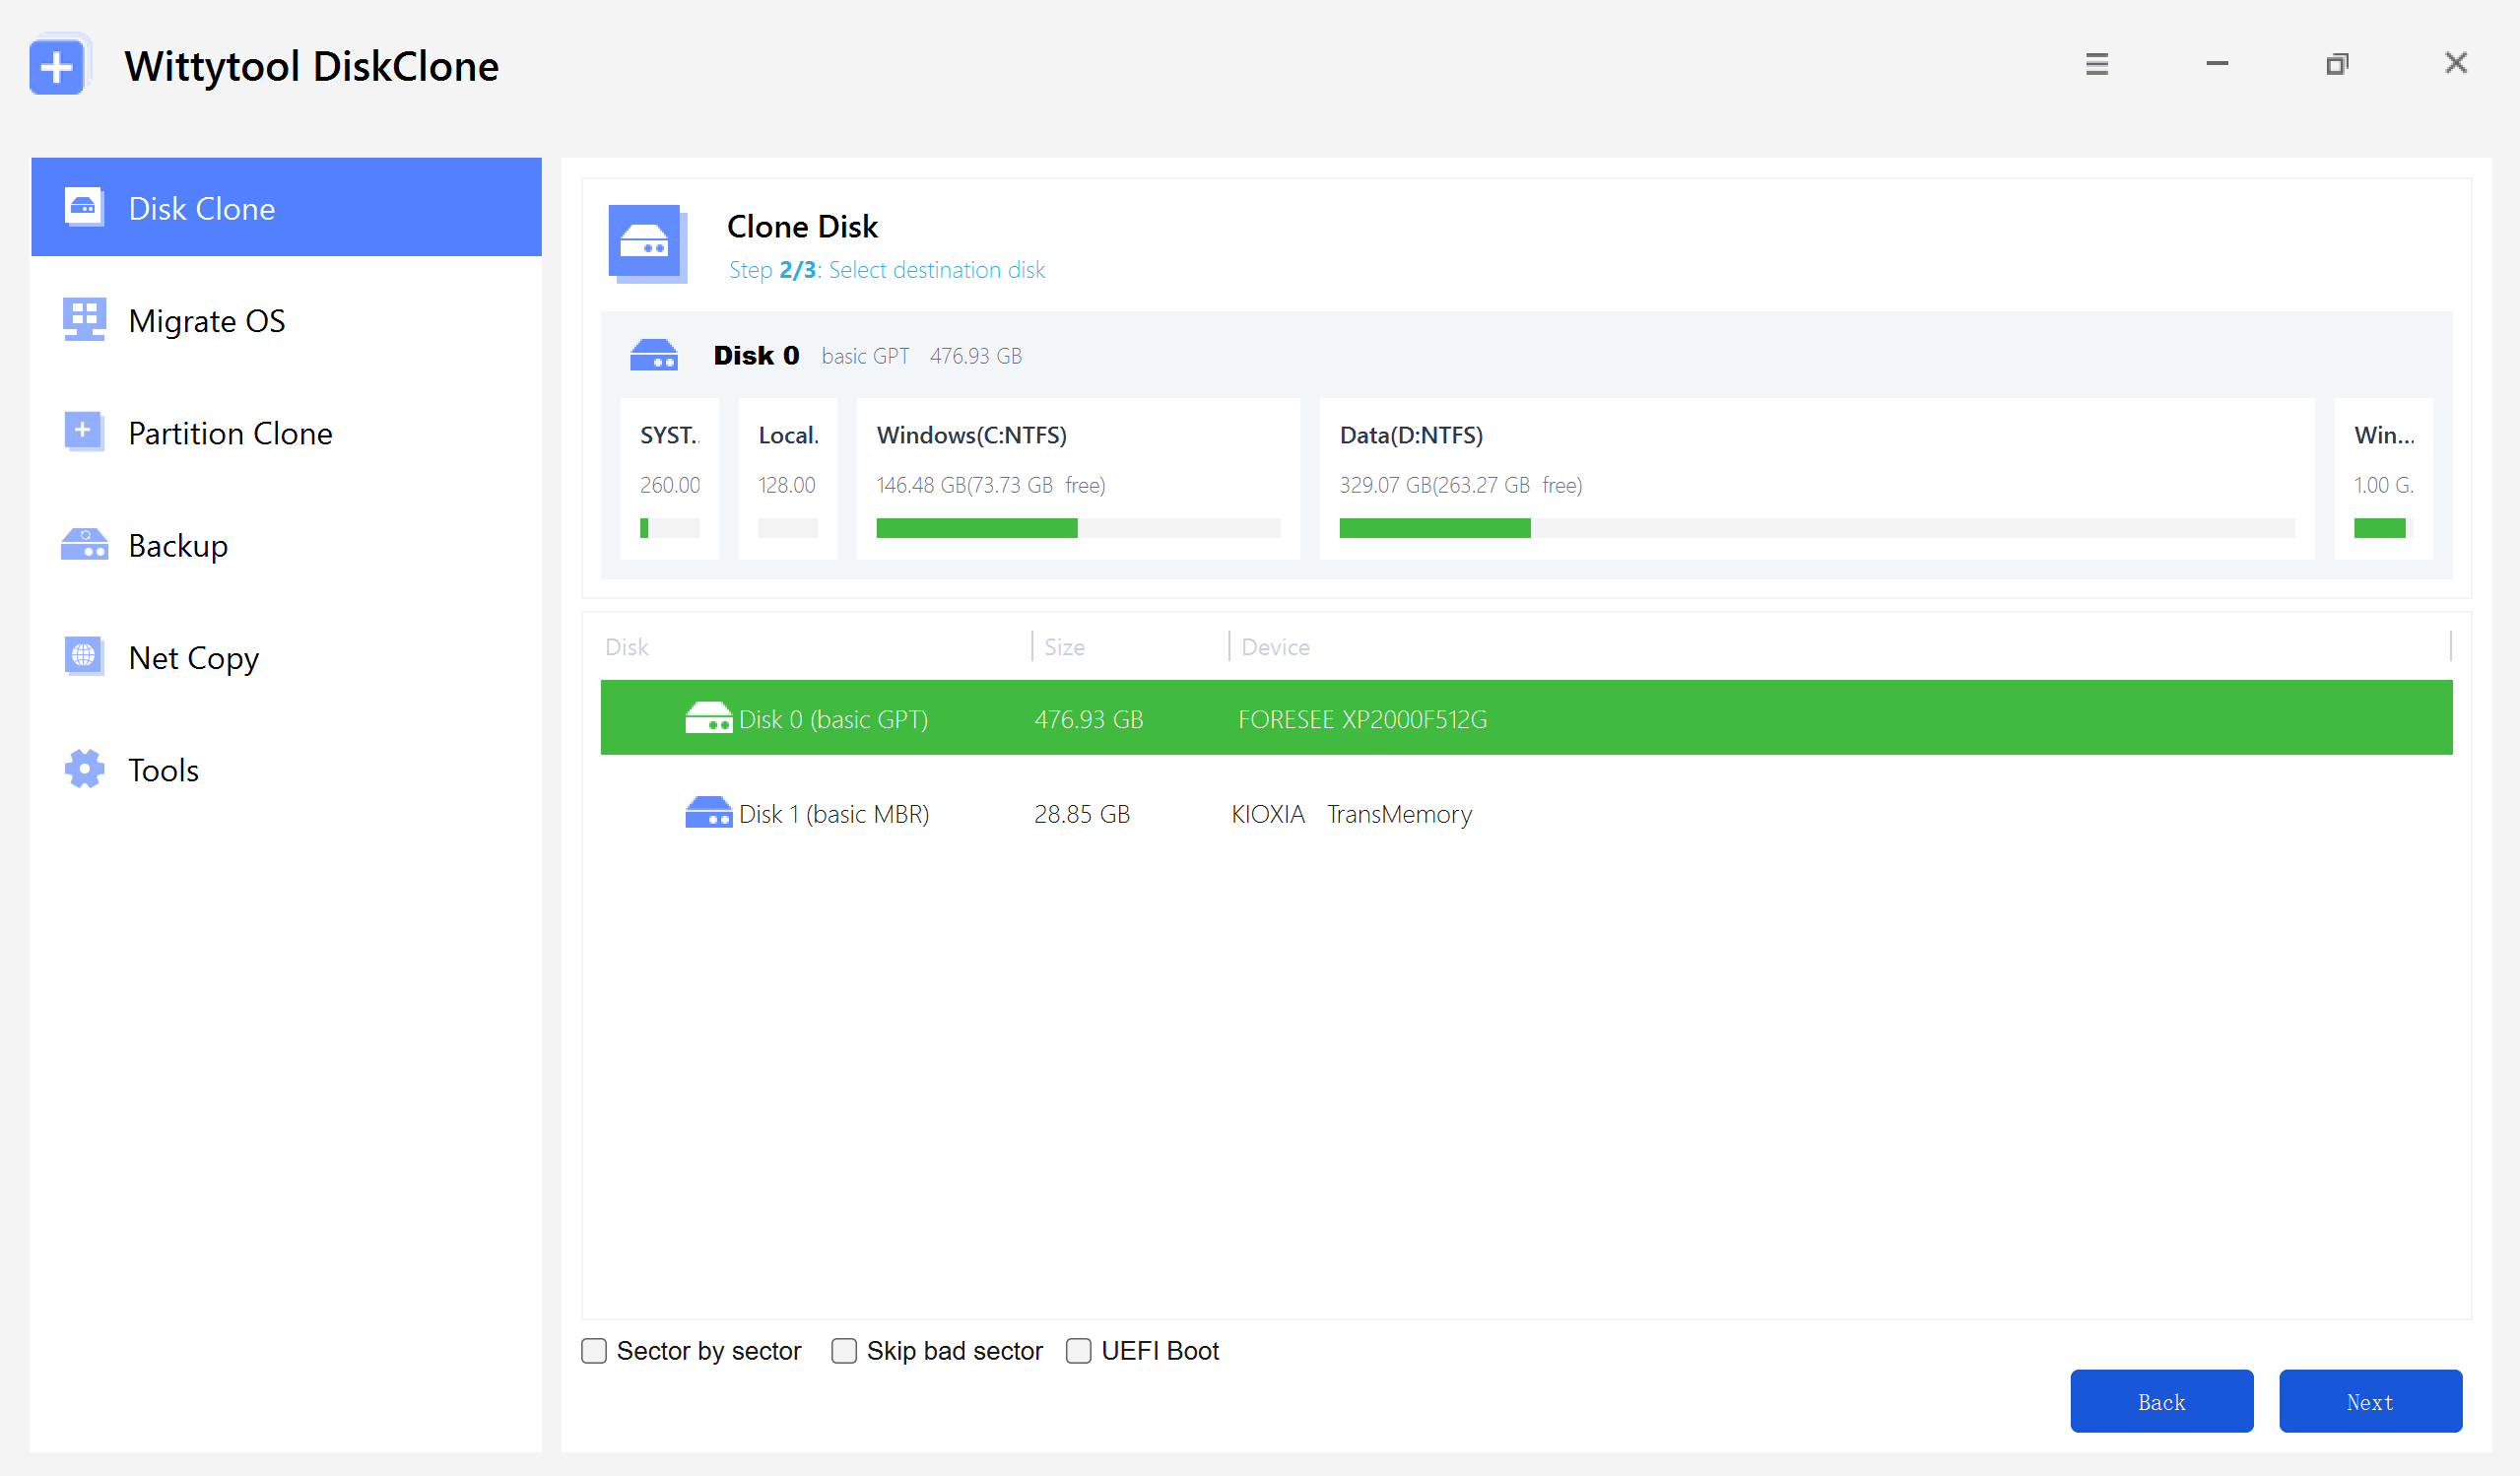
Step 2: Choose your destination disk and click Next to access the configuration settings.
Here, you can enable sector-level cloning, skip bad sectors, or check the UEFI BOOT option to convert the boot mode, ensuring the drive is fully compatible with the UEFI firmware of modern motherboards.
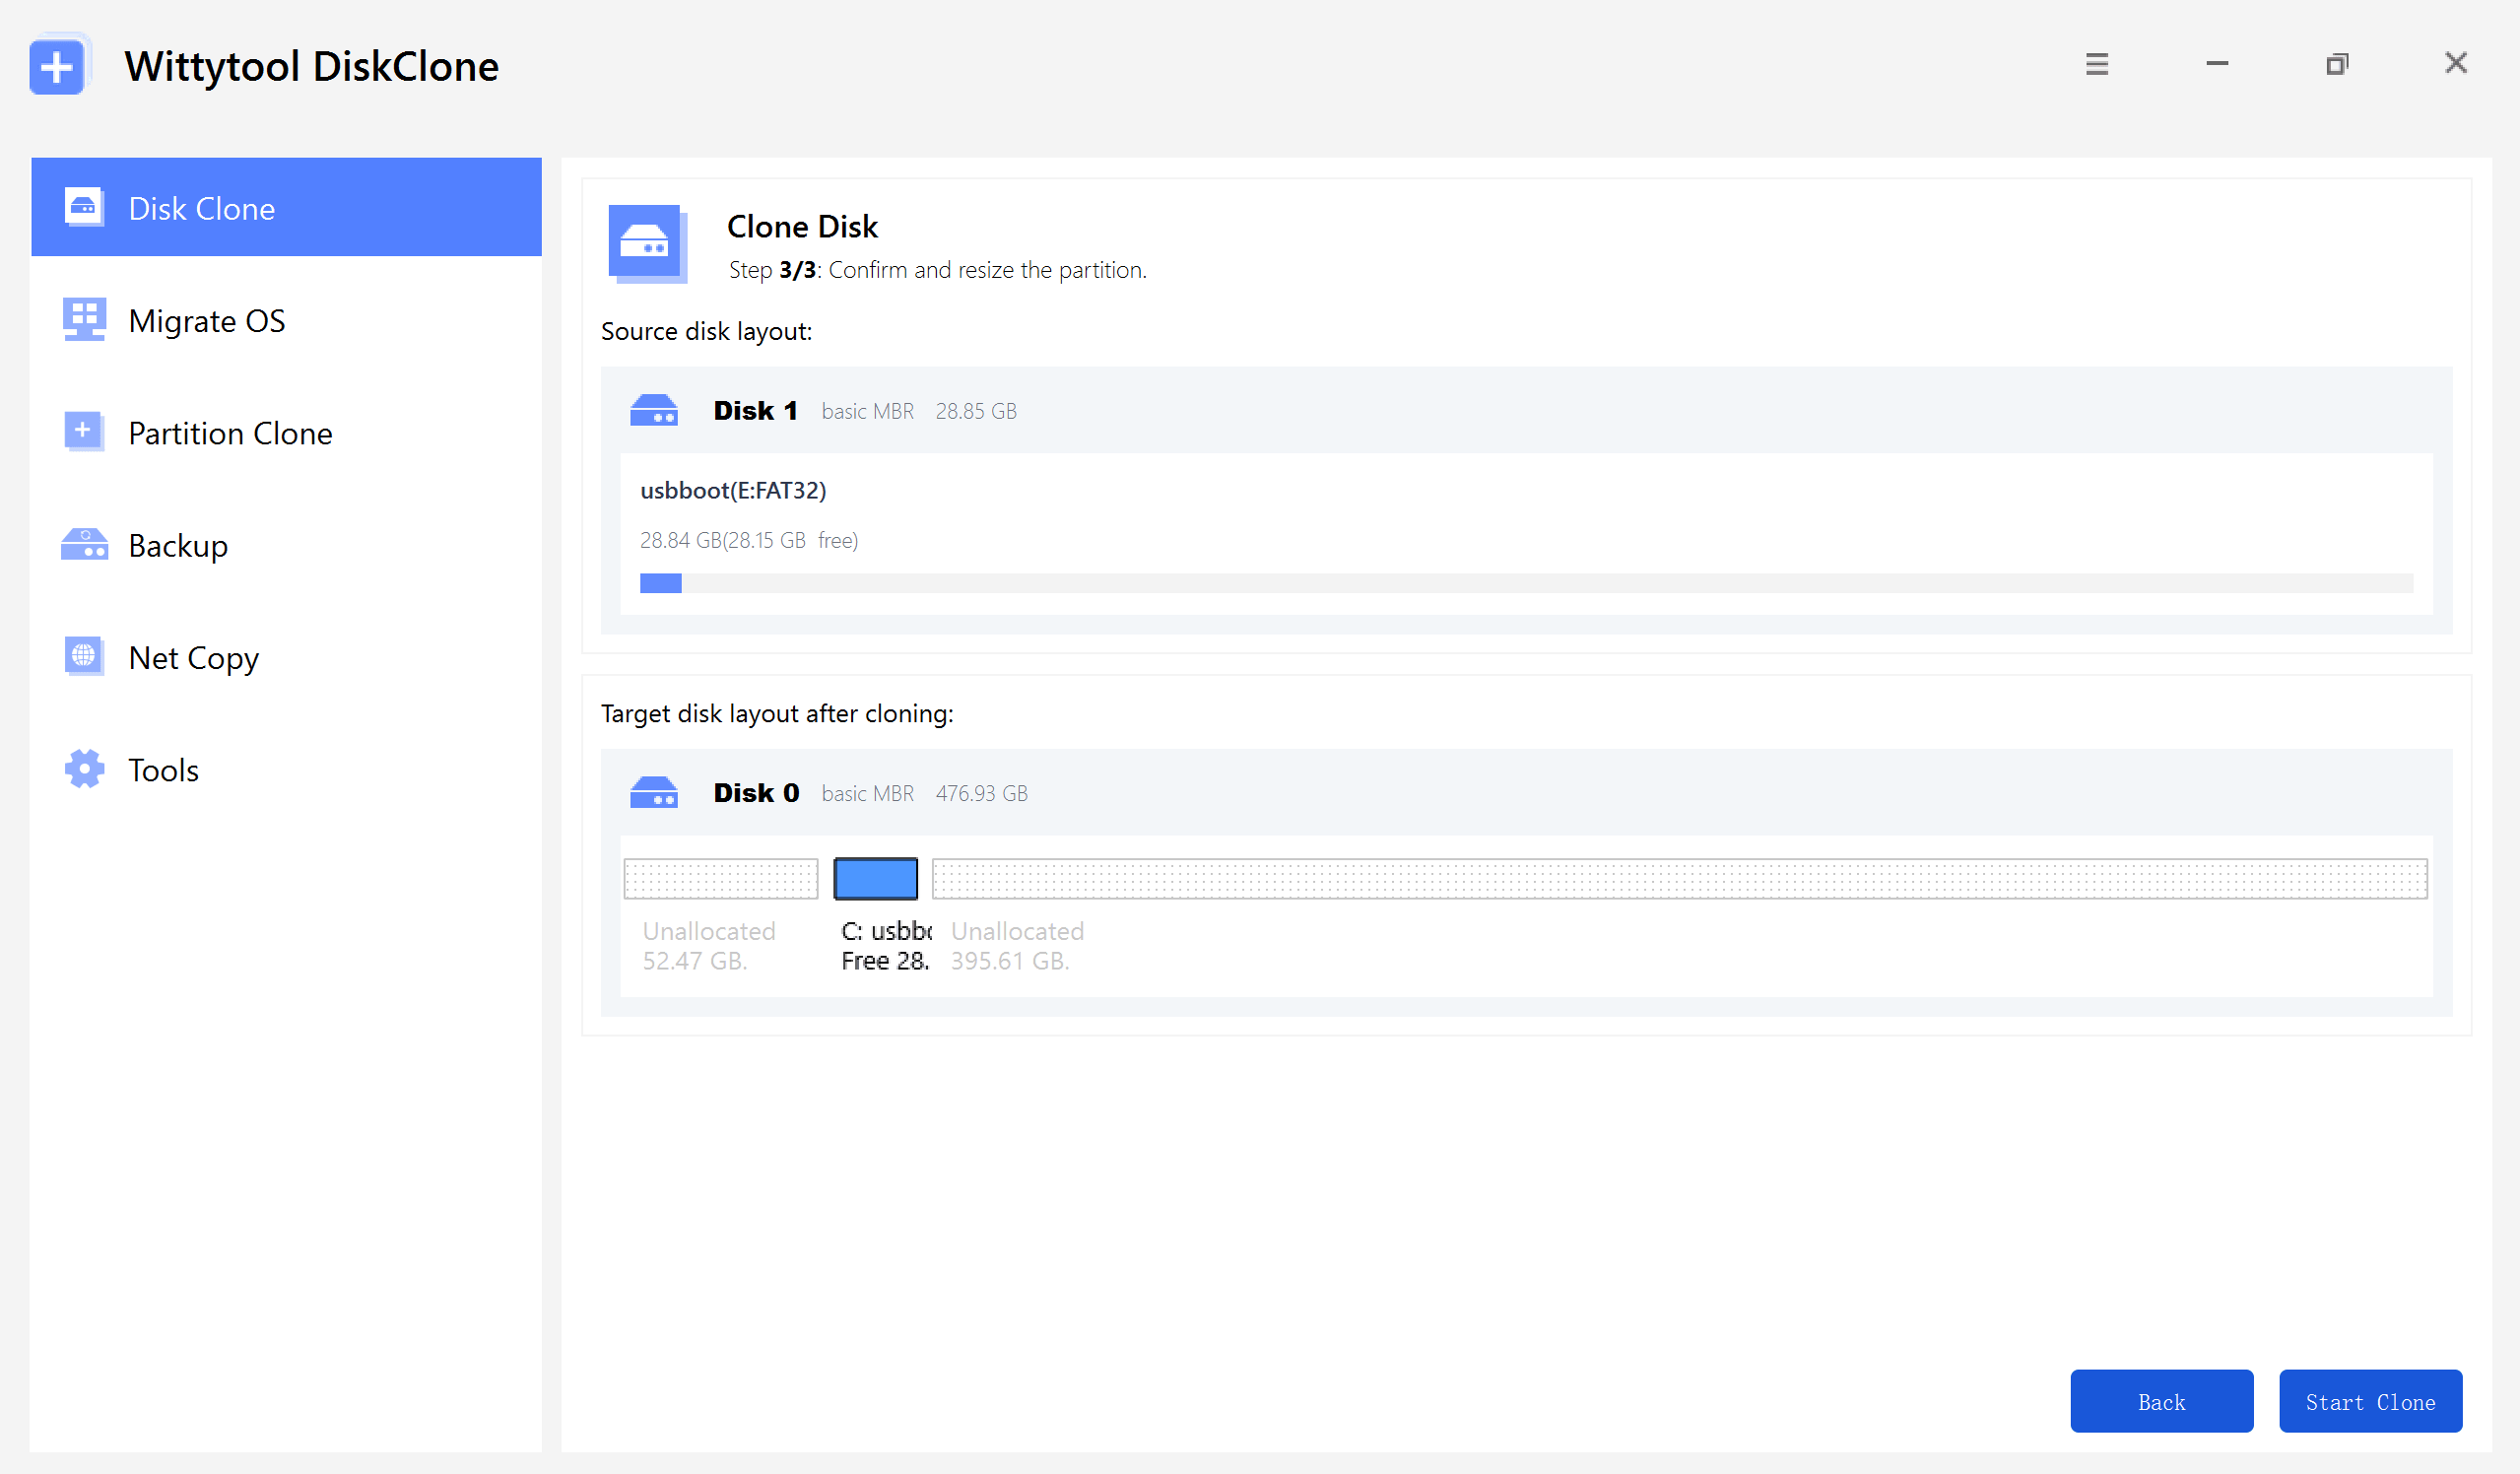
Step 3: Resize the partitions on the target disk layout as needed to fit your requirements, then click the “Start Clone” button to begin the cloning process.
Watch the Disk Cloning Video Guide with Wittytool Disk Clone:
Step 1: Choose Disk Clone Mode
Click on the left panel to access the clone page, then select the disk clone mode.
Note:
During usage, choose the corresponding mode according to your needs. You can read this article about system clone vs system migration to understand the differences in different usage scenarios.
Step 2: Choose Source Disk
Pick the disk from the list view. The layout of the selected disk will be displayed at the top of the list view.
Note:
*Sector by Sector: This option should be selected if the source disk has bad sectors or if the file system on the disk is damaged. It ensures that all sectors on the source disk are cloned.
*Skip Bad Sectors: If the source disk has bad sectors, select this option. Wittytool DiskClone will ignore the bad sectors and clone only the undamaged ones. This method is suitable for older disks that may have bad sectors.
Step 3: Choose Destination Disk
Select the target disk.

Step 4: Resize Partition and Start Cloning
You can resize the partition on the target disk if needed. Click the “Start Clone” button to begin the cloning process.

Conclusion
Both Rescuezilla and Clonezilla are excellent free tools for disk cloning and backup. Your choice depends on your technical level:
- Rescuezilla = Simple, graphical, great for beginners.
- Clonezilla = Powerful, text-based, ideal for experts.
For those who want the easiest experience possible, WittyTool Disk Clone offers a user-friendly way to clone drives without leaving Windows.
Remember: regular backups can save you from data disaster. Choose a tool that you’re comfortable with and use it consistently!
Frequently Asked Questions
Is Rescuezilla the same as Clonezilla?
No. While Rescuezilla is based on Clonezilla, it adds a graphical user interface (GUI) to simplify the process. Clonezilla uses text-based menus only.
Is RescueZilla legit?
Yes. Rescuezilla is a legitimate open-source project with an active community. It is safe to download and use from its official website.
What’s better than Clonezilla?
For advanced users, Clonezilla remains a top choice due to its flexibility. However, for beginners, as a best macrium reflect free alternative, WittyTool Disk Clone offers a easier, more intuitive experience without sacrificing functionality.
Foxclone vs Clonezilla
Foxclone is another GUI-based backup tool similar to Rescuezilla. It’s user-friendly but less known. Clonezilla is more established and widely used in professional environments.
Partclone vs Clonezilla
Partclone is actually the engine behind Clonezilla. It’s a command-line tool for cloning partitions. Clonezilla adds a user interface and additional features on top of Partclone.