Last updated on November 19, 2025
Cloning your hard drive to a USB external drive is one of the most effective ways to create a perfect, bootable replica of your entire system. Whether you’re safeguarding your data, upgrading your computer, or preparing for emergencies, this process ensures every file, setting, and the operating system itself is transferred. To successfully complete this process, using a reliable USB clone tool is crucial. This guide will walk you through the entire operation in clear, simple terms.
Is It Possible to Clone a Hard Drive to a USB Flash Drive?
This is a common question, and the answer is a conditional “yes.” You can clone HDD to USB media, but success depends heavily on the size of the source drive and the capacity and speed of the USB drive.
- Source Drive Size: The USB drive musthave a larger capacity than the total amount of data used on your hard drive. For example, if your 500GB hard drive has 400GB of data, your USB drive needs to be larger than 400GB (a 512GB or 1TB drive is ideal).
- USB Drive Type: While possible, cloning to a small, slow USB flash drive is not recommended for system drives. The process can be slow, and the resulting clone may be unreliable for booting. A high-speed USB 3.0+ external Solid State Drive (SSD) is a far better choice for performance and reliability.
💡 My View: In my decade of experience, I always advise using a reputable external SSD for cloning system drives. The speed difference during creation and when booting from the clone is significant, making it a worthwhile investment for a serious backup solution.
A Step-by-Step Guide to Cloning Your Drive to a USB Device
The most reliable method for cloning involves using dedicated disk cloning software. These tools handle the complex process of copying every sector of data, including the hidden system partitions essential for booting. We will use a free disk cloning software – WittyTool Disk Clone for this tutorial due to its user-friendly interface and reliability, which is perfect for beginners.
Part 1: Cloning a Data Drive to a USB Hard Drive
This process is ideal for creating a backup of a secondary drive that contains your documents, photos, and videos, but not your operating system.
Connect and Prepare: Attach your USB external hard drive to the computer. Ensure it is detected by Windows. Back up any important files already on the USB drive, as the cloning process will erase everything on it.
Download Wittytool Disk Clone to begin cloning:
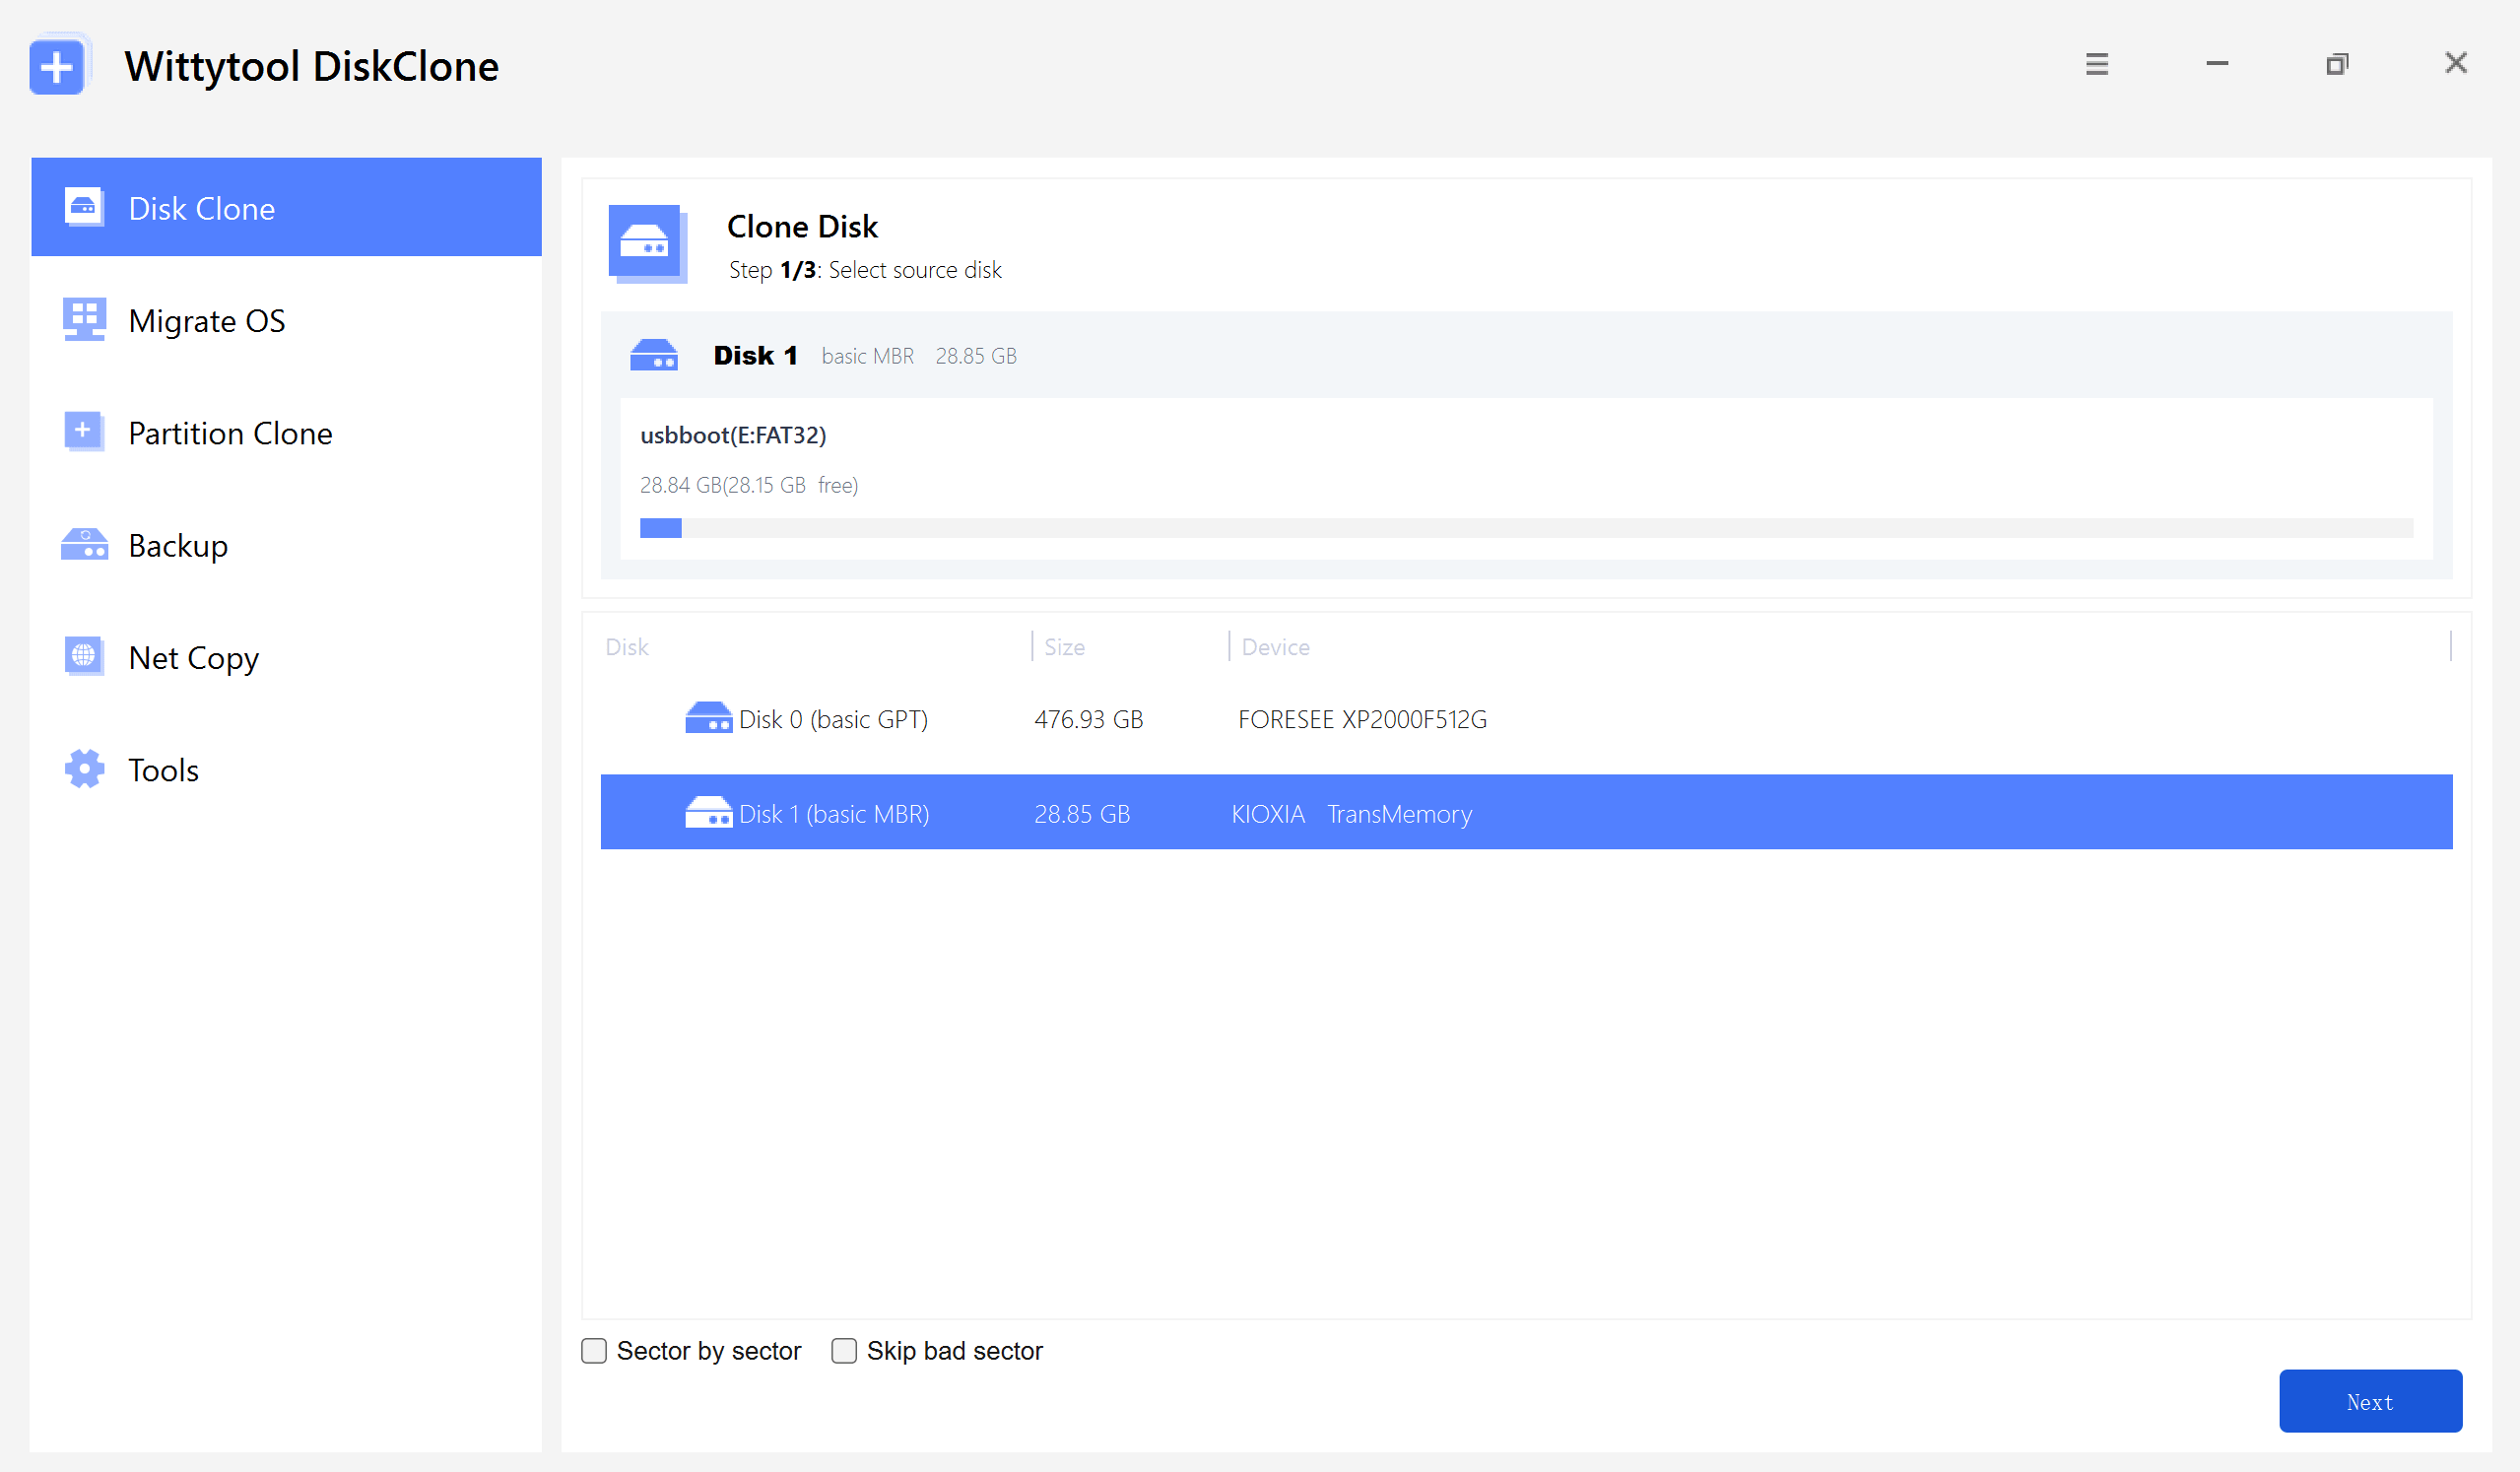
Step 1: Select Disk Clone (or Partition Clone for a nearly identical workflow), then choose your source disk and click Next.
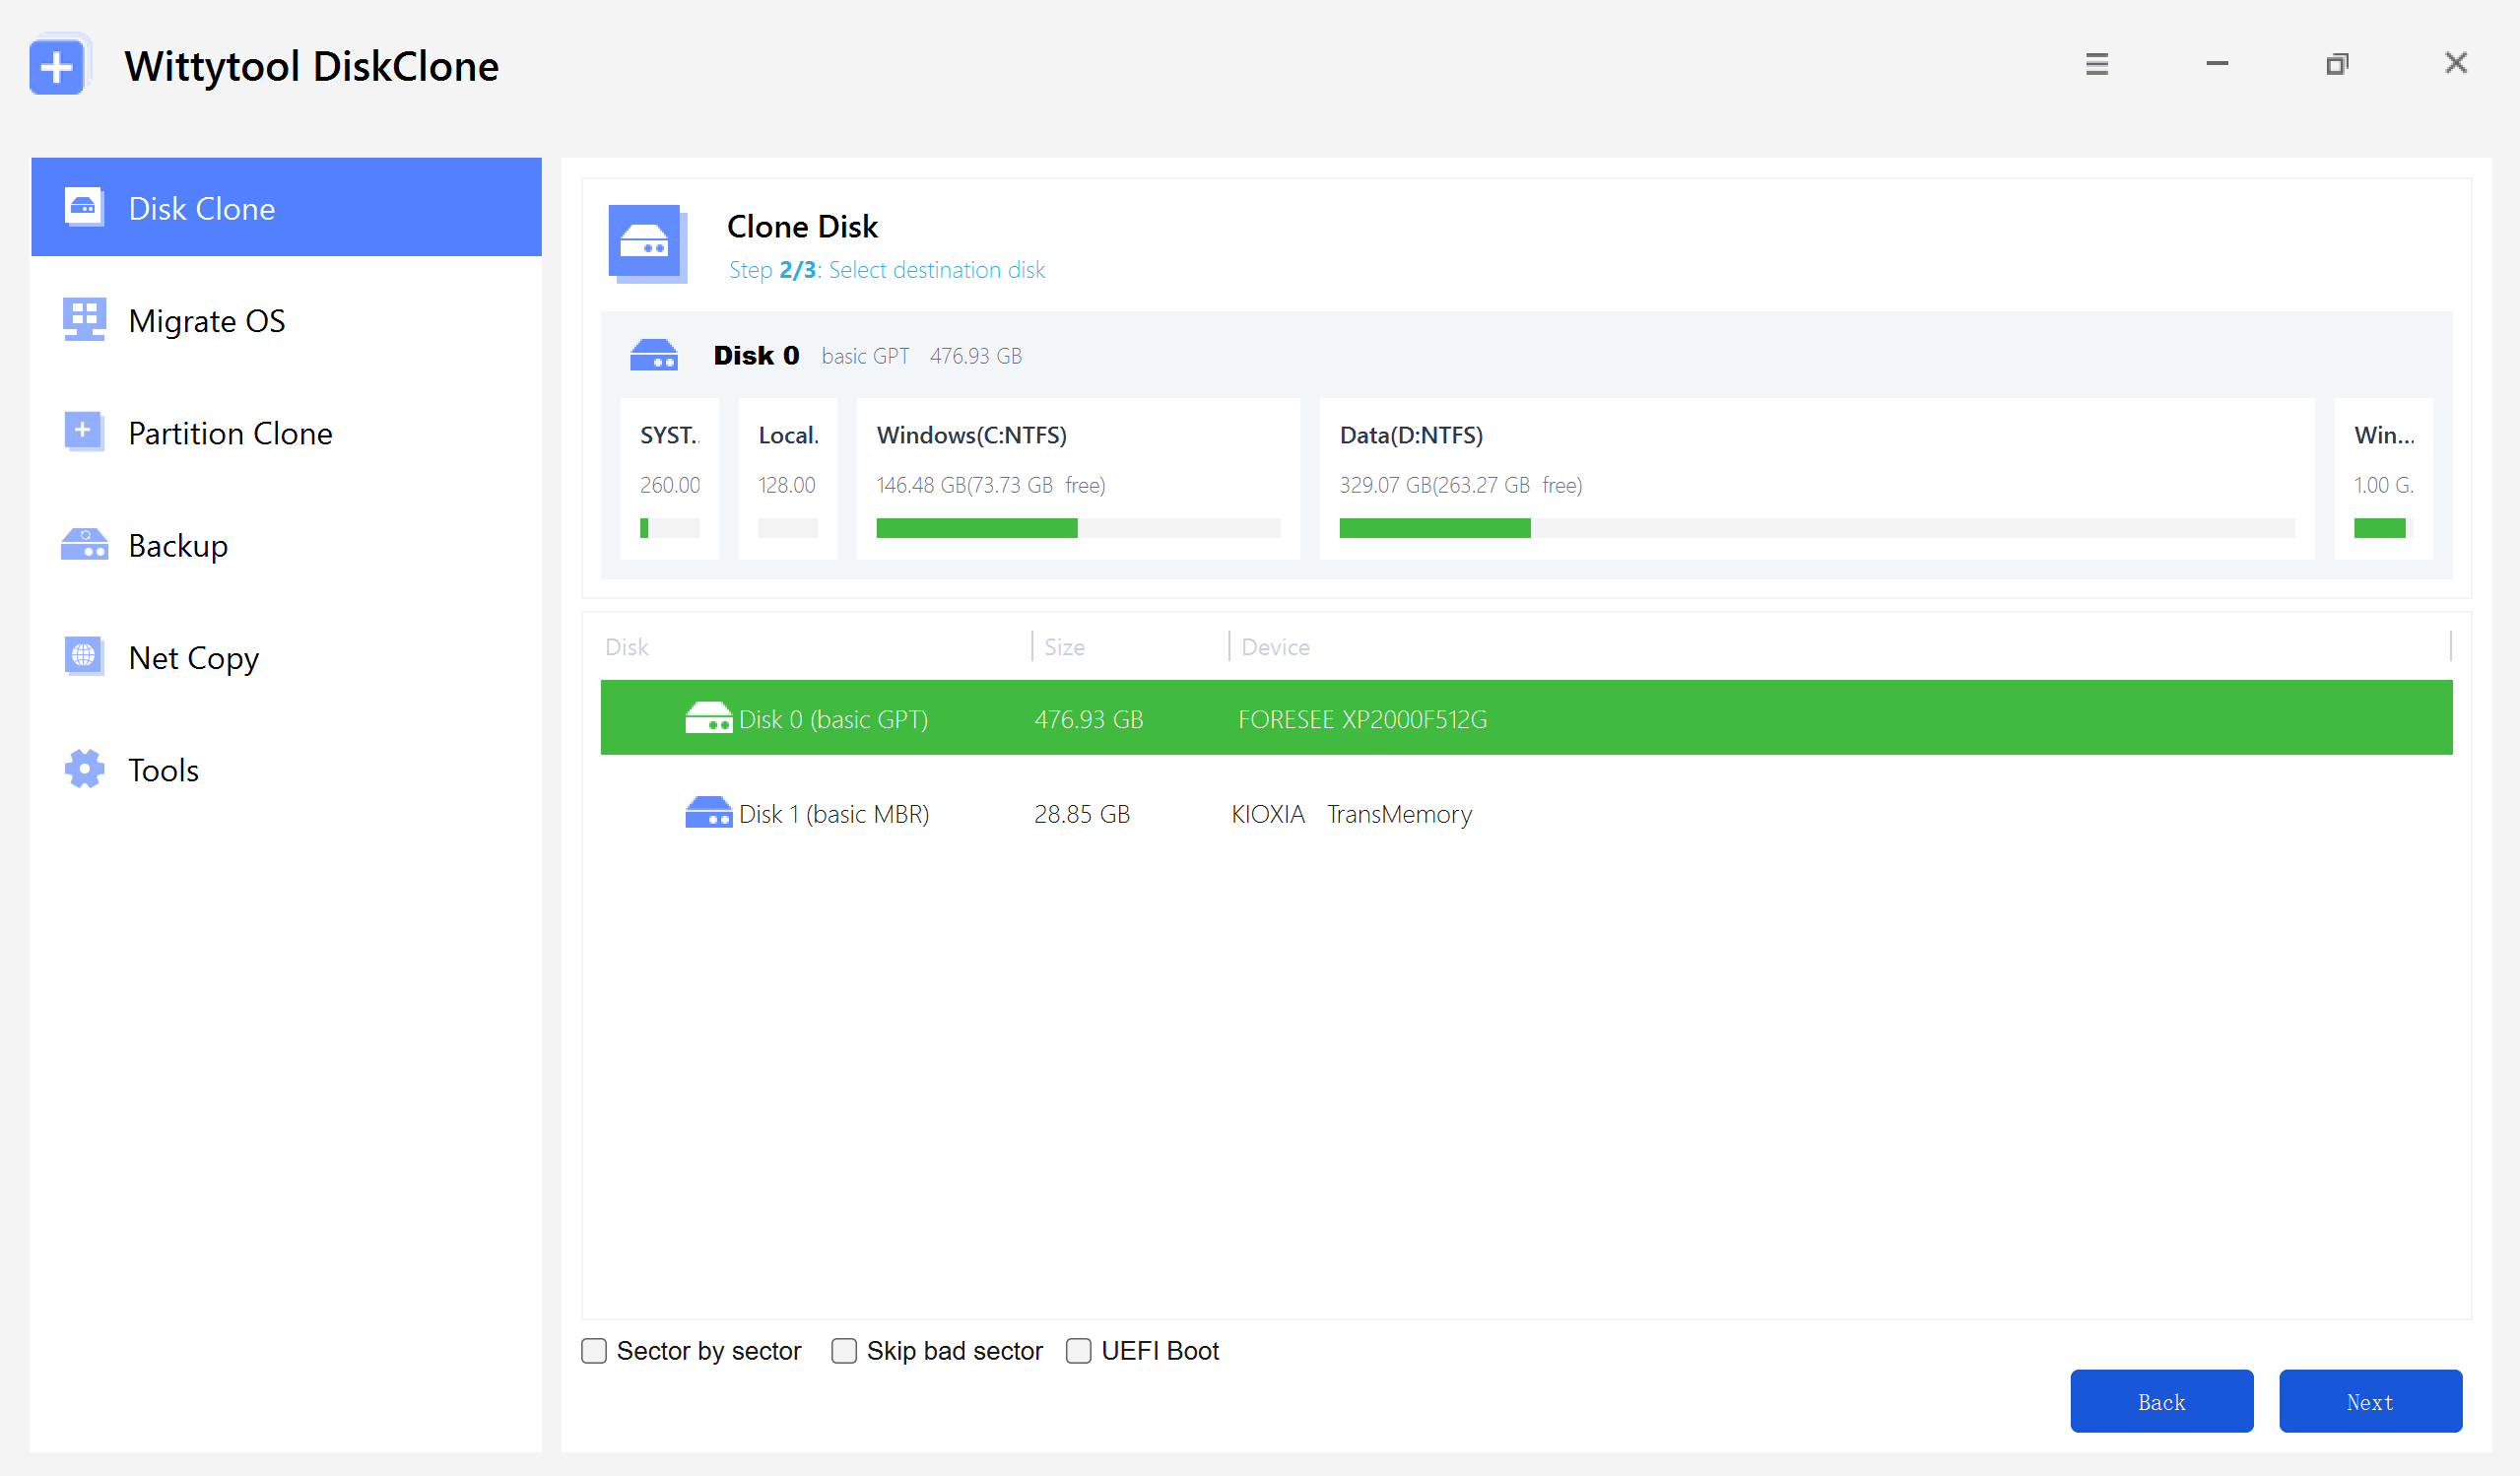
Step 2: Choose your destination disk and click Next to access the configuration settings.
Here, you can enable sector-level cloning, skip bad sectors, or check the UEFI BOOT option to convert the boot mode, ensuring the drive is fully compatible with the UEFI firmware of modern motherboards.
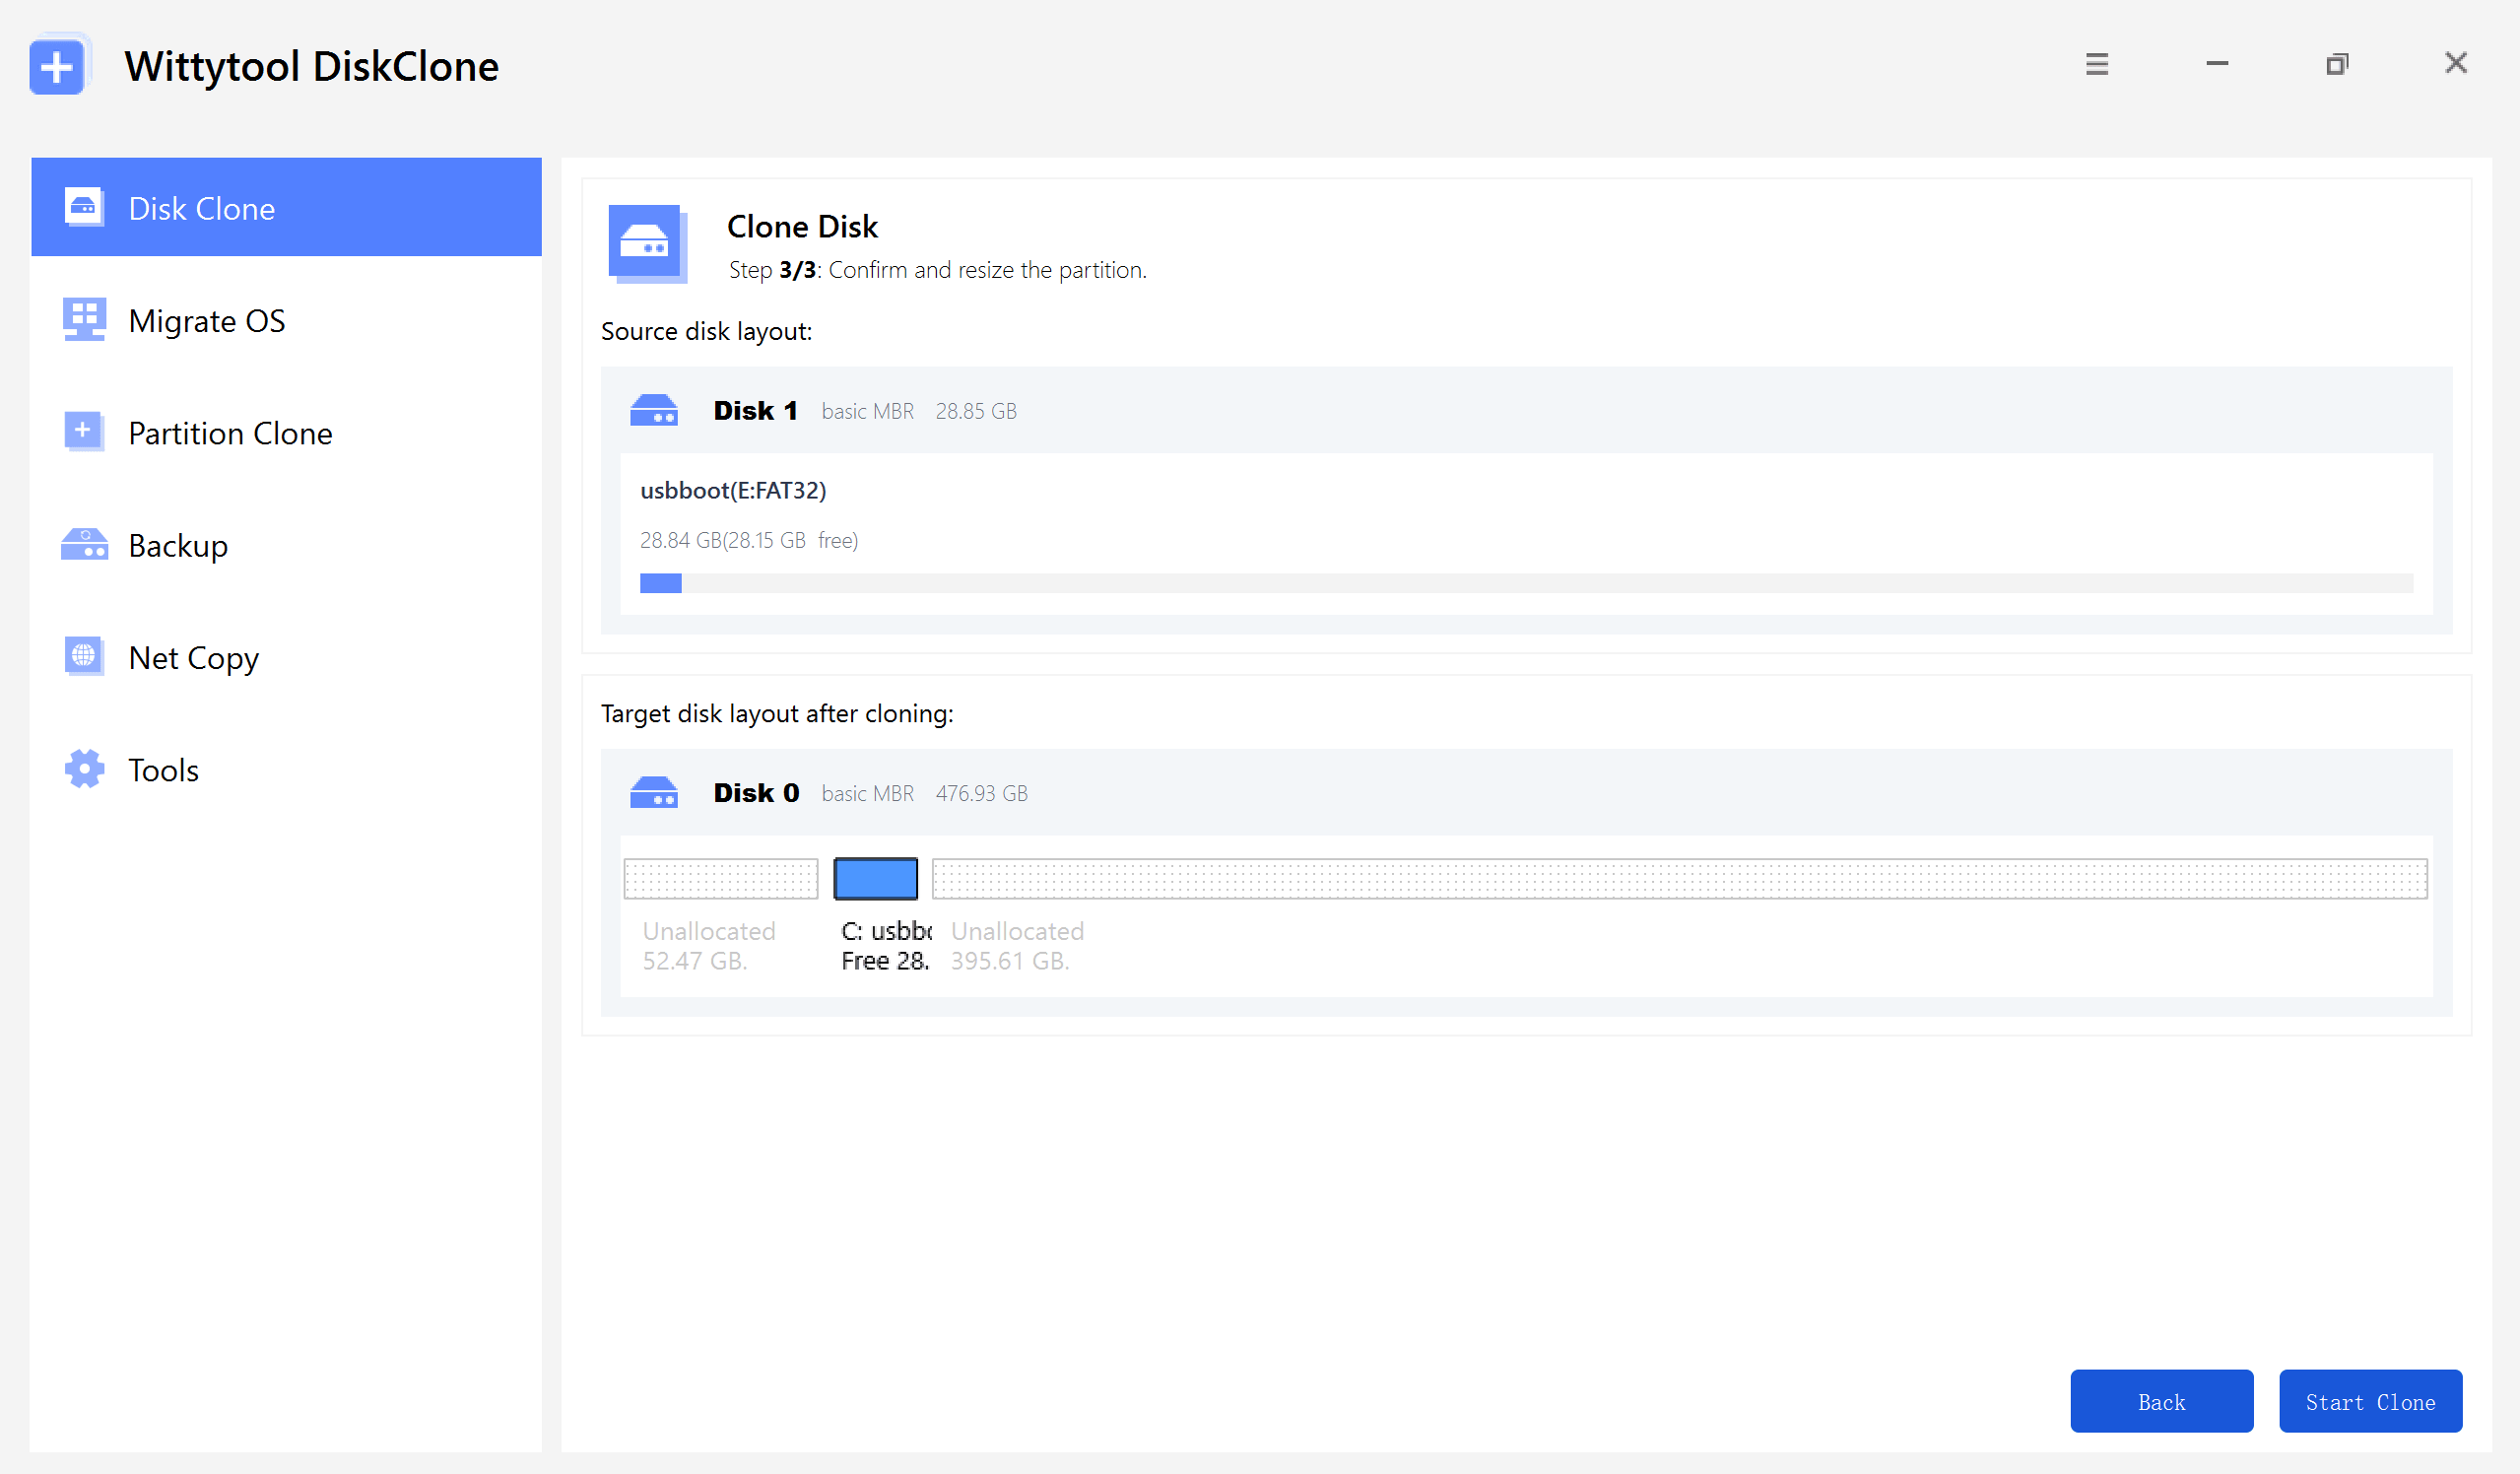
Step 3: Resize the partitions on the target disk layout as needed to fit your requirements, then click the “Start Clone” button to begin the cloning process.
Watch the Disk Cloning Video Guide with Wittytool Disk Clone:
⚠️ Critical Note: Do not interrupt the cloning process by disconnecting the USB drive or turning off your computer. This can corrupt both the clone and the original drive.
Part 2: Cloning Your System Drive to a Bootable USB Flash Drive
Cloning the drive that contains your Windows or macOS operating system requires extra care to ensure the clone is bootable. The steps are similar but with a crucial difference in the setup.
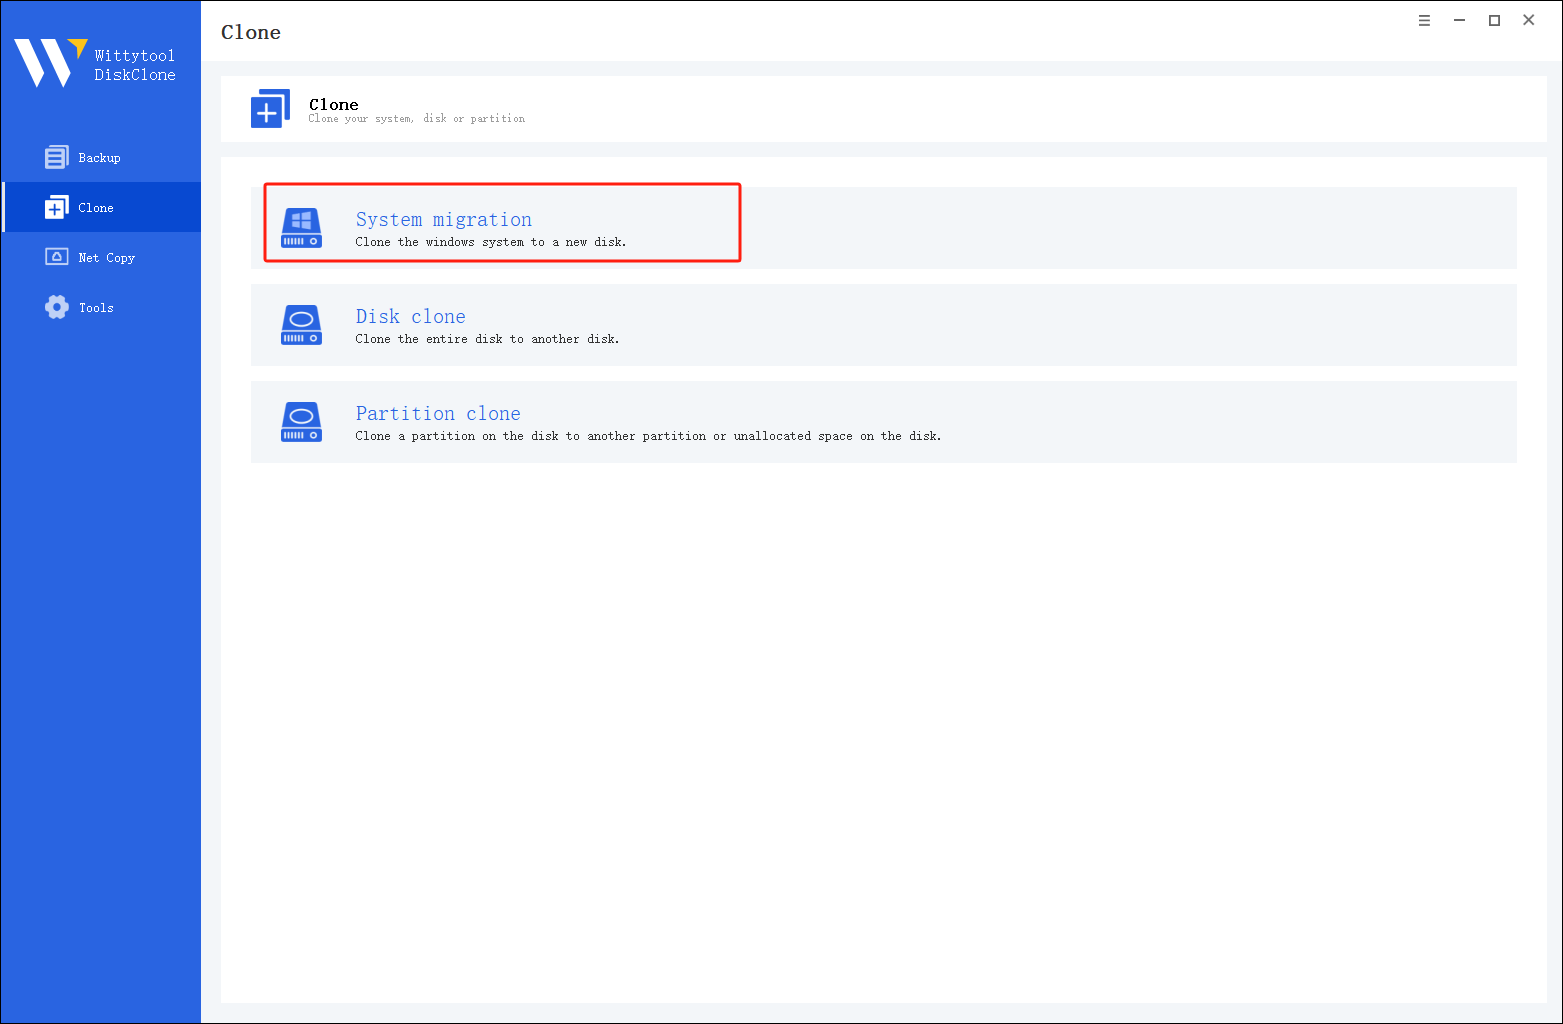
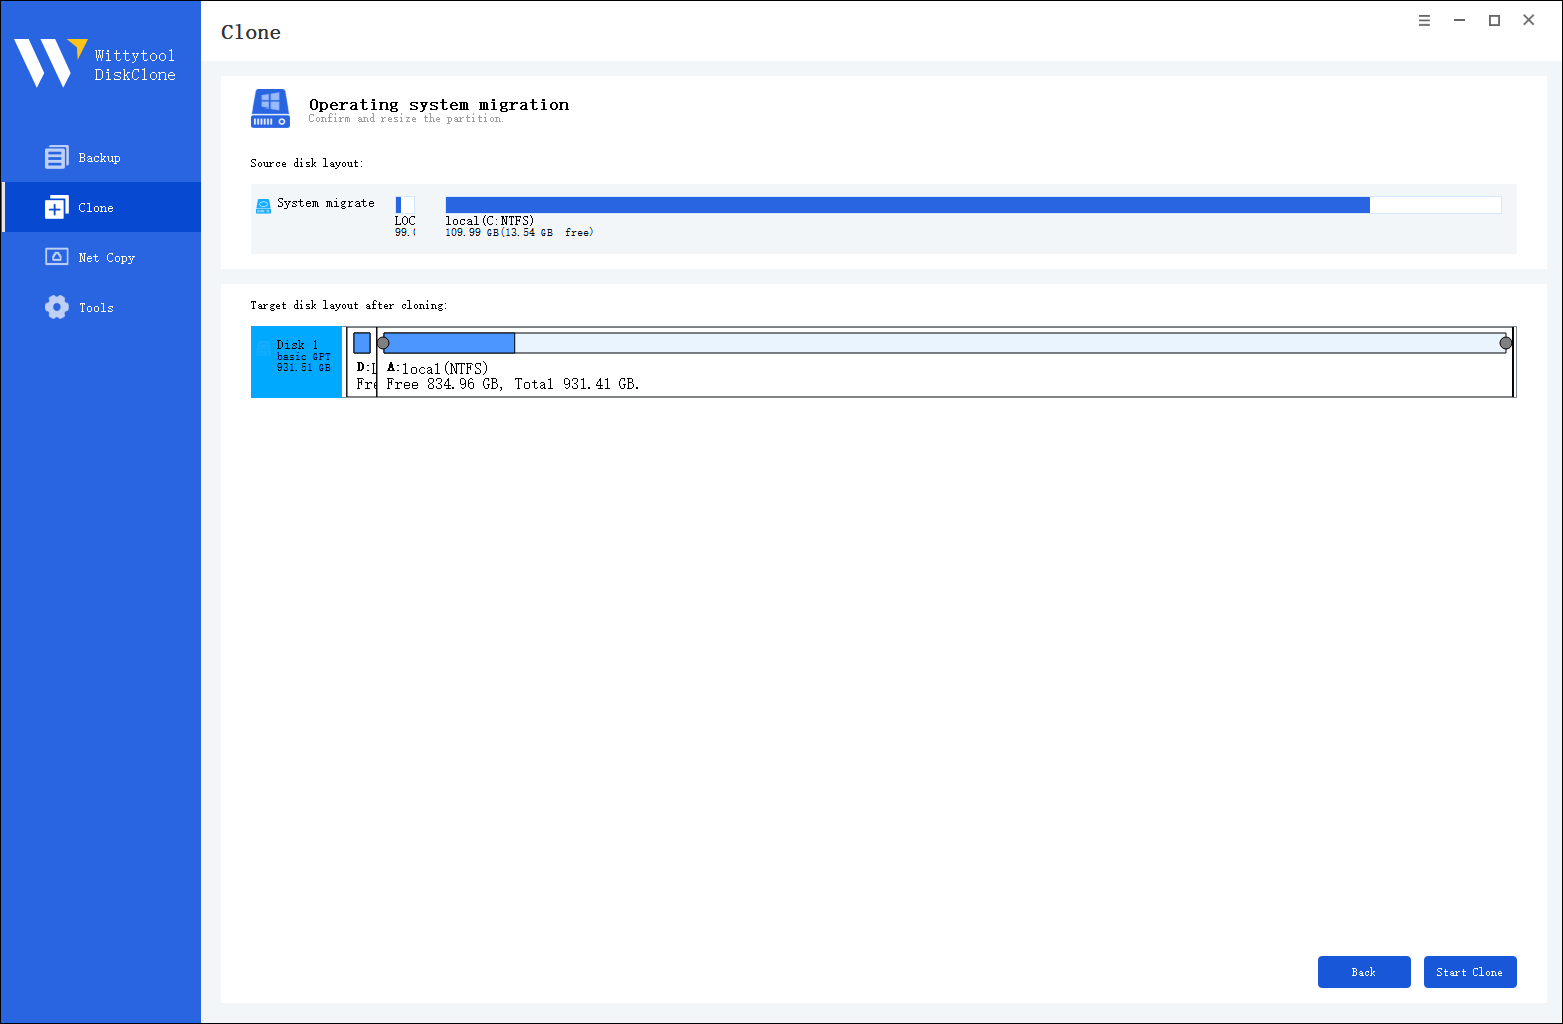
Step 1: Select Migrate OS in left pannel, then choose the destination disk from the list.
*Change Windows SID: When cloning multiple machines on the same network, select “Change Windows SID” to prevent SID duplicated issues related to network access. This direct approach allows you to change windows sid without sysprep, making large-scale cloning operations much quicker and more efficient.
Step 2: Confirm Partition Size. Review and resize the partitions on the target disk as needed. Once ready, click the “Start Clone” button to begin the cloning process.
Once the cloning process is complete, you must tell your computer to load Windows from the new drive:
Step 3. Restart your PC and immediately press the BIOS key (usually F2, F12, or Del) repeatedly as the computer starts up.
Step 4. Navigate to the Boot menu or Boot Priority settings. Move your new disk to the top of the list to make it the primary boot device.
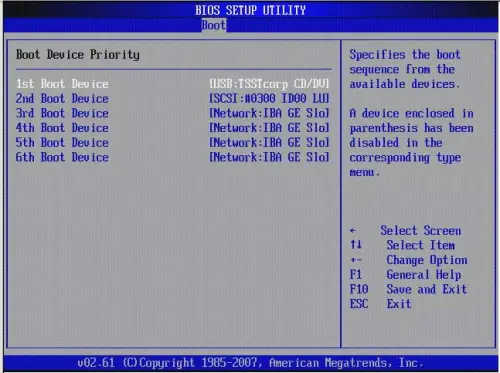
Step 5. Save your changes (often by pressing F10), exit the BIOS, and allow the PC to restart.
Watch this video guide to learn how to clone your system with Wittytool Disk Clone:
Key Reasons for Cloning a Disk to a USB Drive
Why go through this process? A full disk clone is more comprehensive than simple file copying. Here’s why it’s a cornerstone of good digital hygiene.
Creating a Robust Data Backup
A disk clone is the ultimate insurance policy. While file backups protect your documents, a clone protects your entire working environment. If your primary hard drive fails completely, a clone on an external USB drive can get you back up and running in hours, not days. A study by the data recovery firm Secure Data found that over 30% of data loss incidents are due to hardware failure, a risk a current clone directly mitigates.
Streamlining System Upgrades and Transfers
Planning to move from a traditional Hard Disk Drive (HDD) to a faster Solid State Drive (SSD)? Cloning is the perfect method. You can clone your existing system—with all your applications, licenses, and preferences intact—directly to a new SSD connected via USB. Once verified, you simply swap the drives. This eliminates the tedious process of reinstalling Windows and all your software.
Preparing a Bootable USB for Emergency Recovery
A bootable clone is a powerful disaster recovery tool. If your computer won’t start due to a virus, corrupted system files, or a failed update, you can boot directly from the USB clone. This allows you to access all your files and often use built-in repair tools to fix the internal drive, all without losing access to your computer.
💡 My View: Many users only think about backups after a problem occurs. I advocate for a proactive approach. Scheduling a full disk clone to an external USB drive every three to six months is a best practice that can save immense time and stress.
Conclusion
Cloning your hard drive to a USB external drive is a straightforward process with the right tool, and it provides unparalleled peace of mind. The key to success lies in using reliable software like WittyTool Disk Clone and a high-quality destination drive. Whether your goal is data security, a system upgrade, or creating a recovery solution, this method ensures you have a complete and functional copy of your digital life.
Cloning HDD to USB: Frequently Asked Questions
Can I use the cloned USB drive on a different computer?
Generally, a Windows system clone will not boot on a different computer due to hardware driver conflicts. However, the data on the clone will still be accessible by connecting the USB drive to another computer as a secondary device. For transferring a system to a new PC, specialized “PC to PC” migration software is better suited.
What’s the difference between cloning and imaging?
Cloning creates a 1:1, bootable copy of a drive to another drive. Imaging creates a single, compressed file (an image) of the drive, which must be restored to a drive before it can be used. Cloning is simpler for direct replacement, while imaging is more flexible for long-term, versioned backups.
The cloning software says the target drive is too small, but it has more space than my data. Why?
This happens because cloning copies the entire partition structure. If your source drive has a large, empty partition, the software may still try to copy it at its full size. Some advanced software, like WittyTool, offers an option to “Resize partitions” on the target drive, allowing you to fit the data onto a smaller drive intelligently.
How often should I clone my hard drive?
For most users, cloning your system drive every 3-6 months is sufficient if you perform regular file backups in between. If you frequently install new software or make significant system changes, consider cloning more often.