Last updated on May 8, 2026
When you see a reallocated sector count warning on your hard drive, it’s natural to feel concerned. After all, reallocated sectors mean that your drive has identified bad sectors and moved the data to healthy ones. But how many reallocated sectors are too many? Is there a way to fix the reallocated sector count and prevent further damage? In this guide, we’ll walk through everything you need to know about how to fix reallocated sector count warnings. You’ll also learn about the best utility to use to fix reallocated sector count, ensuring that your drive stays healthy longer and your data remains safe. We’ll discuss whether the warning signals a time for replacement or if there’s still hope for your drive. Let’s dive into these critical steps to safeguard your storage.
What is Reallocated Sector Count Warning
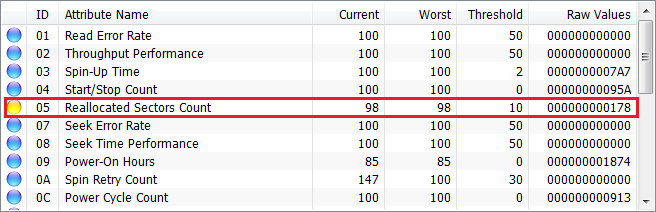
A reallocated sector count warning is a red flag that your drive is experiencing some level of sector damage, which could be a sign of impending failure. When the reallocated sectors count reaches a number like 000000000009, it indicates that multiple sectors have been found faulty and the drive has remapped them. This can lead to data loss or corruption, especially if it continues to grow. If you’ve ever faced a cloned SSD won’t boot issue or tried to repair bad sectors with limited success, you know how critical it is to address these warnings promptly. In this section, we’ll explore how this issue can cause system instability, impact your data integrity, and the steps you can take to prevent further damage.
Reasons for Reallocated Sector Count Warning
A Reallocated Sector Count warning is not a random error; it is a clear symptom of physical degradation of your storage medium. Understanding the underlying causes is key to assessing the severity of the warning and taking appropriate action. Essentially, this warning is triggered when your hard drive (HDD) or solid-state drive (SSD) encounters a sector that has become unreliable or failed. The drive’s firmware then transparently moves the data to a reserved pool of spare sectors. The following are the most common reasons why this process is initiated:
- Physical Degradation: Over time, the magnetic coating on platters (in HDDs) or the memory cells (in SSDs) can wear out, making sectors unreliable.
- Minor Physical Damage: Shock, vibration, or manufacturing defects can cause physical imperfections on the drive’s surface.
- Bad Sectors: When a sector becomes unreadable or unwritable, the drive’s firmware marks it as “pending” and attempts to recover the data.
- Wear and Tear: This is the most common reason. Every read/write operation contributes to the gradual aging of the storage medium.
- Overheating: Consistently high operating temperatures can accelerate the degradation of drive components.
- Power Issues: Sudden power outages or voltage spikes can interrupt write processes, potentially corrupting sectors.
How to Fix Reallocated Sector Count Warning
If you’re seeing a Reallocated Sector Count Warning, one of the most effective ways to address the issue is cloning the affected drive with a new one. This approach allows you to transfer your data from the failing drive to a healthy one, reducing the risk of data corruption and drive failure.
A powerful tool like Wittytool DiskClone simplifies this process. With it, you can create an exact copy of your drive, preserving your operating system, files, and settings. The best part? You can even Clone Hard Drive to USB External Drive, making it easy to back up your data to an external source.
Additionally, if you’re looking for a Free USB Disk Clone Tool, Wittytool DiskClone offers a free version that can help you quickly and easily clone your hard drive to a USB device. This method is especially helpful if you want to keep your important files safe while troubleshooting or replacing the failing drive.
By using these cloning tools, you can ensure that your data remains intact and that you’re prepared for any potential drive issues in the future—without the need for a costly repair or replacement right away.
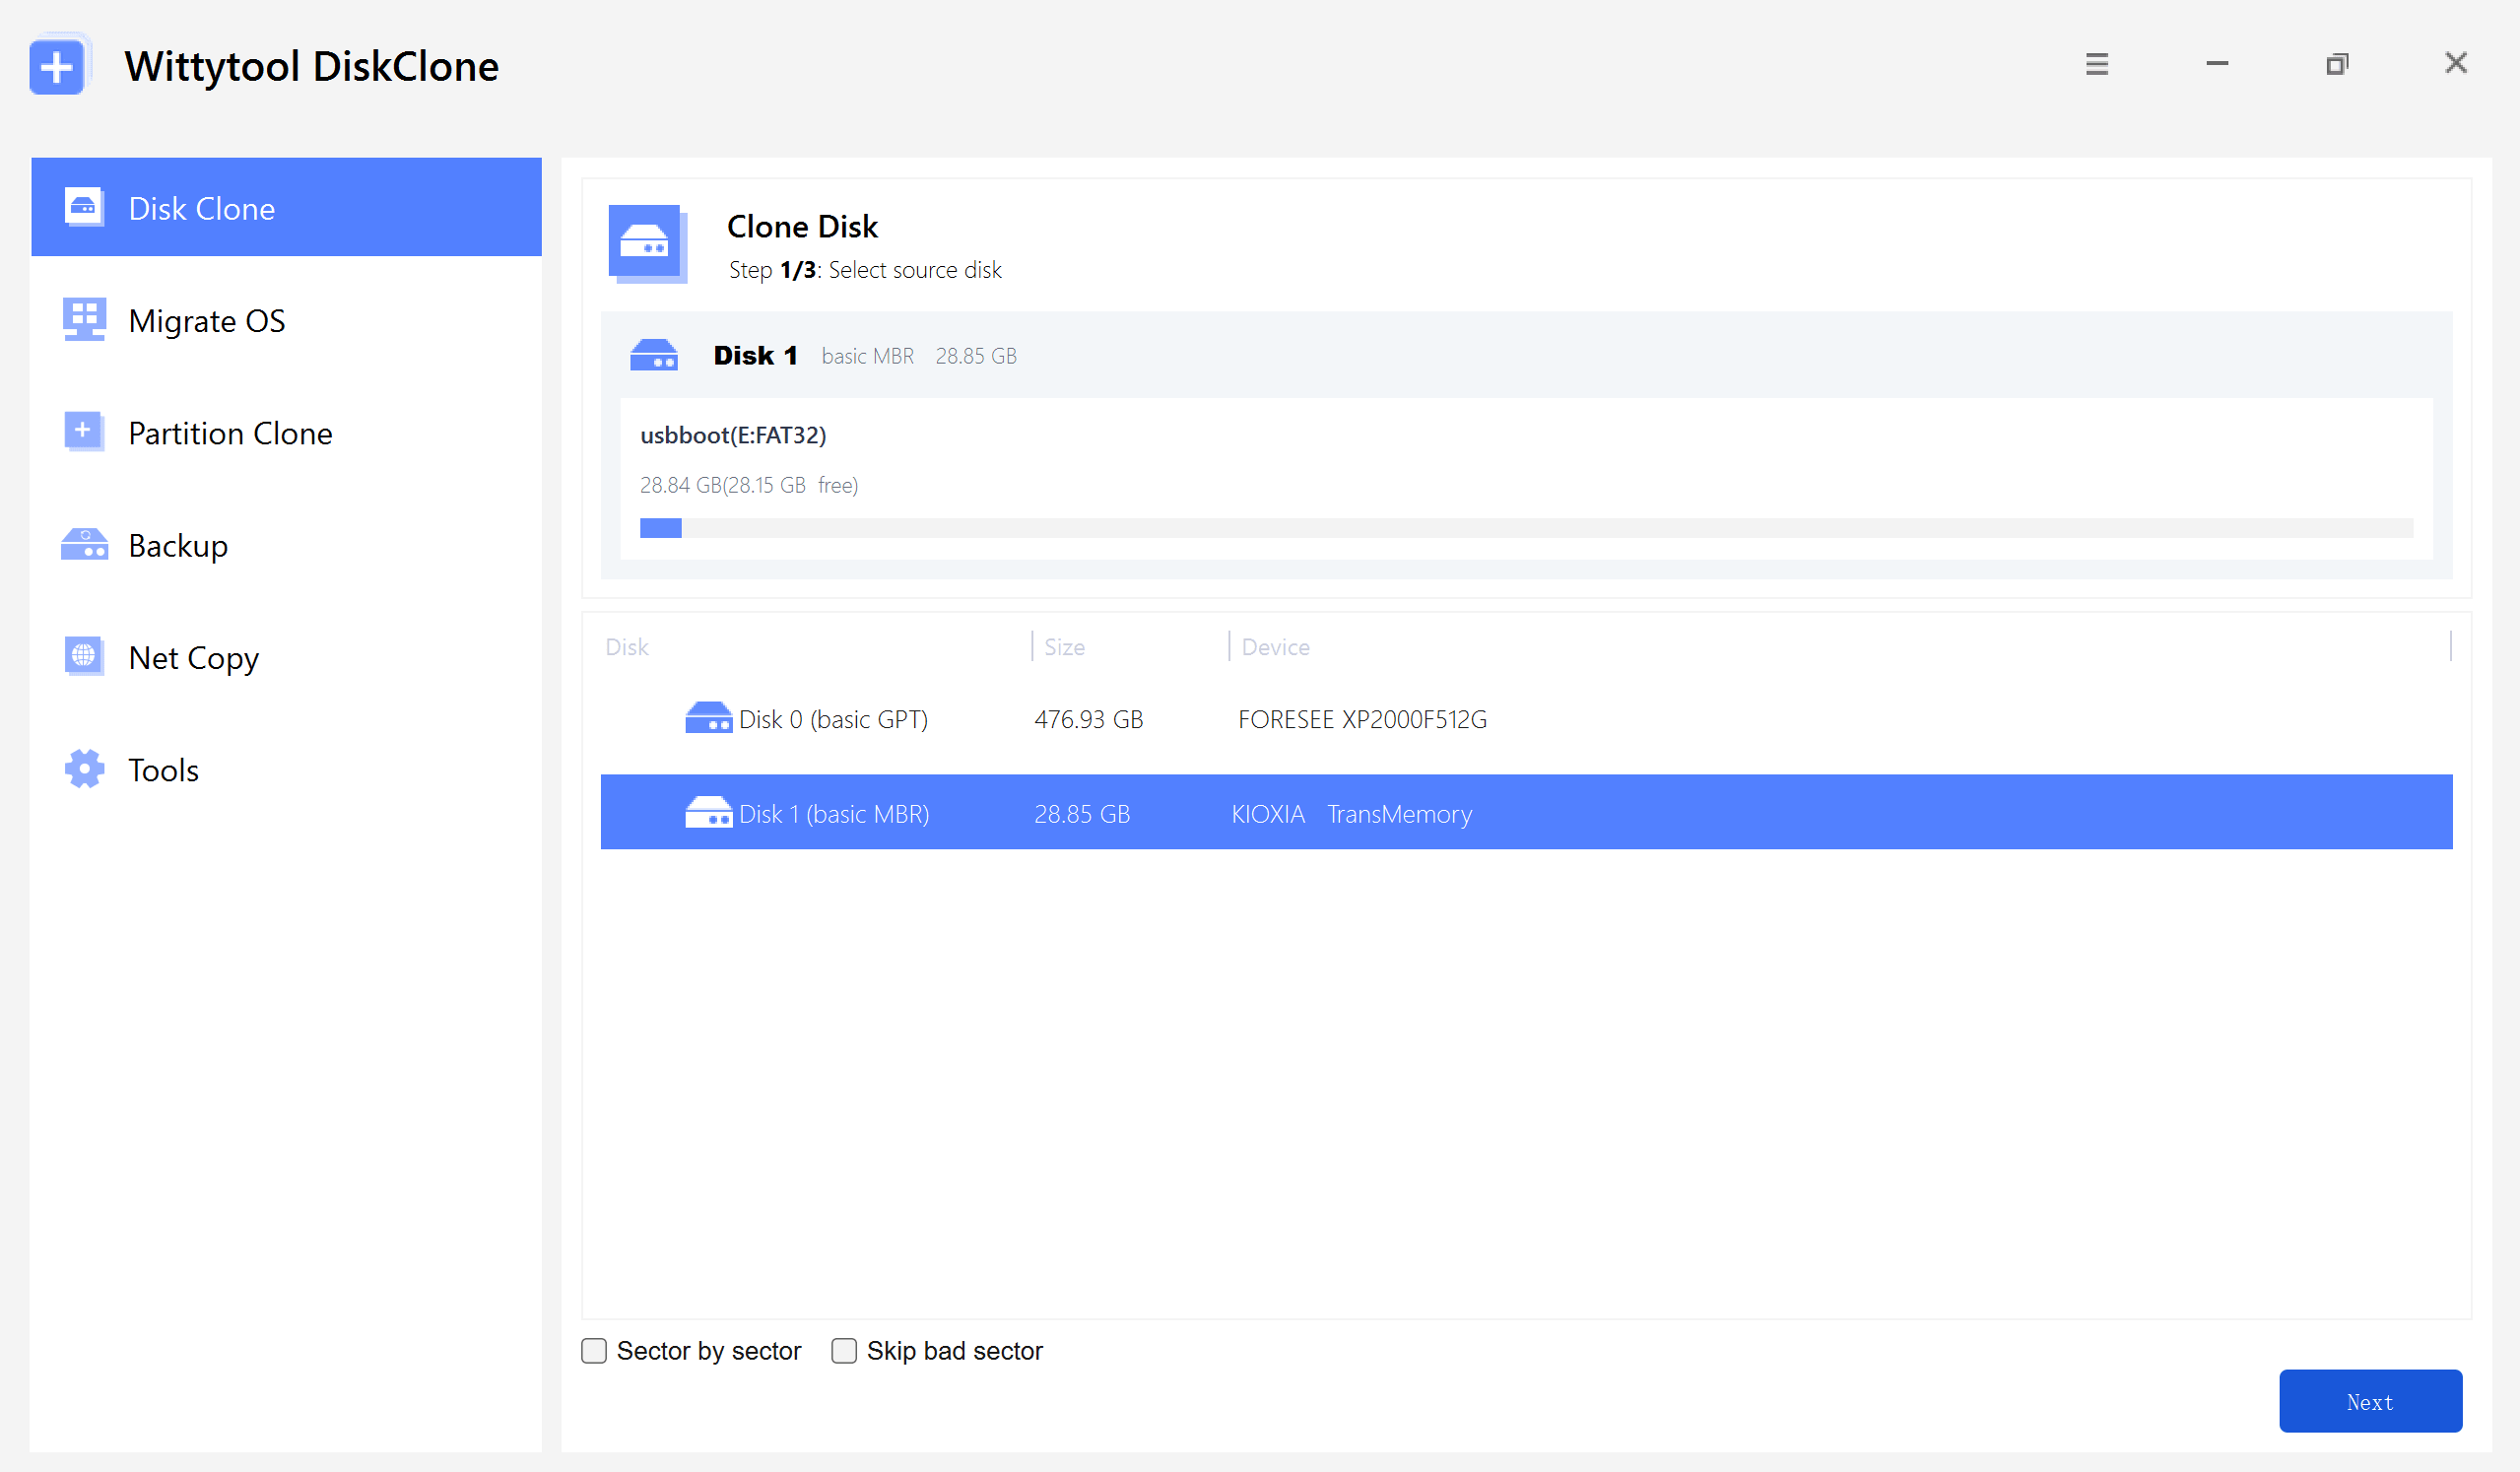
Step 1: First, pick either Disk Clone or Partition Clone (both follow the same logic), then simply select your source disk and hit Next.
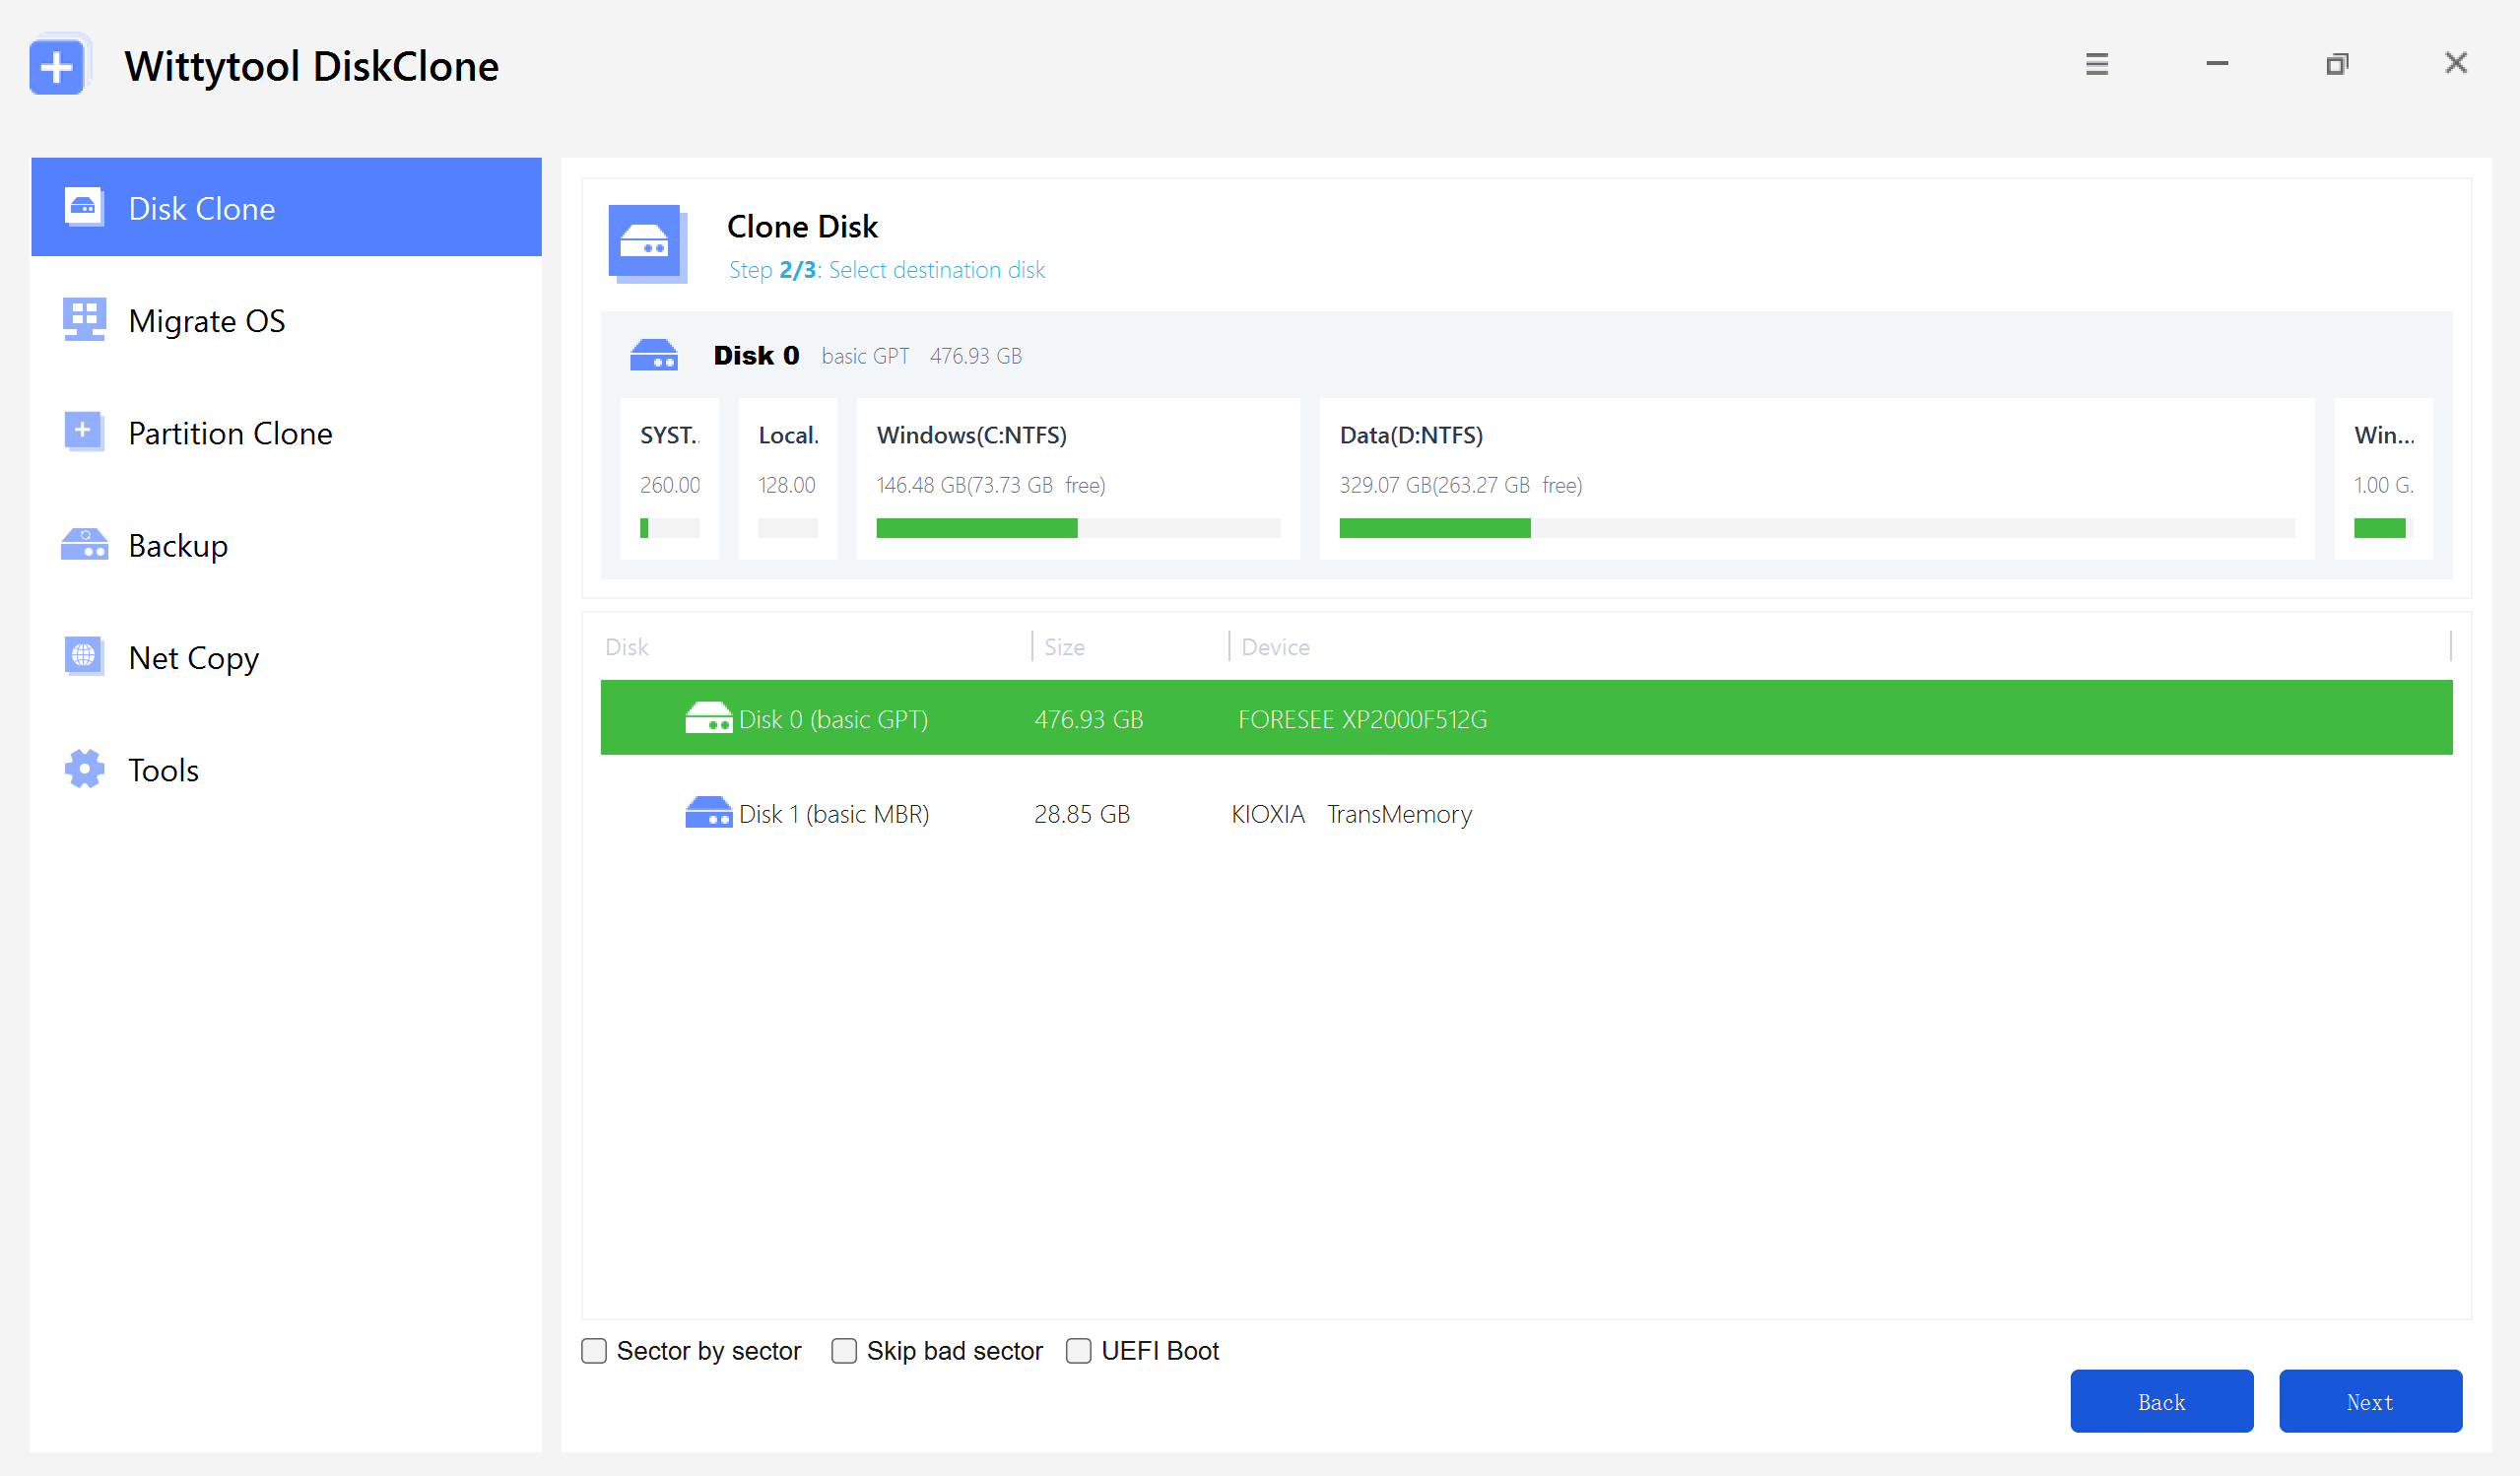
Step 2: After choosing your destination disk, click Next to view the available setup options. You have the flexibility to enable sector-by-sector cloning, ignore bad sectors, or check the UEFI BOOT box to switch the boot mode for seamless compatibility with modern UEFI-based hardware.
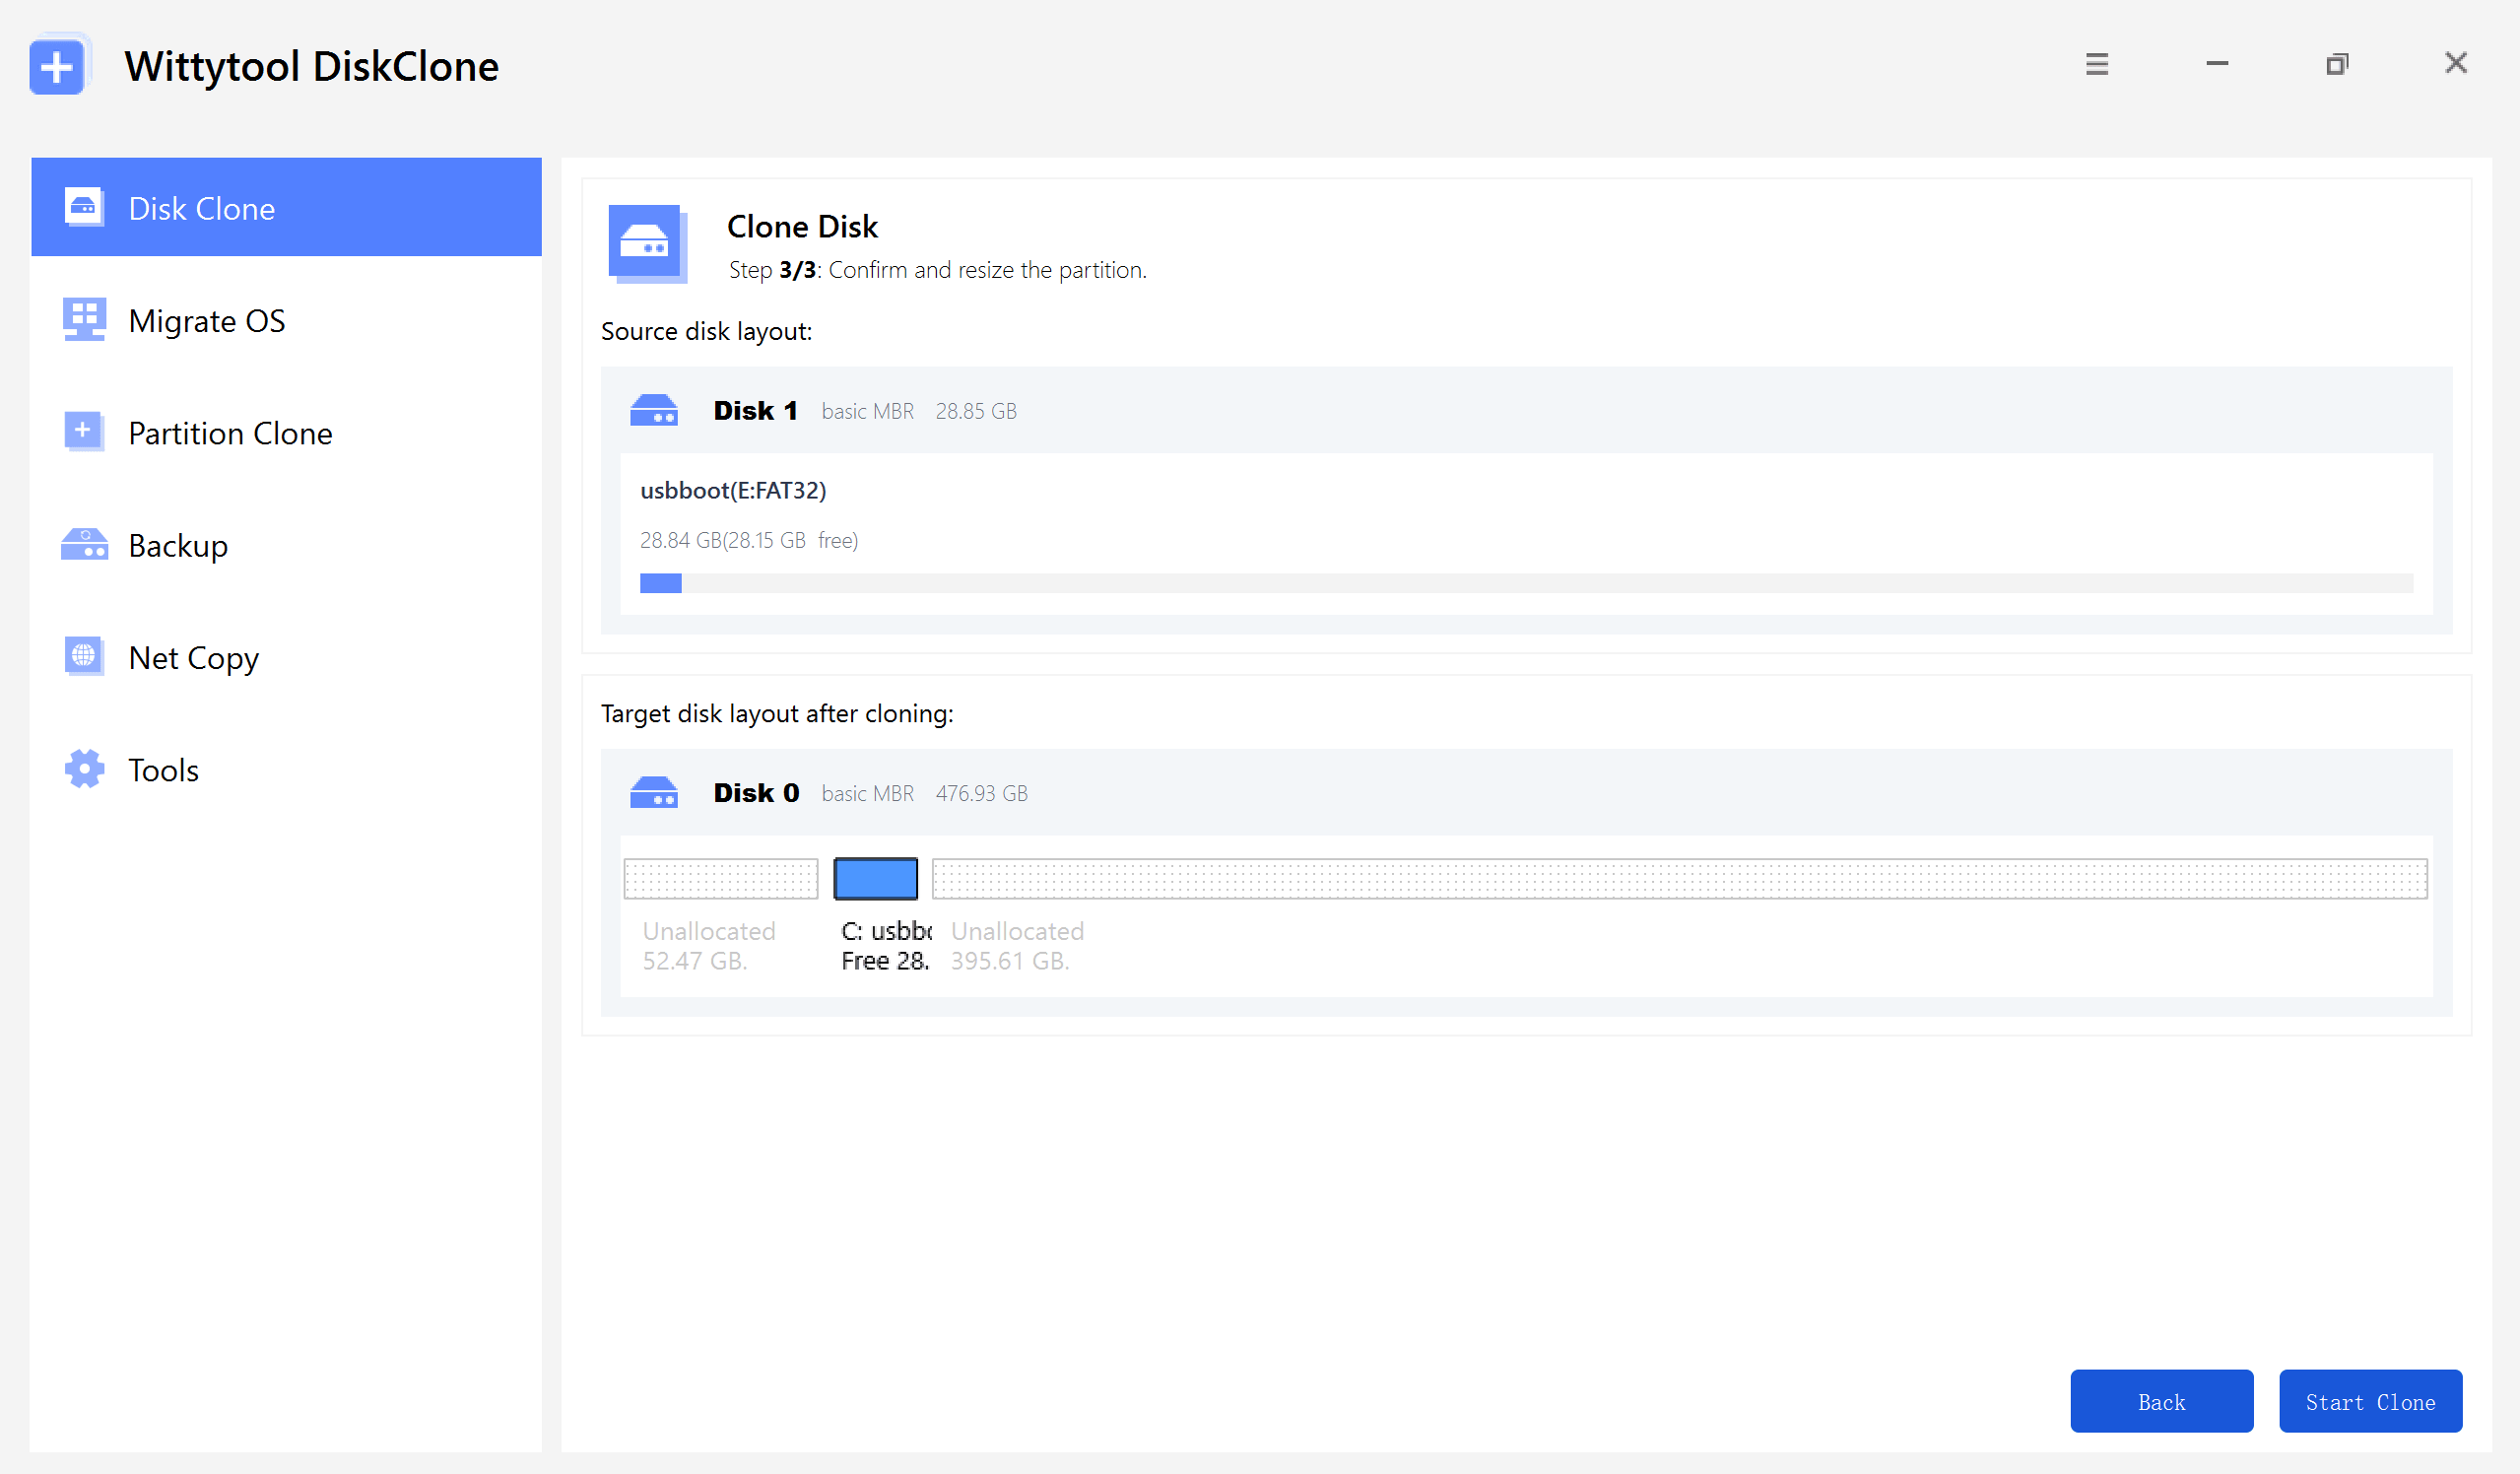
Step 3: Adjust the partition sizes on your target drive as required by your specific layout. Once finished, click the “Start Clone” button to kick off the cloning operation.
Video guide on how to clone HDD/SSD using Wittytool Disk Clone:
How to Check Your Reallocated Sector Count
Before taking any action, it’s crucial to accurately check the Reallocated Sectors Count value of your drive. This is a S.M.A.R.T. (Self-Monitoring, Analysis, and Reporting Technology) attribute, and you cannot view it through standard Windows file explorer. Fortunately, it’s easy to check using both built-in system tools and free third-party utilities, with the latter providing the most user-friendly and detailed information. The following methods are listed from simplest to most detailed.
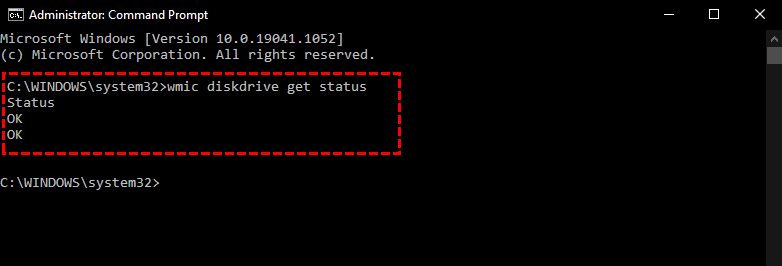
Method 1. For Windows user, using built-in Windows tools:
- Command Prompt: Use the
wmiccommand:wmic diskdrive get status.
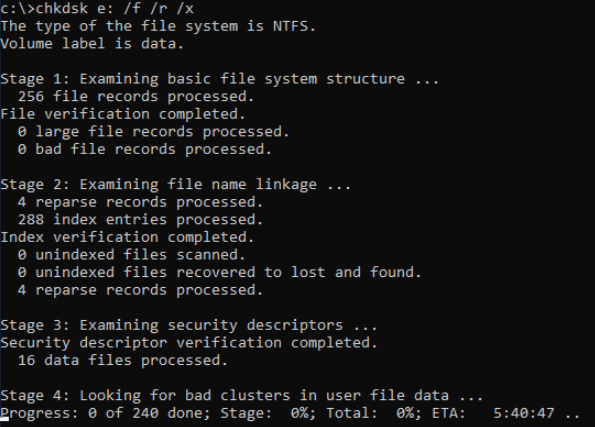
- Windows CHKDSK: Run
chkdsk X: /r(replace X with your drive letter) to scan for and attempt to recover data from bad sectors.
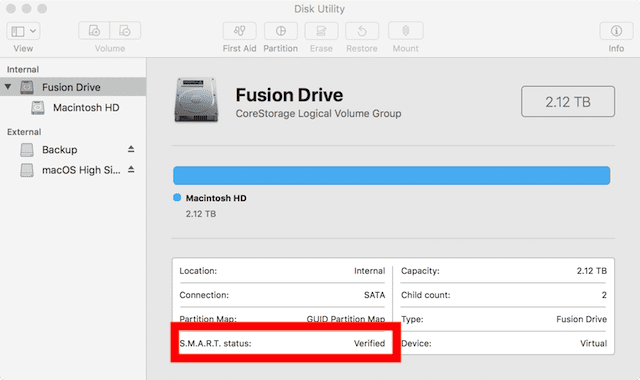
Method 2. For Mac user, using built-in Mac tools:
- Use the built-in Disk Utility (
Applications > Utilities > Disk Utility). Select the drive and look for S.M.A.R.T. status.
- For more detailed information, use the Terminal and the
smartctlcommand (requires installingsmartmontoolsvia Homebrew:brew install smartmontools).

Conclusion
In conclusion, hard drive monitoring, regular backup, and planned replacement are crucial for safeguarding your data and ensuring hardware longevity. Reallocated sectors serve as an early warning sign of drive failure, and understanding the eight potential causes emphasizes the need for proactive maintenance. Since reallocated sectors can’t be fixed, always back up important data and consider replacing the drive when necessary. Take the steps today to prevent data loss and extend the life of your hardware.