Last updated on June 25, 2026
Dealing with a slow or unresponsive computer can be a major inconvenience. If you’re experiencing frequent error messages, files that won’t open, or strange clicking noises from your computer, you might be facing an issue with bad blocks on your hard drive. This guide will provide a clear, step-by-step explanation of how to repair bad sectors on a hard drive. We’ll cover what bad sectors are, what causes them, and the practical steps you can take to fix them and protect your valuable data. The process is similar across brands, but if you are specifically using a Western Digital device, we have a dedicated guide on how to repair bad sector of western digital HDD using brand-specific tools. This article is written in simple terms, perfect for beginners who want to solve this problem confidently.
According to data storage firm Backblaze, hard drives have a measurable annual failure rate, making understanding these issues essential for any computer user.
What Causes Bad Sectors?
To effectively address the problem, it’s helpful to know what causes it. Bad sectors, often called bad blocks, are small clusters of data storage on your hard drive that have become damaged and cannot be read or written to by the computer. There are two primary types:
- Physical Bad Sectors: These are caused by physical damage to the drive’s platter. This can happen due to a manufacturing defect, a physical shock like dropping the laptop, or exposure to extreme heat or dust over time. Once a physical bad blocks occurs, it is permanently damaged.
- Logical Bad Sectors: These are caused by software or firmware issues, not physical damage. For example, if your computer loses power unexpectedly while writing a file, the data in that sector can become corrupted. Malware or virus infections can also lead to logical bad blocks.
❗ Important Note: General wear and tear is a significant factor. A study on drive reliability suggests that hard drives are most likely to fail either very early in their life (infant mortality) or after 3-4 years of use as components wear out. Logical bad blocks are more common and, fortunately, are often repairable using software tools.
Is It Possible to Fix Bad Sectors? What to Expect
This is the most critical question, and the answer depends on the type of bad sector.
✅ Logical bad sectors can often be repaired. The repair process typically involves the operating system or a disk utility marking the sector as “bad” so it is no longer used for storing data. Any readable information is then moved to a healthy part of the drive. This effectively “repairs” the drive’s usability without healing the underlying software corruption.
❌ Physical bad sectors cannot be repaired. There is no software tool that can fix a physical scratch or imperfection on a hard drive platter. However, the drive can often be told to avoid using these damaged sectors, a process called “reallocation.” If your drive has a growing number of physical bad sectors, it is a strong indicator of impending drive failure, and you should focus immediately on backing up your data and replacing the drive.
How to Repair Bad Sectors on Your Hard Drive
If you suspect your drive has logical bad blocks, here are two effective methods to attempt repair. Always ensure you have a backup of your most important files before starting any repair process.
Method 1. Use the CHKDSK Command to Scan and Repair Bad Sectors
CHKDSK (Check Disk) is one of the best free hard drive repair tools to fix bad blocks on a HDD. The /r parameter is the most powerful option, as it locates bad sectors and recovers any readable information.
- Click the Windows Start button, type cmd.
- Right-click on Command Prompt in the search results and select Run as administrator.
- In the black window that opens, type the following command and press Enter:
chkdsk C: /r(Replace “C:” with the letter of the drive you want to check if it’s different). - If the drive is in use (like your main Windows C: drive), you will see a message saying it cannot run and asking if you want to schedule the scan to run before the next startup. Type Y for yes and then press Enter.
- Restart your computer. The check will begin before Windows loads. This process can take several hours for large drives, so be patient.
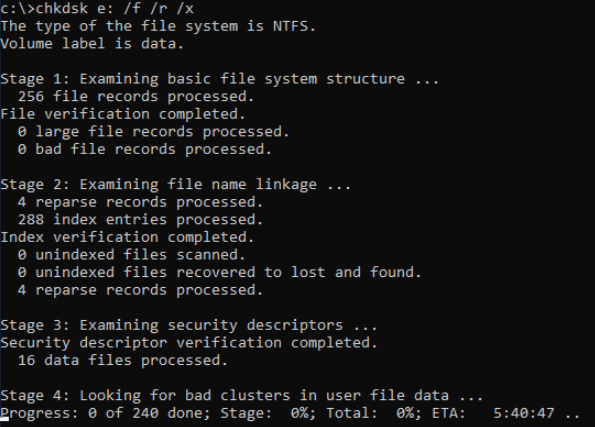
💡 How it works: CHKDSK performs a sector-by-sector scan. When it finds a logical bad sector, it attempts to recover the data and then marks the block as “bad,” instructing the drive never to use it again. This prevents future errors and data loss from that specific spot.
Method 2. Recover Data and Perform a Full Format for Deeper Repair
If CHKDSK is unable to resolve the issue or you cannot access your data, a more comprehensive approach is needed. This involves first rescuing your data and then performing a “full format” which can force the drive to identify and lock out bad blocks.
Firstly, download and install a reputable data recovery software like WittyTool Data Recovery. This powerful tool is designed not only for severe cases like drive failure but also for everyday accidents, allowing you to undelete files or recover permanently deleted photos from formatted, corrupted, or inaccessible drives. It supports a wide range of file types. Install the software on a different, healthy drive if possible to avoid overwriting the data you’re trying to save.
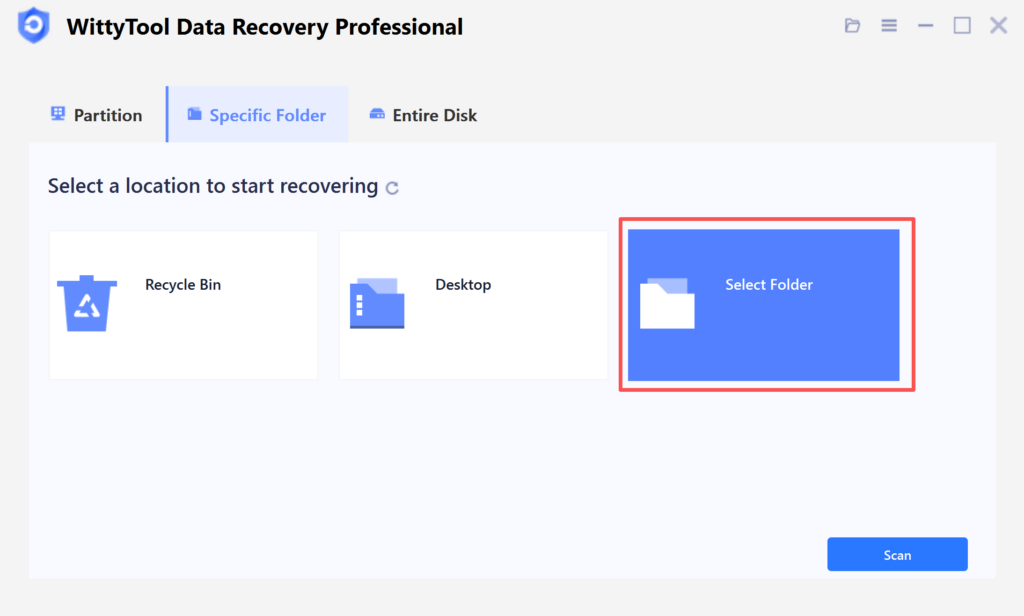
Step 1: Initiate Folder Scan
Download and Open Wittytool Data Recovery. Navigate to the target directory by clicking “Select Folder“, locate the missing folder’s original path, and confirm with “OK” to begin the search operation.
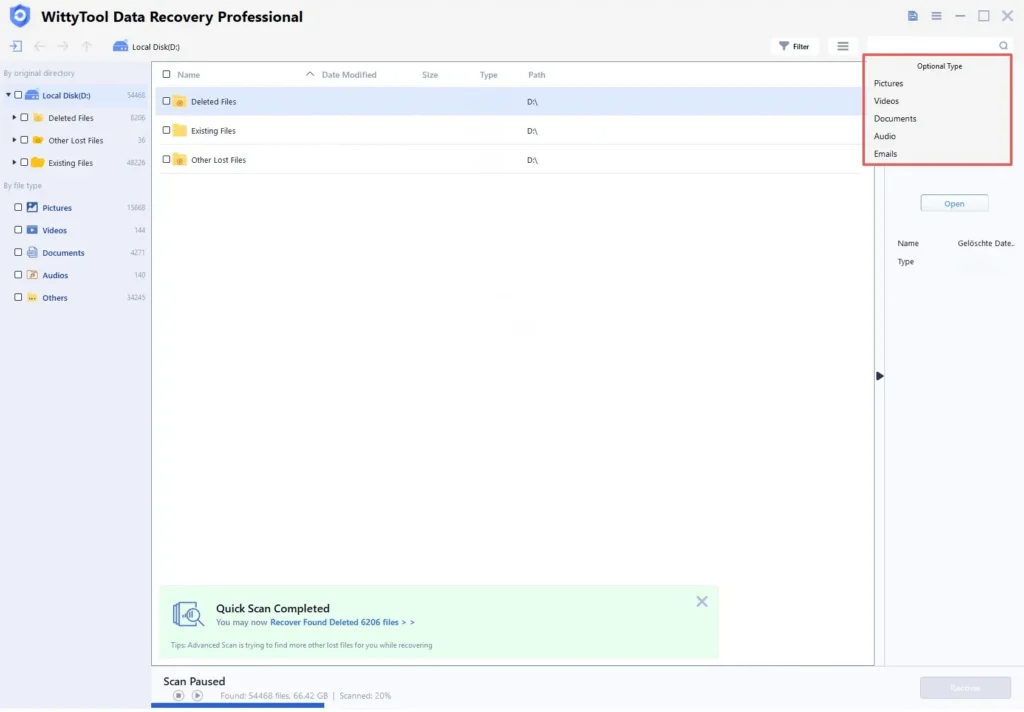
Step 2: Locate and Verify Content
If the folder name is known, input it in the search field for rapid results. Examine files within discovered folders by double-clicking to view previews. Alternatively, employ the Filter tool to narrow results by specific file formats.
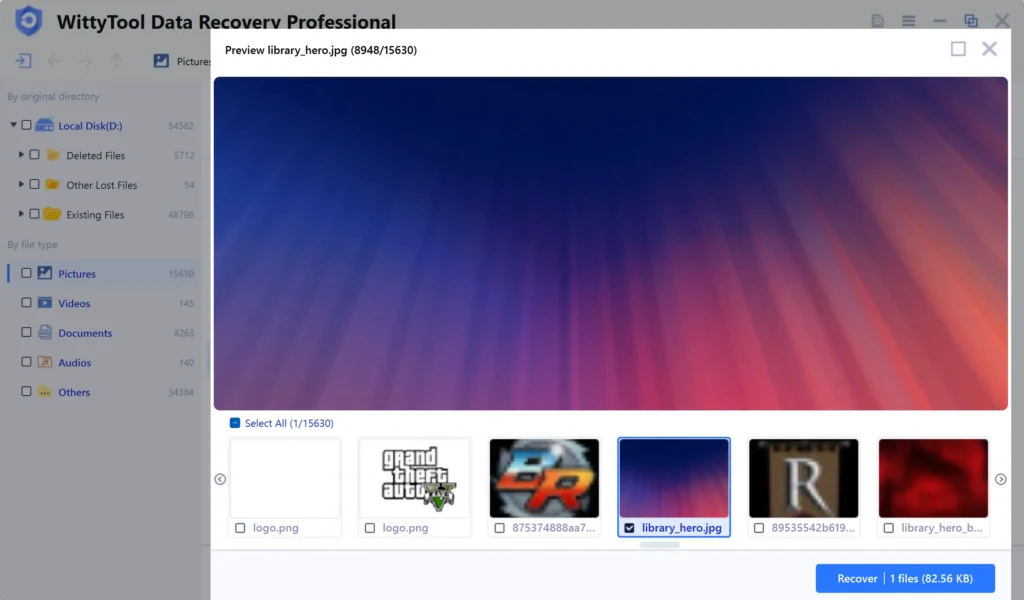
Step 3: Restore Data to Safety
Mark necessary folders/files, execute “Recover“, then designate a new destination where data security is ensured – crucially NOT the original partition or directory – to preserve recovered content.
Secondly, perform a Full Format: Once your data is safe, you can attempt to repair the drive. Open File Explorer, right-click on the problematic drive, and select Format. In the dialog box, crucial step: uncheck “Quick Format.” This ensures Windows performs a full format which includes a scan for bad sectors. Click Start.
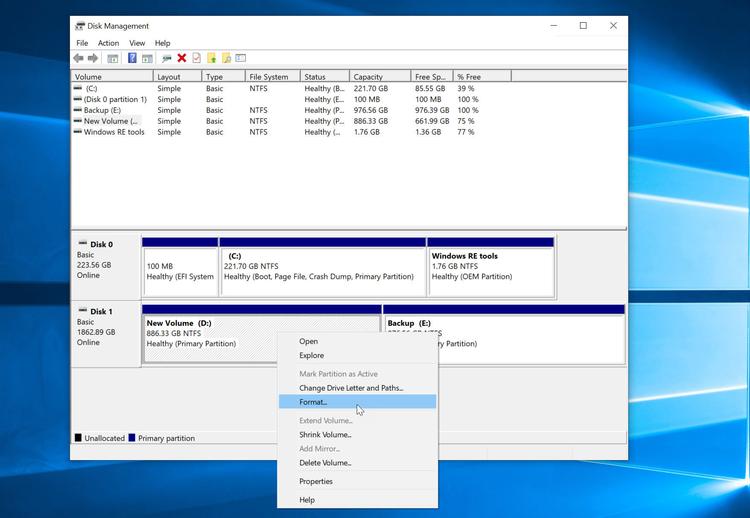
⚠ Warning: A full format will erase all data on the drive. This is why step 1 (data recovery) is absolutely essential. This method can be effective because the low-level scanning during a full format can identify and remap bad sectors that a quick scan might miss.
How to Protect Data on a Disk with Bad Blocks
Once you have addressed the bad blocks, the priority shifts to data protection. A drive that has developed bad sectors is statistically more likely to develop more in the future.
Option 1. Clone Your Drive to Transfer Everything to a New Disk
If your old hard drive is still working but showing problems, the safest step is to clone it to a new, healthy drive. WittyTool Disk Clone is designed for this task. It creates a perfect copy of your operating system, programs, and files for a seamless switch. This tool is versatile. Beyond internal hard drives, you can use it to clone SD card data or utilize its network clone feature to deploy systems to multiple computers over a LAN. Now download the software and run it. Before cloning, connect your new hard drive (HDD or SSD) to your computer, then following the steps below:
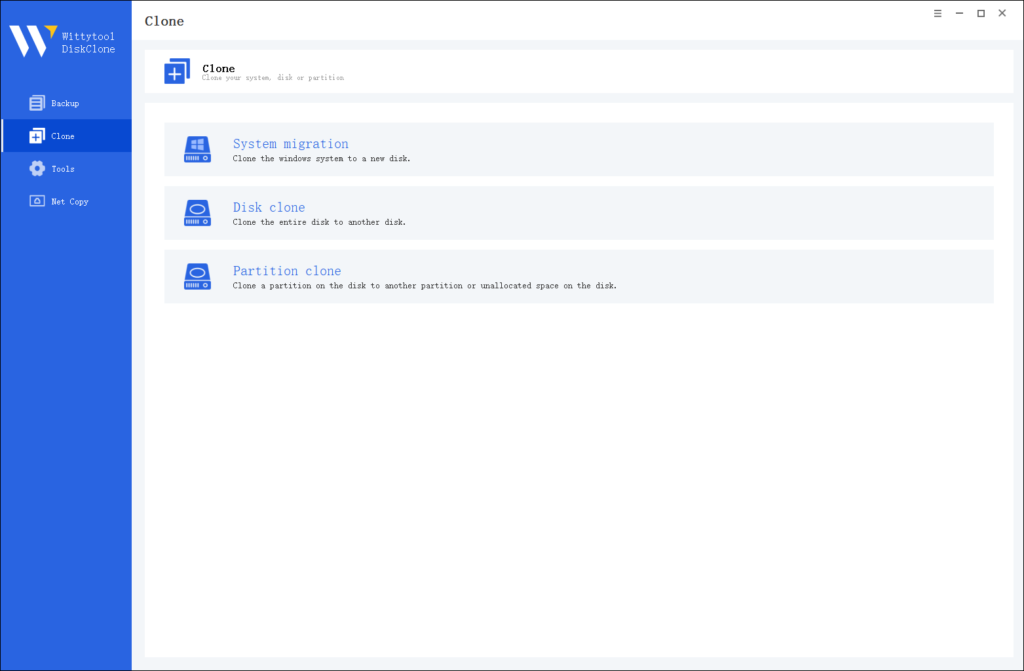
Step 1: Choose Disk Clone Mode
Click on the left panel to access the clone page, then select the disk clone mode.
Note:
During usage, choose the corresponding mode according to your needs. You can read this article about system clone vs system migration to understand the differences in different usage scenarios.
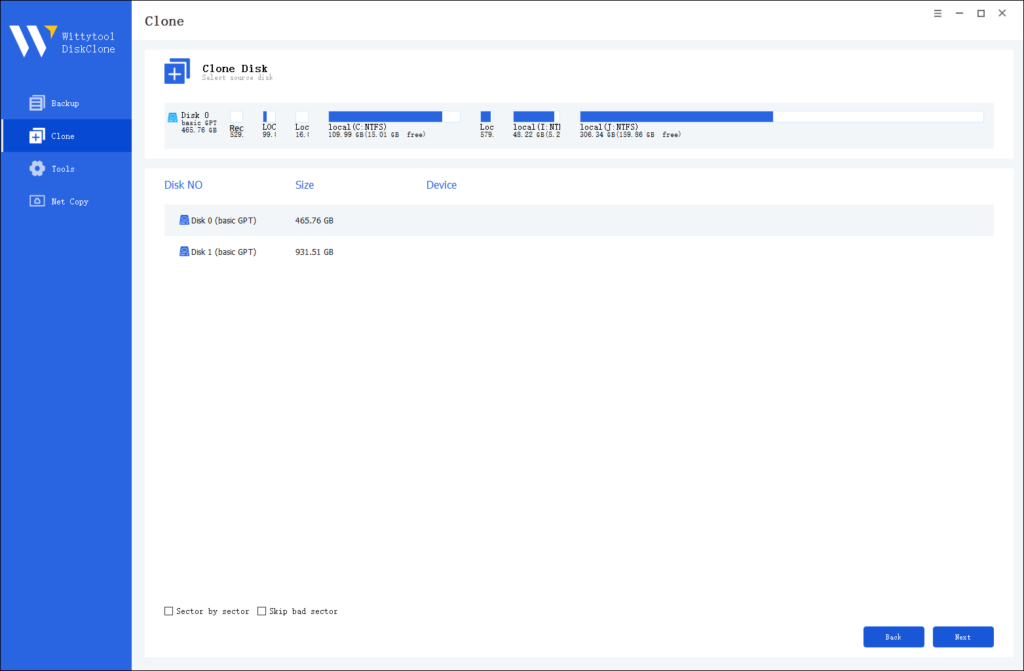
Step 2: Choose Source Disk
Pick the disk from the list view. The layout of the selected disk will be displayed at the top of the list view.
Note:
*Sector by Sector: This option should be selected if the source disk has bad sectors or if the file system on the disk is damaged. It ensures that all sectors on the source disk are cloned.
*Skip Bad Sectors: If the source disk has bad sectors, select this option. Wittytool DiskClone will ignore the bad sectors and clone only the undamaged ones. This method is suitable for older disks that may have bad sectors.
Step 3: Choose Destination Disk
Select the target disk.

Step 4: Resize Partition and Start Cloning
You can resize the partition on the target disk if needed. Click the “Start Clone” button to begin the cloning process.

Option 2. Back Up Your Files Regularly to Prevent Data Loss
Cloning is for migration; backup is for ongoing protection. WittyTool Disk Clone also support the backup feature like to create regular, compressed images of your entire drive or selected files.
Watch the Video Guide on How to Create a Backup with Wittytool Disk Clone:
Step 1. Turn to Backup tab, click Create backup.

Step 2. Choose the data which you want to backup, then click Start Backup.

Step 3. The software will perform an automatic and fast backup, and once the process is complete, you can easily locate the backup file.
Bonus Tips: How to Prolong Your Hard Drive’s Lifespan
It’s also important to know what not to do.
- ❌ Do not use unreliable “free” repair tools from untrustworthy websites. These can contain malware that may steal your data or cause further damage.
- ❌ Never open the hard drive casing yourself. The internal platters are extremely sensitive to dust and static electricity. Opening the drive outside of a professional cleanroom environment will almost certainly destroy it.
- ❌ Avoid repeatedly running intensive repair tools. If a drive is physically failing, aggressive scanning can put additional strain on it and accelerate the failure.
Final Thoughts
Knowing how to repair bad blocks on a hard drive is a valuable skill that can save you from data loss. The key takeaways are: logical bad sectors are often repairable with tools like CHKDSK, while physical damage requires drive replacement. The most important step, before any repair attempt, is to back up your data. Tools like WittyTool‘s Data Recovery and Disk Clone are invaluable for recovering data and migrating to a new drive safely. By understanding the causes and solutions, you can take control of your data’s security and extend the functional life of your storage devices.
FAQ
Q1: What are the symptoms of a hard drive with bad sectors?
A: Common symptoms include: your computer running very slowly, especially when accessing files; frequent freezing or crashing; corrupted files that won’t open; and error messages during file operations or when running Windows Scan/CHKDSK.
Q2: After repairing bad sectors, is my hard drive safe to use?
A: It can be, but with caution. If the number of bad sectors was small and stable, the drive may have a long life ahead. However, you should monitor it closely. If new bad block appear frequently, the drive is failing and should be replaced immediately.
Q3: Can I repair bad sectors on an external hard drive?
A: Yes, the same methods apply. You can run CHKDSK on an external drive by using its drive letter (e.g., chkdsk E: /r). The process is identical to repairing an internal drive.
Q4: Are SSDs affected by bad blocks?
A: SSDs can experience similar issues, often called “bad blocks.” The underlying technology is different, but the symptoms and outcomes are comparable. SSDs have built-in mechanisms to handle bad blocks, but they can still eventually fail.
Q5: How often should I check my hard drive for errors?
A: For a typical home user, running a CHKDSK scan every 3-6 months is a good preventive measure. If your computer is on constantly or handles critical data, consider checking it more frequently or using a S.M.A.R.T. monitoring tool for ongoing alerts.
Q6: Can a full format fix physical bad blocks?
A: No. A full format can only help with logical bad blocks. For physical damage, the format may force the drive to reallocate the sector (stop using it), but it does not “fix” the physical flaw. The drive remains inherently unreliable.